Introduction
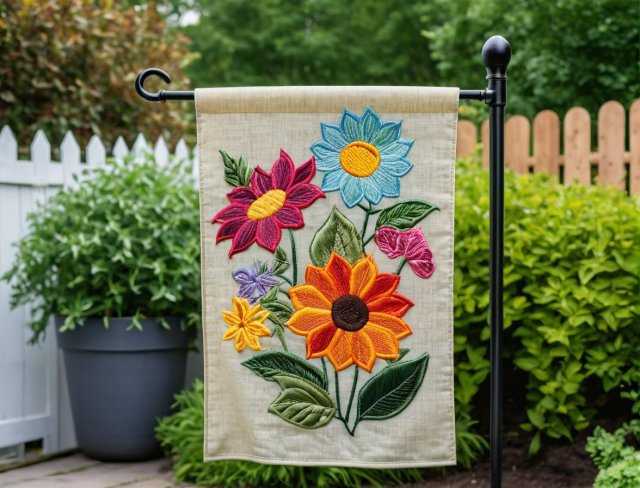
Embroidery has long been revered for its ability to transform fabric into works of art, imbuing them with intricate designs and profound symbolism. Within this timeless craft, garden flag embroidery stands as a testament to nature’s beauty and human creativity. This article explores the meticulous process of creating garden flag embroidery, focusing on the techniques and elements that bring these vibrant designs to life.
Garden flags have emerged as beloved decorative accents, offering a canvas for personal expression and seasonal celebration. Through their versatility and ability to convey messages, these flags enrich outdoor spaces with charm and character. This article delves into the selection of materials, design considerations, and embroidery techniques that elevate garden flag embroidery to an art form, showcasing the unique qualities and enduring appeal of these meticulously crafted creations.
The Appeal of Garden Flag Embroidery
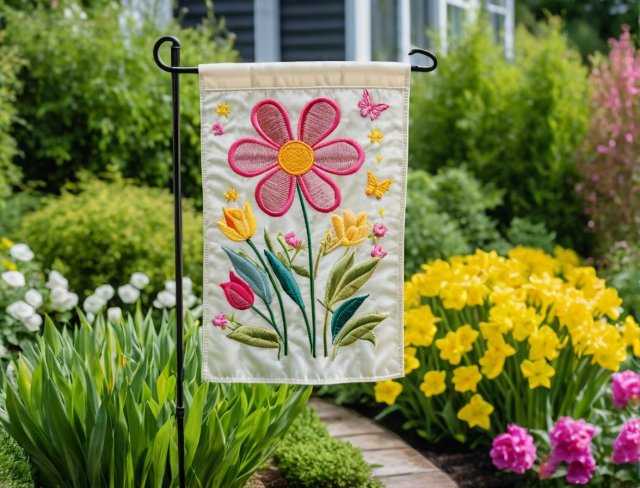
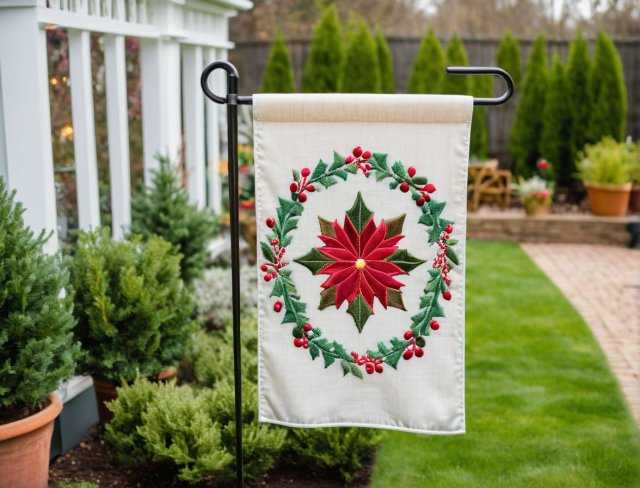
Garden flags have become increasingly popular as decorative accents in outdoor spaces, capturing the essence of seasonal changes, holidays, and personal expressions. Their appeal lies in their versatility and ability to transform any garden, patio, or pathway into a vibrant and personalized landscape.
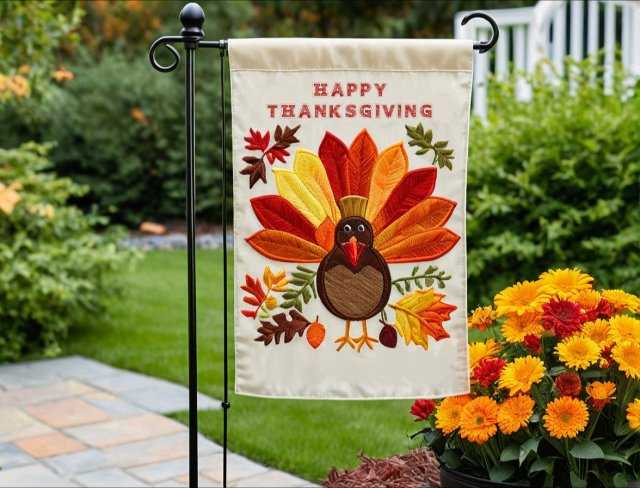
One of the main attractions of garden flags is their ability to convey messages and themes. From welcoming guests with a cheerful greeting to celebrating festive occasions, these flags can be customized to reflect the unique personality and style of the homeowner. They serve as small yet impactful statements, adding charm and character to any outdoor setting.
Additionally, embroidered garden flags are a practical and low maintenance way to enhance curb appeal. They are easy to change according to seasons or holidays, allowing homeowners to refresh their outdoor decor effortlessly. This adaptability makes garden flags a favorite among those who enjoy keeping their outdoor spaces dynamic and visually appealing.
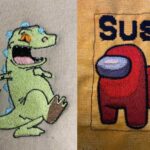
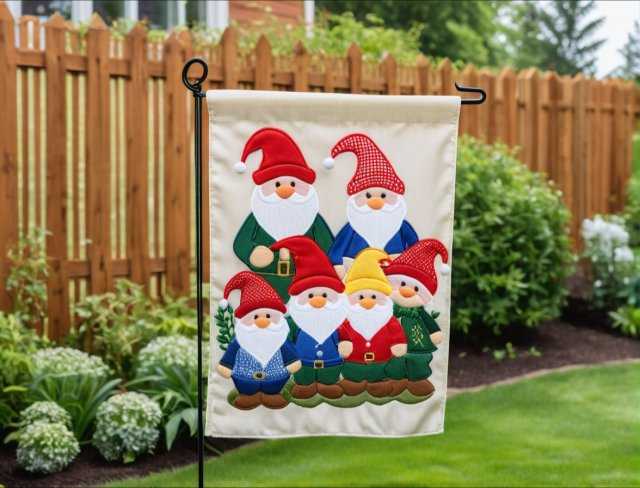
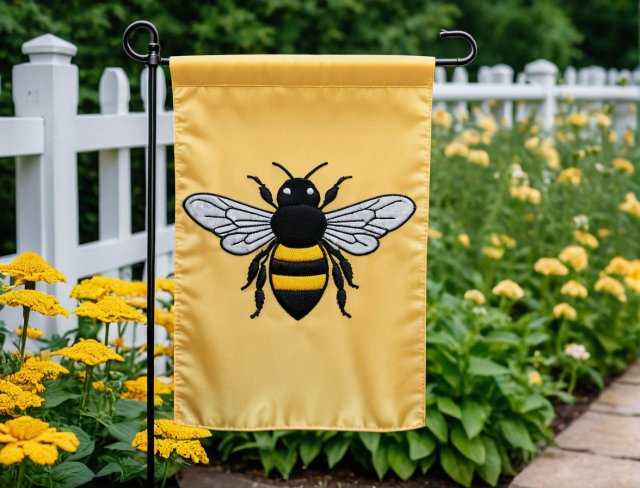
Garden flag embroidery can be a reflection of personal interests and hobbies. Whether showcasing a love for gardening, a favorite sports team, or a cherished pet, these flags provide a creative outlet for self expression. They invite visitors to learn more about the homeowner’s passions and preferences, fostering a sense of connection and community.
The appeal of garden flags in general, lies in their versatility, ability to convey messages and themes, ease of maintenance, and potential for personal expression. These qualities make them a beloved addition to gardens and outdoor spaces, enhancing both aesthetic appeal and emotional resonance.
Selecting the Right Materials
Having the right materials is critical to garden flag embroidery, as it will make or break you finished product. Whether it be choosing the proper needle to use, choosing the perfect fabric that will withstand the test of the elements (sun, rain, cold), and choosing the perfect thread to use; These are very important factors for successful garden flag embroidery.
Needle of Choice
For garden flag embroidery, it’s generally recommended to use embroidery machine needles in sizes ranging from 75/11 to 90/14. The specific needle size you choose will depend on factors such as the type of fabric you’re embroidering on, the density of your design, and the thread weight you’re using. Here’s a basic guideline:
♦ 75/11 Needle: Suitable for lightweight to medium weight fabrics such as cotton, polyester, and blends. Ideal for intricate designs with fine details.
♦ 80/12 Needle: A versatile needle size suitable for a wide range of fabrics and designs. Works well for medium weight to heavyweight fabrics and standard embroidery projects.
♦ 90/14 Needle: Recommended for heavyweight fabrics such as denim, canvas, or thick upholstery fabrics. Also suitable for dense embroidery designs or projects using heavier threads.
When selecting a needle size, consider the thickness and density of your fabric, as well as the complexity of your embroidery design. It’s essential to choose a needle that can penetrate the fabric without causing damage or distortion while also providing adequate support for the thread. Additionally, always ensure that the needle is compatible with your embroidery machine model to avoid compatibility issues or damage to the machine.
Fabric Selection
Creating a garden flag begins with selecting the right materials. The foundation fabric should be durable enough to withstand outdoor conditions while also providing a smooth surface for embroidery. Polyester and nylon are popular choices due to their durability and resistance to fading. Additionally, ensure the fabric is waterproof or water resistant to endure various weather conditions.
When choosing a waterproof or water resistant fabric, look for options specifically designed for outdoor use. These fabrics are often treated with special coatings or finishes that repel water, preventing moisture from seeping through and compromising the integrity of the embroidery. This extra layer of protection ensures that your garden flag remains vibrant and intact, even during rainy or humid weather.
Choosing the Perfect Thread
Selecting the right thread is a critical step in garden flag embroidery, as it significantly influences the overall appearance and durability of the finished product. Here are some essential considerations to keep in mind when choosing the perfect thread for your garden flag:
1. Polyester Embroidery Thread: Polyester thread is widely regarded as the optimal choice for garden flag embroidery due to its exceptional durability, colorfastness, and resistance to UV rays. Polyester threads maintain their vibrant colors even after prolonged exposure to sunlight, making them ideal for outdoor use. Additionally, polyester threads offer excellent tensile strength, ensuring that your embroidery withstands the rigors of outdoor conditions without fraying or breaking.
2. Rayon Embroidery Thread: Rayon thread is prized for its luxurious sheen and smooth texture, making it an attractive option for adding a touch of elegance to garden flag designs. While rayon thread may not be as UV resistant as polyester, it can still produce stunning results in shaded or less exposed garden areas. However, it’s essential to note that rayon threads are more prone to fraying and breaking compared to polyester, so they may require extra care and attention during embroidery.
3. Cotton Embroidery Thread: Cotton thread offers a natural, matte finish and is easy to work with, making it a popular choice for embroidery enthusiasts. However, cotton threads are not as durable or UV resistant as polyester, so they may not be suitable for long term outdoor use. Nevertheless, cotton threads can add a rustic charm to garden flag designs and are well suited for indoor or sheltered outdoor environments where exposure to sunlight and moisture is minimal.

4. UV Resistant Thread: For maximum longevity and color retention, consider using UV resistant threads specifically designed to withstand the harsh effects of sunlight. These threads are treated with special coatings or additives that protect against fading and degradation, ensuring that your garden flag remains vibrant and beautiful over time. UV resistant threads are an excellent choice for high exposure areas or climates with intense sunlight, providing added peace of mind that your embroidery will withstand the elements.
When selecting threads for garden flag embroidery, it’s essential to choose colors that complement the design and fabric of the flag. Vibrant, UV resistant threads ensure that the designs remain bright and beautiful, even after exposure to the elements. Additionally, opting for waterproof or water resistant threads helps maintain the integrity of the embroidery in wet conditions, further enhancing its durability and longevity. By carefully considering these factors and choosing high quality threads, you can create stunning garden flags that stand the test of time and add a touch of elegance to any outdoor space.
Designing the Embroidery Pattern
Designing the embroidery pattern is a crucial step in creating a captivating and visually appealing garden flag. This process involves translating your ideas and inspirations into a cohesive design that reflects the beauty of nature and complements your outdoor space. Here are some in depth considerations to help you create an embroidery pattern that truly shines:
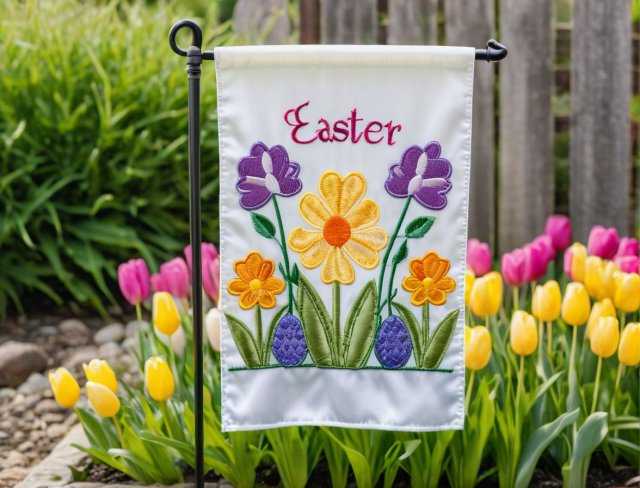
• Theme and Inspiration: Before diving into the design process, take some time to consider the theme and inspiration for your garden flag. Whether you’re celebrating a specific season, holiday, or personal milestone, the theme will set the tone for the entire design. Draw inspiration from your surroundings, such as the colors and shapes of your garden, or explore themes that hold personal significance to you. By choosing a theme that resonates with you, you’ll infuse your garden flag with meaning and personality.
• Composition and Layout: Once you’ve established a theme, it’s time to plan the composition and layout of your embroidery pattern. Consider the size and shape of your garden flag, as well as any specific placement requirements for the design. Pay attention to balance and symmetry, ensuring that the elements of your design are arranged harmoniously and draw the viewer’s eye across the flag. Experiment with different arrangements and compositions until you find one that feels cohesive and visually pleasing.
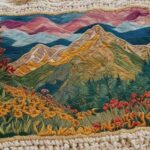
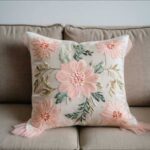
• Element Selection: Garden flags offer endless possibilities for creative expression, allowing you to incorporate a wide range of elements into your design. Popular motifs include flowers, butterflies, birds, animals, and geometric patterns, each offering its own unique charm and symbolism. Consider the overall aesthetic you wish to achieve and select elements that complement your theme and style. Don’t be afraid to mix and match different elements to create a dynamic and visually interesting design.
• Color Palette: The choice of colors plays a significant role in the overall impact of your embroidery pattern. Select a color palette that reflects the mood and theme of your design, whether you prefer vibrant and bold hues or soft and subtle tones. Consider the colors of your garden and outdoor decor, as well as the surrounding landscape, when choosing your palette. Experiment with different combinations and shades to create depth and dimension in your design.
• Detail and Complexity: The level of detail and complexity in your embroidery pattern will depend on your skill level and personal preferences. While intricate designs can be visually stunning, they may also require more time and precision to execute. If you’re new to embroidery or prefer a simpler aesthetic, consider opting for larger, more straightforward motifs that still pack a visual punch. Conversely, if you’re an experienced embroiderer looking for a challenge, don’t hesitate to push the boundaries of your skills with intricate patterns and fine details.
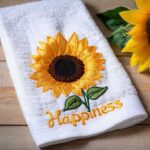
• Personalization: One of the most rewarding aspects of designing a garden flag is the opportunity for personalization. Incorporate elements that hold special meaning to you, such as your favorite flowers, symbols, or quotes. Add initials, names, or significant dates to commemorate special occasions or loved ones. By infusing your design with personal touches, you’ll create a garden flag that is truly one of a kind and reflects your unique identity.
• Digital Design Tools: Take advantage of digital design tools and software to bring your embroidery pattern to life with precision and accuracy. These tools allow you to sketch, edit, and refine your design with ease, ensuring that every element is perfectly positioned and scaled. Explore different digital embroidery file formats, such as .pes or .dst, compatible with your embroidery machine, to seamlessly transfer your design from screen to fabric.
By carefully considering these factors and taking the time to plan and refine your embroidery pattern, you’ll create a garden flag that is not only visually stunning but also meaningful and reflective of your personal style and creativity. Embrace the design process as an opportunity for artistic expression and exploration, and let your imagination soar as you bring your vision to life one stitch at a time.
Embroidery Techniques and Tips
Embroidery techniques and tips play a pivotal role in achieving flawless results in garden flag embroidery. Here’s an in depth exploration of essential techniques and valuable tips to elevate your embroidery skills:
Embroidery machines offer a wide range of customization options, allowing you to control stitch density, length, and style. Experiment with different stitch types, such as satin stitch, running stitch, and fill stitch, to achieve varying textures and effects in your embroidery designs. Adjusting stitch parameters like density and length can enhance the clarity and definition of your designs, ensuring crisp and precise stitching.
When selecting thread colors for your embroidery design, consider the overall aesthetic you wish to achieve and how different hues will interact with each other. Vibrant, contrasting colors can create dynamic and eye catching designs, while subtle, tonal variations can add depth and dimension. Pay attention to color placement and sequencing to ensure a harmonious and balanced composition.
Embroidery machines allow for easy customization of stitch order and color changes, enabling seamless transitions between different sections of your design. Take advantage of this feature to create intricate, multicolored designs with ease. Plan your stitching sequence carefully to minimize thread changes and optimize machine efficiency.
Regularly monitor thread tension throughout the embroidery process to prevent puckering, looping, or thread breakage. Adjust tension settings as needed to achieve smooth and even stitches. Additionally, keep an eye on bobbin thread tension, as imbalances can affect the overall quality of your embroidery.
For those seeking to achieve double sided embroidery, where the image appears the same on both sides of the fabric, using the same color bobbin thread as embroidery thread is essential. This technique ensures that the reverse side of the embroidery maintains the same vibrant colors and crisp details as the front, resulting in a polished and professional looking finish.
Take your time with intricate sections of your embroidery design, allowing the machine to work slowly and steadily for the best results. Avoid rushing through complex areas, as this can lead to stitching errors or uneven tension. Patience and attention to detail are key to achieving professional quality embroidery.
Consider using embroidery software to digitize and refine your designs before stitching. Digital design tools offer precise control over stitch placement, density, and direction, allowing you to create intricate and detailed embroidery patterns with ease. Experiment with different design elements and techniques to unleash your creativity and bring your vision to life.
When embroidering on delicate or stretchy fabrics, use appropriate stabilizers to provide support and prevent distortion. Choose stabilizers that are compatible with your fabric and embroidery technique, ensuring optimal results. Secure the fabric and stabilizer firmly in the embroidery hoop to minimize shifting during stitching.
Regular maintenance and cleaning of your embroidery machine are essential for optimal performance and longevity. Keep the machine well oiled and free of dust and debris to prevent mechanical issues and ensure smooth operation. Follow manufacturer guidelines for routine maintenance tasks, such as bobbin winding, needle changes, and tension adjustments.
Finally, don’t be afraid to experiment and push the boundaries of your embroidery skills. Embrace challenges as opportunities for growth and learning, and don’t be discouraged by mistakes or setbacks. With practice, patience, and perseverance, you’ll develop the confidence and expertise to create stunning garden flag embroidery that captivates and delights.
Finishing Touches and Assembly
Once the embroidery is complete, it’s time to move on to the final stages of finishing and assembling your garden flag. Attention to detail during this phase ensures that your flag not only looks beautiful but also stands the test of time in your outdoor space. Here’s a comprehensive guide to the finishing touches and assembly process:
• Removing the Fabric from the Hoop and Stabilizer
Carefully remove the fabric from the embroidery hoop, taking care not to tug or stretch the fabric excessively. Gently release the tension on the hoop and loosen any screws or clamps holding the fabric in place. Once the fabric is free from the hoop, carefully tear away any stabilizer that remains attached to the back of the design. Take your time with this step to avoid damaging the delicate stitches.
• Trimming Loose Threads and Inspecting the Design
With the fabric removed from the hoop, inspect the embroidery design closely for any imperfections or loose threads. Use sharp embroidery scissors to carefully trim any stray threads, taking care not to cut into the fabric or embroidery stitches. Pay special attention to areas where thread ends may have become tangled or knotted during stitching. Once all loose threads have been trimmed, visually inspect the design for any areas that may require touch ups or reinforcement.
• Assembling the Garden Flag
When assembling your garden flag, it’s essential to consider the specific features of the flag itself. Some garden flags come pre equipped with a sleeve or pocket sewn into the top edge, designed to accommodate a flagpole. If your flag already has a sleeve, simply insert the flagpole into the opening and ensure it is securely in place.
However, if your garden flag does not have a built in sleeve, you can easily create one during the assembly process. Begin by folding over the top edge of the fabric to form a sleeve that is wide enough to fit your flagpole comfortably. Secure the fold with a row of straight stitches, ensuring that the stitching is sturdy and evenly spaced.
Once the sleeve is in place, you can proceed to hem the remaining edges of the flag to prevent fraying and give it a polished finish. Whether your flag comes with a pre existing sleeve or requires one to be added, attention to detail during the assembly process ensures a professional looking result that will withstand the elements and enhance the beauty of your outdoor space.
• Applying Fabric Sealant or UV Protector
For added durability and longevity, consider applying a fabric sealant or UV protector to the finished flag. These products help preserve the vibrant colors of the embroidery and protect the fabric from fading and degradation due to exposure to sunlight and outdoor elements. Choose a sealant specifically designed for use on outdoor fabrics, and follow the manufacturer’s instructions for application carefully. Apply the sealant evenly to the front and back of the flag, paying special attention to the embroidered areas. Allow the sealant to dry completely before hanging or displaying the flag outdoors.
In addition to fabric sealant, you may also want to consider using a waterproof or water resistant sealant to further protect the fabric and thread from moisture damage. This additional layer of protection helps ensure that your garden flag remains in pristine condition, even during inclement weather or heavy rain.
By following these steps for finishing and assembling your garden flag, you’ll create a stunning and durable masterpiece that adds beauty and charm to your outdoor space for years to come. Attention to detail and careful craftsmanship are key to achieving professional quality results that you can be proud of.
Conclusion
Garden flag embroidery is a meticulous and rewarding art form that combines creativity with technical skill. From selecting materials to executing stitches, each step contributes to crafting stunning flags that celebrate nature’s beauty and reflect individuality. As these flags flutter in the breeze, they serve as symbols of artistry and craftsmanship, enriching outdoor spaces with their charm and elegance.
Embracing the joy of garden flag embroidery allows enthusiasts to create lasting masterpieces that enhance gardens, patios, and pathways. With patience and dedication, these flags become more than decorative accents; they become expressions of passion and creativity, adding a touch of splendor to any setting they adorn.
Now that you have read through this article, feel free to SHOP for products we have created. If you are looking for something special which isn’t in our store, feel free to contact us.