Add Flair To Your Artistry
A 7 Step Guide to Seasonal Theme Embroidery
Introduction
Embroidering seasonal themes is an exciting endeavor that allows you to infuse your creations with the spirit of each time of the year. Whether you’re a beginner or an experienced embroiderer, this step-by-step guide will walk you through the process of crafting seasonal masterpieces with ease. From selecting designs to mastering essential techniques, let’s dive into the world of seasonal embroidery and unleash your creativity!
Seasonal theme embroidery not only captures the essence of nature’s ever changing beauty but also celebrates the cultural and traditional significance of each season. From the vibrant blossoms of spring to the cozy comforts of winter, each season offers a unique palette of inspiration and symbolism.
Whether you’re stitching a sunflower to herald the arrival of summer or crafting snowflakes to embrace the magic of winter, seasonal embroidery allows you to connect with the rhythms of the natural world and express your artistic vision in delightful ways. So, gather your threads and hoops, and let’s embark on a journey through the seasons of creativity!
Exploring Seasonal Themes
Before diving into the practical aspects of machine embroidery, it’s essential to understand the inspiration and meaning behind seasonal themes. While it’s common for people to associate seasonal themes with the four primary seasons of spring, summer, fall, and winter, it’s important to recognize that there are far more seasonal themes available, including holidays that are intricately tied to specific times of the year.
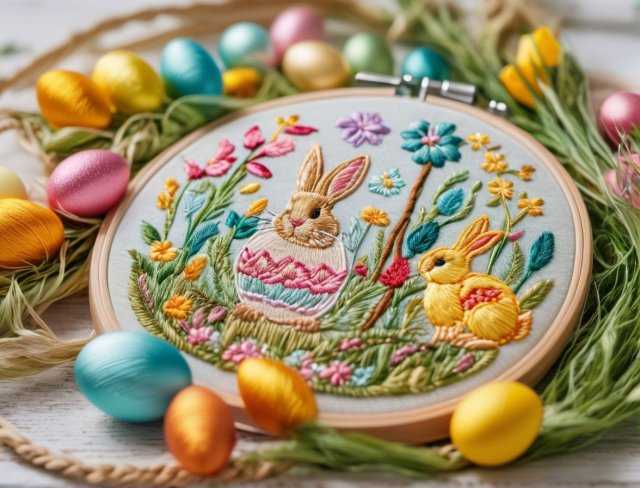
Spring heralds the awakening of nature, symbolizing renewal, growth, and rejuvenation. Embroidery designs featuring blooming flowers, chirping birds, and vibrant greenery evoke the freshness and vitality of the season. Additionally, springtime motifs may include symbols of Easter, such as Easter eggs and bunnies, celebrating themes of rebirth and new beginnings.
Summer embodies warmth, abundance, and leisure, with embroidery designs capturing the essence of sunshine, beaches, and outdoor activities. From cheerful sunflowers and buzzing bees to playful beach scenes and tropical fruits, summer themed embroidery projects evoke feelings of joy, relaxation, and vitality.
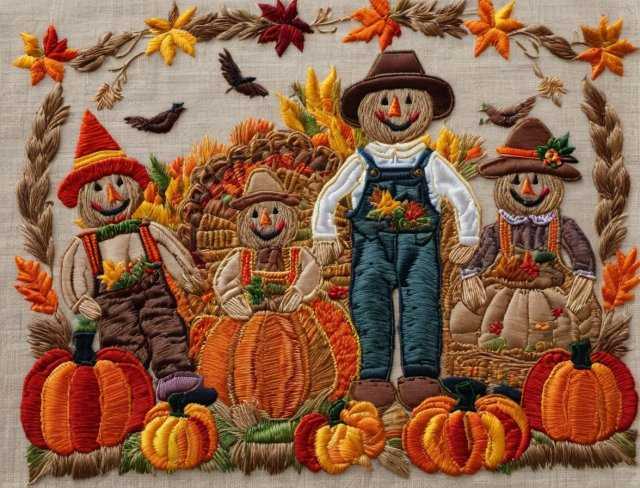
Autumn brings a tapestry of rich colors, harvest bounty, and cozy comforts, symbolizing abundance, gratitude, and transformation. Embroidery designs featuring falling leaves, ripe pumpkins, and rustic harvest scenes celebrate the beauty and abundance of the season. Additionally, autumn motifs may include symbols of Halloween and Thanksgiving, such as jack-o’ lanterns, cornucopias, and harvest feasts.
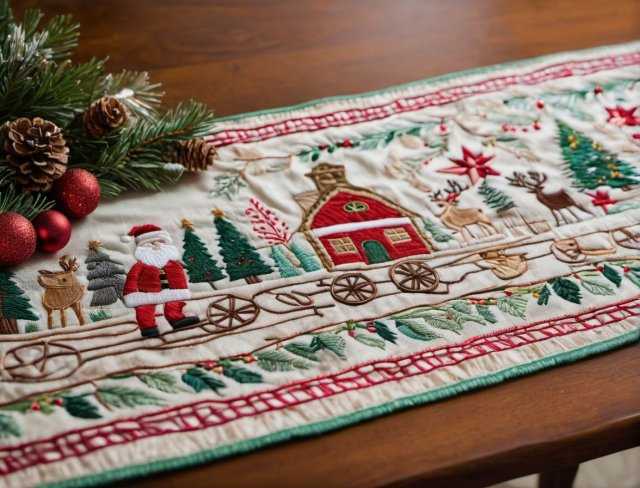
Winter conjures images of snow covered landscapes, sparkling icicles, and warm hearths, symbolizing introspection, coziness, and celebration. Embroidery designs featuring snowflakes, evergreen trees, and festive decorations capture the magic and enchantment of the season. Additionally, winter motifs may include symbols of Christmas, Hanukkah, and New Year’s Eve, such as ornaments, menorahs, and fireworks, celebrating themes of love, hope, and renewal.
In addition to these traditional seasonal themes, embroidery enthusiasts can also explore a wide range of cultural and regional variations, incorporating elements of folklore, mythology, and personal symbolism into their designs. Whether drawing inspiration from nature’s beauty, cultural traditions, or personal memories, seasonal embroidery offers endless possibilities for creative expression and storytelling.
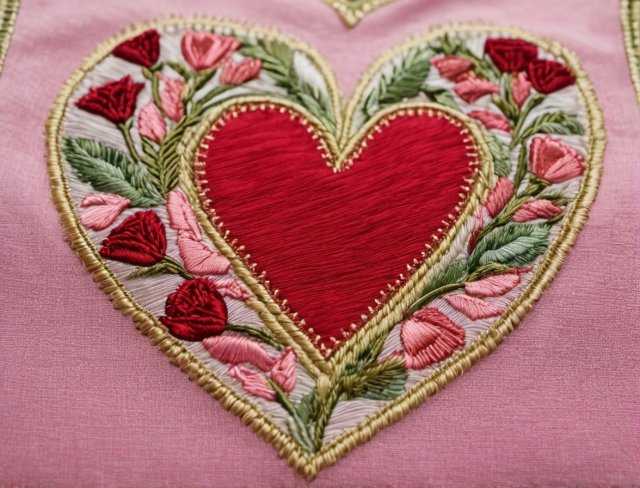
So, as you embark on your journey into the world of seasonal embroidery, take time to explore the meanings and diversity of seasonal themes, including the rich tapestry of holidays such as Easter, Christmas, Diwali, Chinese New Year, Kwanzaa, Ramadan, Hanukkah, and more, that are intricately woven into the fabric of each time of the year.
Step 1: Selecting Seasonal Designs
The first step in crafting seasonal embroidery is choosing the right designs for your project. While traditional motifs such as flowers, animals, and landscapes are popular choices, it’s essential to delve deeper into the vast array of seasonal themes available. Beyond the typical associations with spring, summer, fall, and winter, seasonal designs encompass a rich tapestry of cultural traditions, celebrations, and holidays that offer endless inspiration for embroidery enthusiasts.
When selecting seasonal designs, consider exploring themes beyond the conventional notions of the four primary seasons. Embrace the diversity of cultural and regional celebrations, such as Easter, Christmas, Diwali, Chinese New Year, Kwanzaa, Ramadan, Hanukkah, and more. Each of these holidays carries its own unique symbolism, colors, and motifs that can be beautifully translated into embroidery designs. Whether it’s the vibrant colors of Holi, the intricate patterns of Rangoli, or the festive decorations of Hanukkah, incorporating holiday themed designs into your embroidery projects allows you to celebrate the richness of cultural heritage and embrace the spirit of the season.
Additionally, don’t hesitate to explore lesser known seasonal themes and folklore that may resonate with you personally or reflect your cultural background. From ancient myths and legends to local festivals and customs, there are countless sources of inspiration waiting to be discovered. By broadening your scope and embracing the diversity of seasonal themes, you can infuse your embroidery projects with depth, meaning, and a unique artistic perspective that truly sets them apart. So, as you embark on your journey of selecting seasonal designs, let your imagination soar and allow yourself to be inspired by the rich tapestry of traditions and celebrations that surround you.
Step 2: Preparing Your Materials
Before you dive into the creative process of machine embroidery, it’s crucial to ensure that you have all the necessary materials prepared and organized. Proper preparation not only facilitates a smooth stitching process but also ensures the quality and longevity of your finished embroidery piece.
• Fabric Selection: Begin by selecting the appropriate fabric for your embroidery project. Consider factors such as the type of embroidery design, the intended use of the finished piece, and personal preference. Fabrics like cotton, linen, and felt are commonly used for embroidery due to their smooth texture and ease of stitching. Choose a fabric that complements your design and provides a suitable background for showcasing your embroidery work.
• Embroidery Thread: Selecting the right thread colors is essential for achieving vibrant and visually appealing embroidery. Choose high quality embroidery thread that is colorfast and durable. Consider the color palette of your chosen design and select thread colors that complement each other and enhance the overall aesthetic. Many embroidery projects require multiple thread colors, so ensure that you have an ample supply of each color needed.
• Stabilizer: Stabilizer plays a crucial role in ensuring the stability and quality of your embroidery stitches. It provides support to the fabric during stitching, preventing puckering, stretching, or distortion. Select a stabilizer appropriate for your fabric type and embroidery technique. Common types of stabilizers include tear away, cut away, and water soluble stabilizers, each suited for different fabric weights and embroidery styles.
• Embroidery Hoop: An embroidery hoop is essential for keeping your fabric taut and stable during stitching, ensuring precise and accurate embroidery results. Choose a hoop size that comfortably accommodates your fabric and allows ample space for maneuvering the needle and hoop. Consider investing in a set of embroidery hoops in various sizes to accommodate different project sizes and embroidery techniques.
• Additional Tools and Accessories: In addition to the basic materials mentioned above, gather any additional tools and accessories you may need for your embroidery project. This may include embroidery needles, scissors, marking tools, bobbins, and embroidery design templates. Having all your tools and supplies organized and within reach will streamline the embroidery process and make it more enjoyable.
• Preparation Tips: Before you begin stitching, take time to prepare your fabric and materials properly. Prewash and press your fabric to remove any sizing or wrinkles, ensuring a clean and smooth surface for embroidery. Wind your embroidery thread onto bobbins or spools and organize them by color for easy access during stitching. Precut stabilizer pieces to the size of your embroidery hoop and have them ready for use.
By taking the time to prepare your materials thoughtfully and meticulously, you set yourself up for success in your embroidery endeavors. Properly selected and organized materials not only make the stitching process more efficient but also contribute to the overall quality and beauty of your finished embroidery piece. So, gather your materials, prepare your workspace, and get ready to embark on a creative journey of machine embroidery!
Step 3: Setting Up Your Embroidery Machine
Setting up your embroidery machine correctly is essential to ensure smooth and successful stitching of your seasonal designs. Whether you’re a novice or an experienced embroiderer, following proper setup procedures will help you achieve precise and professional results.
• Thread Selection and Threading: Begin by selecting the appropriate embroidery thread colors for your design. Refer to your design’s color chart or embroidery software to determine the thread colors needed. Thread your machine according to the manufacturer’s instructions, ensuring that the thread is correctly threaded through the machine’s tension disks, thread guides, and needle.
• Hooping Your Fabric: Proper hooping of your fabric is crucial for maintaining tension and stability during stitching. Select the appropriate size embroidery hoop for your design and fabric, ensuring that the fabric is taut and smooth within the hoop. Loosen the hoop screw, place the inner hoop under the fabric, and gently stretch the fabric over the inner hoop. Position the outer hoop over the fabric and tighten the screw securely to hold the fabric in place.
• Loading Your Design: Once your machine is threaded and your fabric is hooped, it’s time to load your seasonal theme embroidery design into the machine. Transfer your design file from your computer, tablet, phone or other device to the embroidery machine using the compatible transfer method. Follow the machine’s instructions to select and load your seasonal theme design file into the machine’s memory.
• Adjusting Machine Settings: Before you begin stitching, take time to adjust your machine settings to ensure optimal stitch quality and performance. This includes adjusting settings such as stitch density, stitch length, and tension according to your fabric type and design requirements. Refer to your machine’s instruction manual for guidance on adjusting settings specific to your machine model.
• Testing Your Setup: Once your machine is threaded, your fabric is hooped, and your design is loaded, it’s a good idea to perform a test stitch to ensure that everything is set up correctly. Stitch out a small portion of your design on a scrap piece of fabric to check for proper tension, thread colors, and alignment. Make any necessary adjustments to your machine settings before proceeding with the full embroidery.

• Workspace Organization: As you prepare to stitch your seasonal design, take time to organize your workspace for optimal efficiency and convenience. Ensure that you have easy access to all necessary tools and supplies, such as scissors, thread snips, and additional thread colors. Keep your work surface clean and clutter free to prevent any distractions or obstacles during stitching.
By following these steps and taking the time to properly set up your embroidery machine, you’ll be well equipped to tackle your seasonal embroidery projects with confidence and precision. Proper setup ensures smooth stitching and professional results, allowing you to unleash your creativity and bring your seasonal designs to life with ease. So, take a moment to double check your machine setup, and get ready to embark on a delightful journey of seasonal embroidery!
Step 4: Stitching Your Seasonal Design
Now that you’ve prepared your materials, set up your embroidery machine, and loaded your design, it’s time to bring your seasonal embroidery design to life through stitching. This step requires careful attention to detail and precision to ensure that your design is executed flawlessly.
• Placement and Alignment: Begin by positioning your hooped fabric under the needle of your embroidery machine, ensuring that the design is centered and aligned correctly. Use the machine’s built-in alignment tools or guidelines to ensure proper placement of your design on the fabric. Take your time to double check the alignment before beginning the stitching process.
• Starting and Stopping Points: Identify the starting point of your seasonal theme embroidery design and lower the needle to the fabric using the machine’s controls. Some embroidery machines offer options for securing the thread at the beginning of the design to prevent unraveling. Stitch a few securing stitches in place before continuing with the main design. Similarly, when you reach the end of a color or section of your design, use the machine’s controls to secure the thread and trim any excess before moving on to the next section.
• Monitoring the Stitching Process: Once you start the embroidery machine, closely monitor the stitching process to ensure that everything is progressing smoothly. Watch for any signs of thread breakage, tension issues, or misalignment and make adjustments as needed. If you encounter any problems during stitching, such as thread breaks or skipped stitches, pause the machine and address the issue before continuing.
• Thread Changes: If your design requires multiple thread colors, be prepared to change colors as needed throughout the stitching process. Pause the machine at the end of each color segment, trim the thread, and rethread the machine with the next color. Take care to match the thread colors accurately to ensure seamless transitions between colors in your design.
• Finishing Touches: Once the seasonal theme embroidery is complete, carefully remove the fabric from the hoop and trim any excess stabilizer or thread tails. If necessary, press the embroidered fabric with an iron to smooth out any wrinkles and set the stitches. Take a moment to admire your finished embroidery piece and celebrate your accomplishment!
• Troubleshooting: Throughout the stitching process, be prepared to troubleshoot any issues that may arise, such as thread breaks, tension problems, or misaligned stitches. Refer to your machine’s instruction manual for guidance on troubleshooting common embroidery issues and make any necessary adjustments to ensure optimal stitch quality.
By following these steps and paying attention to detail throughout the stitching process, you’ll be able to achieve professional quality results with your seasonal embroidery designs. Take your time, stay focused, and enjoy the creative process as you bring your seasonal designs to life through stitching.
Step 5: Adding Finishing Touches
After stitching your seasonal design, adding finishing touches enhances its appearance and ensures a polished final result. These steps focus on refining your embroidery piece and preparing it for display or use.
• Removing Stabilizer: Start by carefully removing any stabilizer from the back of your seasonal theme embroidered fabric. Tear away or cut away excess stabilizer around the edges of the design, taking care not to damage the stitches. If you used a water soluble stabilizer, follow the manufacturer’s instructions to dissolve the stabilizer in water and gently rinse your embroidered fabric to remove any residue.
• Pressing the Fabric: Next, press the embroidered fabric with an iron to smooth out any wrinkles and set the stitches. Use a pressing cloth or ironing board cover to protect delicate embroidery threads from heat damage. Press the fabric from the wrong side using a low to medium heat setting, applying gentle pressure to avoid flattening the stitches. Take care not to drag the iron across the fabric, as this can distort the embroidery design.
• Embellishments and Accents: Consider adding extra embellishments or accents to enhance your seasonal theme design further. Depending on your design and personal preference, you may choose to incorporate beads, sequins, ribbons, or appliqués to add texture, sparkle, or dimension to your embroidery piece. Experiment with different embellishment techniques to customize your design and make it truly unique.
• Mounting or Framing: Once your embroidery piece is pressed and embellished to your satisfaction, consider how you want to display or use it. For wall art or display purposes, mount your embroidered fabric onto a stretched canvas or mounting board using adhesive or framing techniques. Alternatively, frame your embroidery piece in a decorative frame to protect it and showcase it as a standalone artwork. If you plan to incorporate your embroidery into a functional item such as a pillow, tote bag, or garment, proceed to the next step to complete the assembly.
• Finishing Edges: If your seasonal theme embroidery piece will be incorporated into a functional item, such as a pillow or garment, finish the edges of the fabric to prevent fraying and ensure durability. You can accomplish this by serging the edges with a serger machine, sewing a narrow hem with a sewing machine, or using decorative stitching techniques such as a satin stitch or overcast stitch. Choose a finishing method that complements your design and provides a clean, professional looking edge.
• Labeling and Documentation: Consider adding a label or tag to your finished embroidery piece to document the date, designer, and any special details or sentiments associated with the design. This adds a personal touch and helps preserve the story behind your creation for future generations to enjoy. Attach the label securely to the back or underside of your embroidery piece using a hand sewn stitch or fabric adhesive.
By following these steps and adding finishing touches to your seasonal embroidery piece, you’ll elevate its appearance and ensure that it’s ready to be proudly displayed, gifted, or used in your home or wardrobe. Take your time to enjoy the final stages of the embroidery process and celebrate the creative journey that brought your seasonal design to life.
Step 6: Troubleshooting Common Issues
Embroidering seasonal themes, like any craft, may encounter challenges along the way. Being prepared to troubleshoot common issues ensures a smoother stitching process and helps maintain the quality of your seasonal embroidery designs. Here’s how to address some common embroidery problems:
• Thread Breakage: If your embroidery thread keeps breaking during stitching, there could be several reasons. Check the tension settings on your machine to ensure they’re appropriate for the fabric and thread you’re using. Also, inspect the thread path for any snags or obstructions that may be causing friction. Ensure that the thread is properly seated in the tension discs and that the needle is the correct size and type for the thread.
• Tension Problems: Irregular or inconsistent tension in your stitches can result in unsightly loops or puckering. Adjust the tension settings on your machine gradually, testing with scrap fabric until you achieve balanced stitches. If you’re experiencing tension issues with metallic or specialty threads, consider using a thread lubricant or needle designed specifically for those types of threads.
• Misalignment: If your embroidery design is stitching out of alignment or off center, double check the placement of your fabric in the hoop and the positioning of the design in the machine’s memory. Ensure that the hoop is securely attached to the machine and that the fabric is hooped evenly and tautly. Use the machine’s alignment tools or guidelines to verify the positioning of your design before starting stitching.
• Thread Nesting or Bird’s Nesting: Thread nesting, also known as bird’s nesting, occurs when the upper thread forms loops or tangles on the underside of the fabric during stitching. This can be caused by issues such as improper tension, incorrect threading, or a dull or damaged needle. Check the threading path to ensure that the upper thread is properly seated in the tension discs and that the bobbin is wound evenly and inserted correctly. Additionally, try changing the needle to a new, sharp one and adjusting the tension settings as needed.
• Skipped Stitches: Skipped stitches occur when the machine fails to form stitches in certain areas of the design, resulting in gaps or inconsistencies. This can be caused by issues such as a dull or bent needle, improper needle size or type, or insufficient tension. Try changing the needle to a new one and adjusting the tension settings to see if that resolves the issue. Additionally, ensure that the fabric is properly stabilized and that the machine is using the appropriate stitch settings for the design.
• Thread Fraying: If your embroidery thread is fraying or shredding during stitching, it may be due to several factors, including thread quality, needle type, or tension settings. Check the thread quality and ensure that you’re using a high quality embroidery thread suitable for your machine and fabric. Experiment with different needle types and sizes to find the best match for your thread and fabric combination. Adjust the tension settings as needed to prevent excessive friction and stress on the thread.
By familiarizing yourself with these common embroidery issues and knowing how to troubleshoot them effectively, you’ll be better equipped to tackle any challenges that arise during your seasonal embroidery projects. Don’t be discouraged by setbacks, use them as learning opportunities to refine your skills and improve your craft. With patience, practice, and perseverance, you’ll be able to overcome obstacles and create beautiful seasonal embroidery designs with confidence and skill.
Step 7: Showcasing Your Creations
After investing time and effort into crafting your seasonal embroidery designs, it’s time to showcase your creations and share them with others. Showcasing your embroidery allows you to celebrate your achievements, inspire fellow enthusiasts, and foster connections within the creative community. Here’s how to effectively showcase your seasonal embroidery creations:
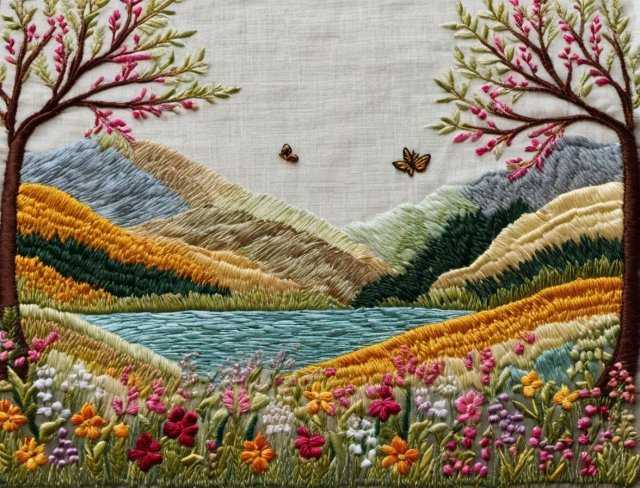
• Photography: Start by capturing high quality photographs of your embroidery pieces. Use natural light or a well lit environment to showcase the colors and details of your designs accurately. Experiment with different angles, compositions, and backgrounds to highlight the unique features of each embroidery piece. Consider investing in a camera or smartphone with a good quality camera and editing software to enhance your photos further.
• Online Platforms: Share your seasonal themes embroidery creations on various online platforms to reach a wider audience and connect with fellow embroidery enthusiasts. Consider creating a portfolio or gallery on your website or blog to showcase your work and share insights into your creative process. Additionally, explore social media platforms such as Instagram, Pinterest, and Facebook, where you can share photos of your embroidery pieces, engage with followers, and connect with like minded individuals in the embroidery community.
• Craft Shows and Exhibitions: Participate in local craft shows, fairs, or exhibitions to showcase your embroidery creations in person. Rent a booth or table at a craft fair or collaborate with local galleries or art organizations to display your work in exhibitions or group shows. Engage with visitors, share stories behind your designs, and network with other artists and attendees to build connections and gain exposure for your embroidery work.
• Collaborations and Partnerships: Collaborate with other artists, designers, or brands to showcase your embroidery seasonal theme creations in unique ways. Partner with fashion designers to incorporate your seasonal theme embroidery designs into clothing collections, collaborate with interior designers to create custom home decor pieces, or team up with local businesses to host embroidery workshops or events. By partnering with others, you can expand your reach, explore new opportunities, and introduce your embroidery work to new audiences.
• Community Engagement: Engage with your local community by volunteering to teach embroidery classes or workshops at community centers, libraries, or schools. Share your knowledge and passion for embroidery with others, inspire creativity, and foster a sense of community among fellow embroidery enthusiasts. Consider hosting embroidery meetups or stitching circles where people can gather to share tips, techniques, and projects in a supportive and collaborative environment.
• Documentation and Promotion: Document your embroidery process and creations through blog posts, tutorials, or video demonstrations. Share behind the scenes insights, tips, and techniques to educate and inspire others interested in embroidery. Promote your embroidery work through newsletters, email campaigns, or press releases to attract attention and generate interest in your creations. Consider offering special promotions, discounts, or limited edition releases to incentivize engagement and sales.
By effectively showcasing your seasonal embroidery creations, you can celebrate your artistic achievements, connect with fellow enthusiasts, and inspire others to explore the world of embroidery. Whether online or in person, sharing your embroidery work allows you to engage with a wider audience, build relationships within the creative community, and leave a lasting impression with your unique designs. So, don’t be shy, share your seasonal embroidery creations proudly and let your creativity shine!

Conclusion
Embroidering seasonal themes is a delightful journey that allows you to express your creativity, celebrate traditions, and connect with the rhythms of nature throughout the year. By following the step-by-step guide outlined in this tutorial, you’ve gained valuable insights and techniques to bring your seasonal embroidery designs to life with confidence and skill. From selecting designs to troubleshooting common issues, each step of the process offers opportunities for learning, growth, and artistic expression.
As you continue to explore the world of seasonal embroidery, remember to embrace the diversity of themes, draw inspiration from cultural traditions, and infuse your creations with meaning and personal flair. Whether stitching spring blossoms, summer sunsets, autumn harvests, or winter wonderlands, let your imagination soar and your stitches tell stories that evoke joy, beauty, and wonder.
As you embark on your journey of seasonal embroidery, don’t hesitate to experiment, learn from mistakes, and celebrate your progress along the way. Whether you’re a beginner or an experienced embroiderer, the joy of creating something beautiful with your own hands is a rewarding experience that transcends skill level or expertise.
So, gather your threads, fire up your embroidery machine, and let the magic of seasonal embroidery unfold before you. With each stitch, you’re not just creating art, you’re capturing moments, preserving traditions, and weaving threads of beauty that enrich the fabric of life. So, embrace the seasons, cherish the moments, and let your creativity flourish in every stitch. Happy embroidering!
Now that you have read through this article, feel free to SHOP for products we have created. If you are looking for something special which isn’t in our store, feel free to contact us.


