Introduction
Satin stitch embroidery is celebrated for its ability to create sleek, lustrous designs with a polished, professional finish. This technique, known for its smooth and shiny appearance, is often employed to enhance borders, lettering, and intricate motifs. The satin stitch achieves its distinctive look through densely packed parallel stitches that cover the fabric beneath, resulting in a clean and refined effect. Mastering this technique involves understanding various critical factors such as stitch length, density, underlayment, thread tension, and compensation settings, each playing a crucial role in achieving a flawless outcome.
Successfully navigating these elements requires more than just technical proficiency; it demands a comprehensive understanding of how each factor interacts with the others to impact the final design. For example, the interplay between stitch length and density affects both the appearance and texture of the satin stitch, while proper underlayment and thread tension are essential for preventing common issues like puckering or misalignment. By delving deeply into these principles and applying them with precision, embroiderers can unlock the full potential of satin stitch embroidery, transforming their designs into vibrant, dynamic pieces that truly stand out.
Understanding the Satin Stitch Embroidery
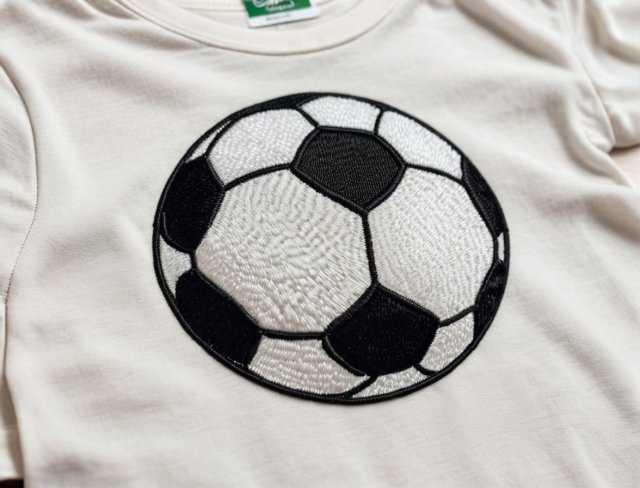
The satin stitch is a cornerstone of machine embroidery, prized for its ability to produce a smooth, polished surface that elevates designs with a sophisticated sheen. At its core, the satin stitch consists of parallel stitches that are densely packed together, creating a high density, smooth finish. This stitch is ideal for areas requiring a solid and lustrous appearance, such as monograms, borders, and intricate patterns. Unlike fill stitches, which are often used for broader coverage, the satin stitch focuses on providing a sleek, uninterrupted surface that enhances both the texture and visual appeal of the design.
One of the defining characteristics of the satin stitch is its versatility in varying stitch lengths. Shorter stitches, generally between 1 to 2 mm, are perfect for detailed and intricate designs where precision is paramount. They ensure that the edges of the design are sharp and well defined, contributing to a high quality finish. Medium length stitches, ranging from 2 to 3.5 mm, offer a balance between coverage and flexibility, making them suitable for a wide range of applications, including larger designs where some flexibility is necessary. Longer stitches, from 3.5 to 5 mm, are used for more straightforward, linear designs, but they require careful handling to prevent issues such as thread snagging or fabric distortion.
In machine embroidery, the density of the satin stitch plays a critical role in achieving the desired aesthetic and functional outcome. Higher stitch densities, around 0.3 to 0.4 mm, provide full coverage and a robust appearance, which is particularly useful for designs that need to withstand wear and tear. However, this can also lead to problems such as puckering if not managed correctly. Conversely, lower stitch densities, between 0.5 to 0.7 mm, allow for greater flexibility and reduce the risk of fabric distortion, making them ideal for more delicate fabrics or designs that require a lighter touch. Adjusting the density according to the fabric type and design requirements ensures optimal results and a smooth, polished finish.
Another important aspect of satin stitch embroidery is the choice and application of underlayment. The underlay serves as the foundational layer for the satin stitches, providing crucial support and stability. Types of underlay stitches, such as edge run, zigzag, and contour, each serve different purposes, from stabilizing edges to supporting large areas. Properly applied underlayment prevents common issues such as fabric puckering and stitch distortion, ensuring that the satin stitches lay flat and achieve the desired appearance. Mastery of underlayment techniques is essential for creating clean, crisp borders and smooth, flawless satin stitches, making it a key component in the successful execution of this sophisticated embroidery technique.
The Critical Role of Stitch Length
Stitch length is a pivotal factor in satin stitch embroidery, influencing both the aesthetic quality and functional durability of the final design. In satin stitch embroidery, stitch length refers to the distance between consecutive stitches, and its proper adjustment can significantly impact the outcome of your project. Understanding and manipulating stitch length allows embroiderers to tailor the appearance of their designs to achieve the desired smoothness and precision.

Short stitch lengths, typically ranging from 1 to 2 mm, are crucial for intricate and detailed embroidery work. These shorter stitches ensure that the design’s edges are sharp and well defined, contributing to a clean and polished finish. For complex patterns or fine lettering, short stitches help maintain the integrity of small details, preventing blurring or distortion. This is particularly important in designs that feature delicate elements or require precise alignment, as shorter stitches offer greater control and accuracy. Additionally, they help to create a more uniform surface, reducing the appearance of gaps and inconsistencies that can detract from the overall quality of the embroidery.
Medium stitch lengths, between 2 and 3.5 mm, strike a balance between coverage and flexibility. This range is often used for general purpose satin stitching and is suitable for a variety of designs, from monograms to decorative borders. Medium length stitches provide sufficient coverage while allowing for some degree of flexibility, making them ideal for larger designs or those with slight curves and transitions. By using medium stitches, embroiderers can achieve a smooth finish without the risk of excessive fabric puckering or thread breakage, which can occur with longer stitches. This balance is essential for maintaining a consistent and professional appearance across different types of designs and fabrics.
Longer stitch lengths, ranging from 3.5 to 5 mm, are typically used for straightforward, linear designs or larger open areas. While they offer the advantage of covering more ground with fewer stitches, longer stitches require careful attention to prevent potential issues. The primary concern with longer stitches is the increased risk of snagging or puckering, particularly on delicate or stretchy fabrics. To mitigate these risks, it is crucial to manage thread tension and stabilizer placement effectively. Additionally, longer stitches can sometimes create a less smooth appearance, making it important to assess the design and fabric carefully to ensure that the results meet the desired standards.
In practice, choosing the appropriate stitch length involves considering both the design’s complexity and the fabric’s characteristics. Adjusting stitch length allows embroiderers to achieve the optimal balance between coverage, smoothness, and durability. For intricate designs, short stitches offer precision and clarity, while medium stitches provide versatility and adaptability. Long stitches are best suited for simpler designs and larger areas where flexibility and coverage are key. By understanding and mastering stitch length, embroiderers can enhance the quality and visual appeal of their satin stitch embroidery, creating stunning and professional results that highlight the true potential of this technique.
Optimizing Your Stitch Density
Stitch density is a crucial element in achieving the ideal appearance and functionality of satin stitch embroidery. It refers to the number of stitches packed into a given area, directly influencing the visual and physical characteristics of the finished design. Optimizing stitch density involves carefully balancing coverage, durability, and fabric compatibility to ensure a high quality result that meets both aesthetic and practical requirements.
• High Stitch Density
High stitch density, typically ranging from 0.3 to 0.4 mm, provides a rich, full coverage that is often desired for designs requiring a solid and vibrant appearance. This density is especially effective for creating bold, prominent features, such as logos, text, or intricate designs where a plush, textured finish is beneficial. High density satin stitches fill the area more completely, resulting in a smoother, more even surface that enhances the visual appeal of the design.
However, while high stitch density can produce a striking finish, it also introduces potential challenges. One of the primary concerns is fabric puckering. As the number of stitches increases, the fabric may gather or distort if not properly supported. To mitigate this, it is essential to use appropriate stabilizers and backing materials that provide adequate support and prevent shifting or bunching. Additionally, managing thread tension is crucial to prevent thread breakage and ensure that the stitches lay flat and uniformly.

• Medium Stitch Density
Medium stitch density, usually between 0.5 and 0.7 mm, offers a balance between coverage and flexibility. This density is versatile and suitable for a wide range of applications, including both detailed and larger designs. Medium density satin stitches provide enough coverage to achieve a smooth and polished appearance while allowing for some flexibility in terms of fabric type and design complexity.
This balance is particularly advantageous for designs that need to adapt to different fabric types or those that involve slight curves and transitions. Medium stitch density helps to reduce the risk of puckering and ensures that the design remains flexible and durable without compromising on visual quality. It also allows for easier handling and adjustment during the embroidery process, making it a popular choice for a variety of projects.
• Low Stitch Density
Low stitch density, generally above 0.7 mm, is often used for designs where a lighter touch is required. This density is ideal for delicate fabrics or designs where excessive coverage could lead to issues such as thread puckering or distortion. Low density satin stitches create a more airy and breathable finish, which can be advantageous for lightweight or stretchy fabrics.
While low stitch density reduces the risk of fabric distortion, it may not provide the same level of coverage as higher densities. This can result in a slightly less vibrant appearance, particularly for designs with larger open areas. Therefore, it is important to consider the design and fabric characteristics when opting for low stitch density, ensuring that it still meets the desired aesthetic and functional requirements.
• Adjusting Stitch Density for Fabric and Design
Optimizing stitch density requires careful consideration of both the fabric and the design. Fabrics with varying thicknesses, stretchiness, and textures will respond differently to stitch density adjustments. For instance, thicker fabrics may require higher stitch densities to achieve adequate coverage, while lighter fabrics might benefit from lower densities to prevent distortion.
Design complexity also plays a significant role in determining the appropriate stitch density. Intricate designs with fine details may necessitate higher densities to maintain sharp edges and clarity, whereas simpler designs may work well with medium or low densities. Experimentation and testing on sample fabrics can help determine the best stitch density for a particular project, ensuring that the final result meets both aesthetic and functional standards.
Optimizing stitch density for satin stitch embroidery involves finding the right balance between coverage, flexibility, and fabric compatibility. High, medium, and low densities each offer distinct advantages and challenges, and careful adjustment based on the design and fabric characteristics is key to achieving a polished and professional result. By mastering stitch density, embroiderers can enhance the visual impact and durability of their satin stitch designs, showcasing the full potential of this elegant embroidery technique.
The Importance of Underlayment
Underlayment is a critical yet often underappreciated component of satin stitch embroidery. It serves as the foundational layer that supports and stabilizes the fabric and stitches, ensuring a high quality, professional finish. The proper application of underlayment is essential for achieving smooth, crisp satin stitches and preventing common issues such as puckering, distortion, and thread breakage. Understanding the role of underlayment and selecting the appropriate type for your project can make a significant difference in the overall appearance and durability of your embroidery.
• Types of Underlayment Stitches
The choice of underlayment stitch type can greatly influence the outcome of your satin stitch embroidery. Common underlayment stitches include edge run, zigzag, and contour stitches, each serving specific purposes to enhance the stability and appearance of the final design:
Edge Run Stitch: The edge run stitch is used primarily to stabilize the edges of the design. It is typically a series of parallel stitches that run along the perimeter of the satin stitch area. This type of underlayment is crucial for preventing fraying and ensuring that the edges of the design remain crisp and well defined. It provides a solid foundation that helps maintain the shape and alignment of the satin stitches, resulting in a cleaner and more professional finish.
Zigzag Stitch: The zigzag stitch is a versatile underlayment option that provides coverage and support over a broader area. It is often used for larger designs or designs with curves and transitions. The zigzag pattern offers flexibility and helps to stabilize the fabric, reducing the risk of puckering or shifting. This type of underlayment is particularly useful when working with stretchy or lightweight fabrics that may require additional support.
Contour Stitch: The contour stitch is designed to follow the shape of the design, providing support and stability along the contours of the satin stitches. This type of underlayment is ideal for designs with intricate details or complex shapes. It helps to maintain the design’s integrity by preventing distortion and ensuring that the satin stitches lay flat and evenly. The contour stitch also helps to define the design’s shape, enhancing the overall clarity and precision of the embroidery.
• Benefits of Using Underlayment
The application of underlayment in satin stitch embroidery offers several key benefits that contribute to the quality and longevity of the finished design:
Prevents Puckering: One of the primary functions of underlayment is to prevent puckering, which can occur when the fabric gathers or distorts due to the density of the stitches. By providing additional support, underlayment helps to keep the fabric smooth and flat, reducing the risk of unsightly puckers and ensuring a clean, even surface.
Enhances Stability: Underlayment stabilizes the fabric, making it easier to handle and embroider. This is especially important for fabrics that are prone to shifting or stretching during the embroidery process. By providing a stable base, underlayment ensures that the satin stitches are applied accurately and consistently, resulting in a more professional and polished appearance.
Improves Stitch Quality: The use of underlayment enhances the overall quality of the satin stitches by preventing thread breakage and ensuring that the stitches lay flat. It helps to maintain the design’s shape and alignment, resulting in cleaner, more defined edges and a smoother finish. This is particularly important for designs with intricate details or fine lettering, where precision and clarity are essential.
Facilitates Fabric Compatibility: Different fabrics require different types of underlayment to achieve optimal results. For example, heavier fabrics may require thicker or more robust underlayment, while lighter fabrics may benefit from a more delicate approach. By selecting the appropriate underlayment based on the fabric type, embroiderers can ensure that the design is well supported and the final result meets the desired standards.

• Selecting and Applying Underlayment
Choosing the right type of underlayment and applying it correctly are crucial steps in the satin stitch embroidery process. Factors to consider include the fabric type, design complexity, and the specific requirements of the project. Testing on sample fabrics can help determine the most suitable underlayment for a given design, allowing for adjustments and fine tuning to achieve the best possible results.
Underlayment is a fundamental aspect of satin stitch embroidery that plays a vital role in achieving a high quality, professional finish. By understanding the different types of underlayment stitches and their benefits, as well as selecting and applying underlayment appropriately, embroiderers can enhance the stability, appearance, and durability of their satin stitch designs. Properly executed underlayment ensures that the final embroidery meets both aesthetic and functional standards, showcasing the true potential of this elegant technique.
Balancing Thread Tension and Stabilization
Balancing thread tension and stabilization is critical in satin stitch embroidery, as it directly affects the quality, appearance, and durability of the finished design. Properly adjusted tension ensures that the threads lay evenly without puckering or creating unwanted loops, while effective stabilization supports the fabric to prevent distortion and maintain the design’s integrity. Mastery of these elements is essential for achieving a professional and polished look in satin stitch embroidery.
• Understanding Thread Tension
Thread tension controls how tightly or loosely the thread is pulled through the fabric during stitching. Correct thread tension ensures that the stitches lie flat and smooth, without visible puckering or bunching. Here’s a deeper look into the aspects of thread tension:
Top Thread Tension: The top thread tension is adjusted on the sewing machine and determines how tightly the upper thread is pulled. Proper tension ensures that the thread is evenly distributed and that the stitches are formed correctly. Too much tension can cause the thread to break or create puckering, while too little tension can lead to loose, uneven stitches. Regularly testing and adjusting the top thread tension based on the type of fabric and thread being used is crucial for achieving optimal results.
Bobbin Thread Tension: The tension of the bobbin thread, which works in conjunction with the top thread, also plays a vital role. It influences how the stitches are locked together and affects the overall stitch quality. Correct bobbin tension ensures that the top and bottom threads interlock properly, creating balanced and uniform stitches. Adjusting the bobbin tension may be necessary when working with different fabrics or threads to achieve the desired stitch appearance.
Thread Type and Quality: The type and quality of thread used in satin stitch embroidery can impact tension. Different threads, such as polyester, rayon, or metallic, have varying thicknesses and properties that may require specific tension adjustments. High quality threads tend to perform better and reduce the likelihood of tension related issues. It’s important to choose threads that are compatible with your machine and fabric, and to experiment with tension settings to find the best balance.
• Effective Stabilization Techniques
Stabilization involves using backing materials and techniques to support the fabric during embroidery, preventing it from stretching, shifting, or distorting. Effective stabilization is key to achieving crisp and clear satin stitches. Here’s how to approach stabilization:
Choosing the Right Stabilizer: The type of stabilizer used depends on the fabric and design. Common stabilizers include cutaway, tear away, and wash away types. Cutaway stabilizers provide strong support and are ideal for fabrics that stretch or are prone to distortion. Tear away stabilizers offer support for designs that do not require additional backing after stitching. Wash away stabilizers dissolve in water and are suitable for lightweight or sheer fabrics. Selecting the appropriate stabilizer helps maintain fabric stability and ensures that the satin stitches are properly supported.
Layering Stabilizers: For designs with high stitch density or on delicate fabrics, layering stabilizers may be necessary. Using multiple layers of stabilizer provides additional support and prevents issues such as puckering and distortion. It’s important to choose stabilizers that work well together and provide the appropriate level of support for the fabric and design.
Proper Placement of Stabilizers: Ensuring that stabilizers are properly placed and adhered to the fabric is crucial for effective stabilization. The stabilizer should cover the entire area to be embroidered, extending slightly beyond the design edges. Proper placement helps to prevent shifting and ensures that the fabric remains stable throughout the embroidery process.
• Balancing Tension and Stabilization
Achieving the right balance between thread tension and stabilization involves careful adjustment and testing. Here are key considerations:
Testing and Adjustments: Before starting on the final project, it’s important to conduct test stitches on a fabric scrap with the chosen thread and stabilizer. This allows for adjustments to be made to both thread tension and stabilization settings, ensuring that the results meet the desired standards. Testing helps identify potential issues and provides an opportunity to make necessary adjustments before working on the final design.
Monitoring During Embroidery: Continuously monitor the embroidery process for signs of tension problems or stabilization issues. Look for any puckering, thread breakage, or distortion, and make adjustments as needed. Maintaining a consistent focus on tension and stabilization throughout the embroidery process ensures that the final result is polished and professional.
Balancing thread tension and stabilization is essential for achieving high quality satin stitch embroidery. Properly adjusted thread tension ensures that stitches are even and smooth, while effective stabilization prevents fabric distortion and supports the design. By understanding and mastering these aspects, embroiderers can enhance the appearance and durability of their satin stitch projects, creating stunning and professional results that showcase the true potential of this elegant embroidery technique.
Fine Tuning Stitch Direction and Angles
Fine tuning stitch direction and angles is a sophisticated technique in satin stitch embroidery that greatly influences the visual appeal and technical quality of the final design. The direction and angle of satin stitches can affect how light interacts with the surface, how smooth and even the finish appears, and how well the design holds up over time. Mastering this aspect of satin stitch embroidery involves understanding how to manipulate stitch orientation to achieve the best possible results in both aesthetics and functionality.
• Understanding Stitch Direction
Stitch direction refers to the orientation of the stitches relative to the design elements. The way stitches are aligned can significantly impact the texture and visual impact of the satin stitch:
Vertical and Horizontal Stitches: Vertical satin stitches often create a structured and defined look, which is particularly effective for geometric designs or text. Horizontal stitches, on the other hand, can provide a softer, more fluid appearance and are useful for creating smooth gradients or more organic shapes. The choice between vertical and horizontal stitches depends on the design’s requirements and the desired texture.
Diagonal Stitches: Diagonal satin stitches are used to create a dynamic and visually interesting texture. They are ideal for designs that require a sense of movement or depth. By angling stitches diagonally, embroiderers can enhance the dimensionality of the design and create a more sophisticated appearance. Diagonal stitches can also help to blend colors more effectively and reduce visible lines between different stitch areas.
Directional Consistency: Maintaining consistent stitch direction within a design is crucial for achieving a cohesive and polished look. Inconsistent stitch directions can result in uneven texture and disrupt the visual flow of the design. For complex designs, it is important to plan the stitch direction carefully and ensure that transitions between different directions are smooth and seamless.
• Optimizing Stitch Angles
Stitch angles play a critical role in determining how the satin stitches interact with the fabric and how light reflects off the surface:
Angle Impact on Light Reflection: The angle of the satin stitches affects how light is reflected, which in turn impacts the visual texture and shine of the embroidery. Stitches aligned at a consistent angle can create a smooth, reflective surface, while varying angles can introduce subtle variations in light reflection, adding depth and interest to the design. Choosing the right angle based on the thread type and fabric can enhance the overall appearance of the satin stitch.
Angled Stitching for Depth and Dimension: Angling stitches can also contribute to the perception of depth and dimension in the design. For instance, using varying stitch angles in a gradient pattern can create a more realistic and three dimensional effect. This technique is particularly effective for designs that require a sense of movement or shading, as it allows for a more nuanced representation of light and shadow.
Technical Considerations for Angling: When setting stitch angles, it is essential to consider the fabric type and stitch density. Fabrics with a pronounced texture or nap may require adjustments in stitch angle to avoid issues such as puckering or uneven coverage. Additionally, high stitch densities can sometimes exacerbate the effects of stitch angles, making it important to balance these factors to achieve the desired result.

• Practical Application and Testing
Implementing optimal stitch direction and angles involves practical application and testing to ensure that the final result meets the design’s requirements:
Design Planning: Prior to starting the embroidery, carefully plan the stitch direction and angles based on the design elements and desired effects. Consider how the direction and angle will influence the overall texture and appearance. Sketching or digitally previewing the design with different stitch orientations can help visualize the final outcome and make necessary adjustments.
Test Stitches: Conducting test stitches on a sample fabric is essential for evaluating the effects of stitch direction and angles. This allows for adjustments to be made based on real world results, helping to identify any issues with light reflection, texture, or coverage. Testing ensures that the final design achieves the desired visual impact and technical quality.
Adjustments During Embroidery: During the embroidery process, monitor the results and make adjustments as needed. Pay attention to how the stitch direction and angles are affecting the design and be prepared to make modifications to achieve the best possible result. Flexibility and attention to detail during embroidery will help ensure a polished and professional finish.
Fine tuning stitch direction and angles is a vital aspect of satin stitch embroidery that influences both the aesthetic and technical quality of the design. By understanding the impact of stitch direction on texture and stitch angles on light reflection, embroiderers can create visually stunning and professionally finished projects. Careful planning, testing, and adjustments are key to achieving the desired results, ensuring that satin stitch embroidery showcases its full potential in both beauty and craftsmanship.
Compensation Settings for Optimal Stitching
Compensation settings are critical adjustments in satin stitch embroidery that influence the quality, appearance, and durability of the final design. These settings help correct for various factors such as fabric characteristics, thread behavior, and design complexity to ensure that satin stitches are smooth, well defined, and professionally executed. This section provides an in depth exploration of compensation settings, focusing on how they affect stitch density, stitch length, pull compensation, offset compensation, and underlay compensation.
• Understanding Compensation Settings
Compensation settings are designed to address the unique challenges presented by different fabrics, threads, and designs. They involve fine tuning various parameters to ensure that the satin stitch is executed flawlessly. Here’s a comprehensive look at each aspect of compensation settings:
Pull Compensation: Pull compensation is essential for managing the way fabrics stretch or shift during the embroidery process. Fabrics like knits, stretchy synthetics, or those with a loose weave can pull, causing distortion in the satin stitches. Pull compensation adjusts the stitch density or the amount of fabric pulled through the machine to counteract this effect. This adjustment is particularly important for maintaining the integrity of the design and ensuring that the satin stitches remain even and aligned. High pull compensation may be needed for highly elastic fabrics, while lower compensation settings might suffice for more stable materials.

Offset Compensation: Offset compensation corrects for design elements that may shift due to fabric shrinkage, machine movement, or inaccuracies in design alignment. This setting adjusts the position of the stitches to ensure that intricate designs, such as small text or detailed motifs, remain precisely aligned. Offset compensation is crucial for designs that require high precision, as even slight misalignments can lead to noticeable flaws. Properly adjusted offset compensation ensures that the design stays true to its intended appearance, with no gaps or overlaps between stitches.
Underlay Compensation: Underlay stitches provide foundational support for satin stitches, enhancing their stability and appearance. Underlay compensation involves adjusting the density, type, and placement of these foundational stitches to support the satin stitches effectively. The choice of underlay, such as a full coverage underlay, a centerline underlay, or a zigzag underlay, depends on the fabric type and the complexity of the design. Effective underlay compensation prevents issues such as puckering, fabric distortion, and poor stitch adhesion, ensuring that the satin stitches remain crisp and well defined.
• Optimizing Stitch Density and Length
Stitch density and length are integral to achieving a high quality satin stitch. These settings affect the texture, coverage, and visual appeal of the embroidery:
Adjusting Stitch Density: Stitch density refers to the number of stitches per unit area and directly impacts the appearance and functionality of the satin stitch. Higher stitch densities create a denser and more solid appearance, enhancing coverage but potentially leading to increased thread buildup and fabric distortion. Conversely, lower stitch densities offer less coverage and may result in a more transparent or less defined look. The optimal stitch density depends on the fabric type, thread used, and the design’s requirements. For example, a high density satin stitch might be suitable for fabrics with minimal stretch, while a lower density may be preferable for stretchy or lightweight materials.
Modifying Stitch Length: Stitch length affects the smoothness and evenness of satin stitches. Shorter stitch lengths produce a more detailed and refined appearance but can lead to issues such as increased thread buildup or potential for thread breakage. Longer stitch lengths provide a smoother finish and can enhance the fluidity of the satin stitch but may sacrifice some level of detail and definition. Adjusting the stitch length involves balancing the need for visual impact with the practical considerations of thread performance and fabric stability.
• Fabric and Thread Considerations
Different fabrics and threads necessitate specific compensation settings to achieve optimal satin stitch results:
Fabric Type: The properties of the fabric, such as its weight, texture, and elasticity, affect how the satin stitch performs. Fabrics with high elasticity or a tendency to shift may require additional pull or offset compensation to maintain stitch alignment and prevent distortion. For example, a stretchy fabric may need higher pull compensation and a more robust underlay to prevent puckering, while a stable fabric might require less adjustment. Properly selecting and adjusting compensation settings based on fabric characteristics ensures that the satin stitch adheres correctly and maintains its intended shape.
Thread Characteristics: The type and quality of thread used in satin stitch embroidery influence compensation settings. Threads with different thicknesses or properties may require adjustments to stitch density and length to achieve the desired result. High quality threads generally perform better and require less compensation, while lower quality threads may necessitate additional adjustments to prevent issues such as fraying or uneven stitching. It’s important to choose threads that are compatible with the machine and fabric, and to adjust settings accordingly to achieve optimal results.
• Testing and Adjustments
Implementing compensation settings involves a process of thorough testing and adjustment to ensure the best possible outcome:
Conducting Test Stitches: Performing test stitches on a fabric sample with the chosen thread and design allows for a practical evaluation of the compensation settings. This testing phase is crucial for identifying potential issues with stitch density, length, or alignment, and for making necessary adjustments before proceeding with the final embroidery. Test stitches help to fine tune the settings and ensure that the satin stitches meet the desired standards of appearance and functionality.
Monitoring and Adjusting During Embroidery: Throughout the embroidery process, it is essential to monitor the results and make real time adjustments to compensation settings as needed. Watch for signs of distortion, misalignment, or uneven stitching, and be prepared to make modifications to address any issues. Regularly assessing the results helps to ensure that the final design is polished and professionally finished, with satin stitches that are crisp and well defined.
Compensation settings are a vital aspect of achieving optimal results in satin stitch embroidery. By understanding and effectively utilizing settings for pull compensation, offset compensation, underlay compensation, and adjustments for stitch density and length, embroiderers can address the challenges posed by different fabrics, threads, and design elements. Mastering these settings ensures that satin stitches are smooth, well defined, and visually appealing, resulting in high quality embroidery that meets professional standards. Fine tuning compensation settings is essential for unlocking the full potential of satin stitch embroidery and achieving stunning, precise results.
Conclusion
Satin stitch embroidery presents an array of opportunities for crafting detailed and refined designs that make a lasting impression. Achieving flawless satin stitch involves a thorough understanding of several key factors, including stitch length, density, underlayment, thread tension, and compensation settings. Each of these elements significantly influences the final appearance of your embroidery. By mastering these techniques and applying them with precision, you can elevate your projects to a new level of sophistication, resulting in vibrant and dynamic designs that fully showcase the capabilities of machine embroidery.
The successful execution of satin stitch embroidery is not just about technical skill but also about a nuanced appreciation of how each adjustment affects the overall outcome. For instance, precise control of stitch length and density can transform a basic design into a visually stunning piece, while proper underlayment ensures that the stitches lay flat and uniform. Balancing thread tension and compensation settings is crucial for maintaining a smooth, professional finish. By thoughtfully integrating these elements, you can overcome common challenges and unlock the full potential of satin stitch, turning your creative visions into impressive and polished works of art.
Now that you have read through this article, feel free to SHOP for products we have created. If you are looking for something special which isn’t in our store, feel free to contact us.