Introduction
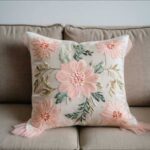
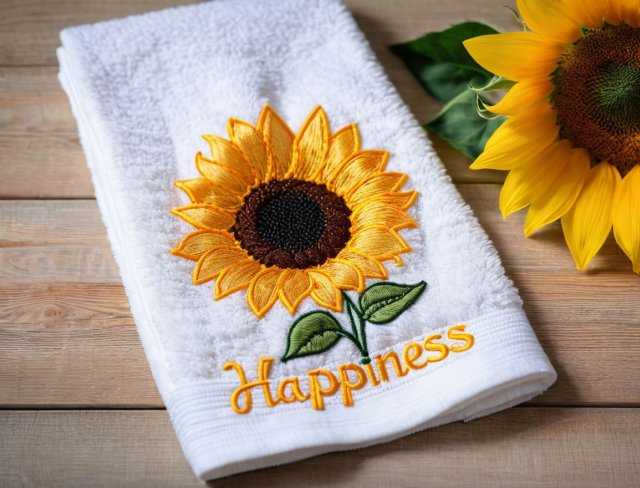
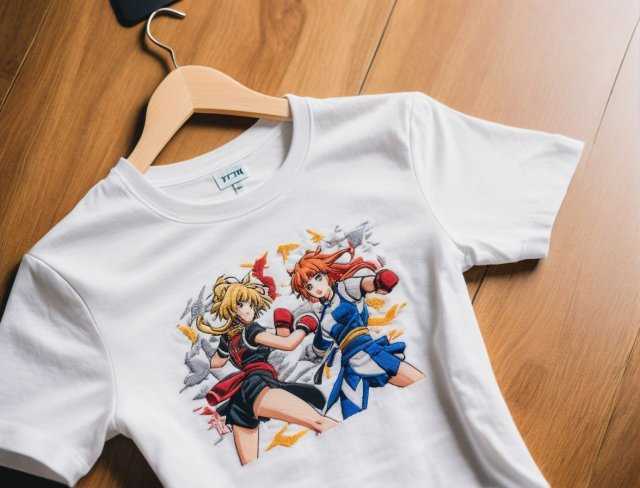
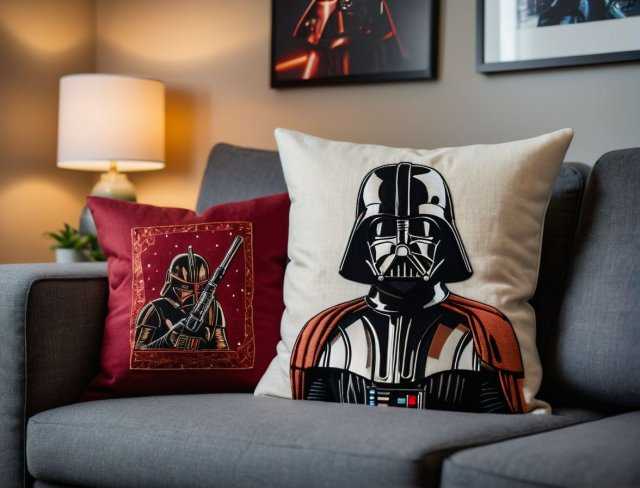
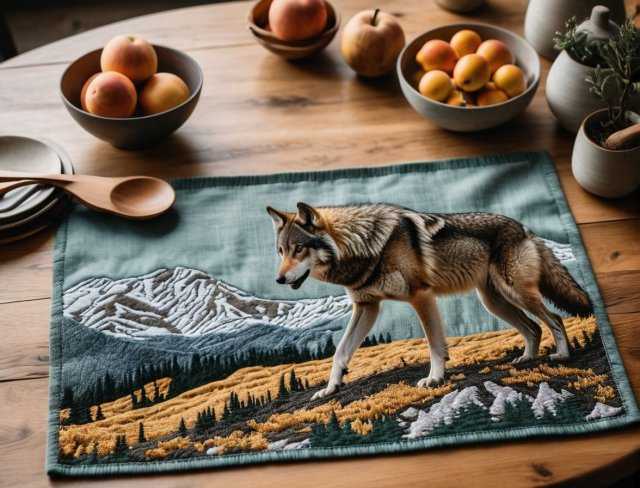
Layer embroidery is a specialized technique that goes beyond the surface, adding intricate depth and dimension to designs. Unlike traditional single layer stitching, this approach involves stacking multiple layers of thread, fabric, and texture to create visually compelling and richly detailed embroidery pieces. By carefully layering colors, textures, and stitch patterns, embroiderers can bring flat designs to life, giving them a dynamic, three dimensional effect that captures attention and showcases artistic mastery. Whether used for fashion, décor, or intricate artwork, layer embroidery requires a blend of creativity, precision, and an understanding of how each element interacts to achieve a harmonious final product.
The art of layer embroidery has evolved significantly with advancements in technology, which have introduced innovative tools and techniques that make complex designs more accessible to a broader audience. From AI enhanced digitizing software to machines with specialized functions tailored for layering, the possibilities for creating intricate designs continue to expand. These advancements, coupled with sustainable materials and cloud based collaboration platforms, have made it easier than ever to execute multi layered embroidery projects. As more embroiderers embrace these tools, layer embroidery is poised to continue growing as a versatile and captivating technique that combines tradition with cutting edge innovation.
The Essence of Layer Embroidery
Layer embroidery represents the fusion of artistry and technical skill, where the deliberate placement of multiple stitch layers transforms a flat design into one rich with texture, depth, and visual complexity. Unlike standard embroidery, which typically involves a single plane of stitching, layer embroidery introduces a dynamic interplay of overlapping threads, varied textures, and intricate detailing.
This approach requires both careful planning and creative intuition, as the embroiderer must visualize how different layers will interact and blend to create the desired effect. The technique often begins with establishing a solid foundation, typically broader, lower density stitches that serve as the base. As layers are added, the stitches evolve from foundational to detailed, allowing for the creation of realistic shadows, highlights, and texture variations.
One of the defining characteristics of layer embroidery is the way it leverages depth to create a three dimensional appearance. The layering process mimics the natural world’s subtleties, such as the soft transition of light across surfaces or the way textures change based on distance and perspective. By combining stitch types, thread densities, and varied color palettes, embroiderers can replicate effects like the shimmer of light, the roughness of natural textures, or the gradual blend of colors.
The interplay between different thread types, such as pairing metallics with standard threads or integrating specialty yarns, further enhances the dimensionality of the design. Layer embroidery isn’t confined to a single technique; it’s a versatile approach that adapts to the artist’s goals, whether that means creating a hyper realistic portrait, a textured landscape, or a stylized abstract design.

Beyond technical execution, the essence of layer embroidery lies in its potential for artistic expression. The layering process allows embroiderers to push the boundaries of what stitched art can achieve, transforming even the simplest of designs into something visually striking. The added dimension can evoke a sense of movement, convey emotional depth, or highlight specific focal points within a design.
Whether applied to intricate floral patterns or bold geometric shapes, layer embroidery introduces a complexity that is both visually appealing and intellectually engaging. The technique demands a deep understanding of how colors interact, how textures can be manipulated, and how layers of stitches can create a cohesive narrative within a design.
In its truest form, layer embroidery is not just a method but an artistic philosophy that prioritizes depth, detail, and dimension. It requires a level of skill that balances both the technical aspects of stitching and the creative intuition needed to build a design layer by layer. The process involves continually assessing how each new stitch or color choice affects the overall piece, allowing for adjustments that enhance the final outcome. Through this deliberate layering, embroiderers can achieve results that are not just visually pleasing but also convey a sense of artistry and craftsmanship, elevating the work beyond traditional embroidery.
Mastering The Techniques
Layer embroidery, while highly creative, is a meticulous craft that requires an understanding of various techniques to achieve the desired depth and dimensionality. By mastering these methods, embroiderers can move beyond flat designs and into more complex, visually striking works. Below are the core techniques essential for successfully executing layer embroidery, each expanded with detailed insights.
1. Planning the Layers: Building a Roadmap for Dimensional Designs
The success of a layered embroidery project hinges on the initial planning phase. Unlike standard designs, where stitches follow a linear progression, layer embroidery involves multiple overlapping elements that need to be mapped out in advance. The planning process starts with identifying the focal points of the design and determining where the depth and highlights should appear. To achieve this, breaking down the design into primary, secondary, and tertiary layers helps define the stitching order and the interplay between them.
A key component of planning is sketching or using digital embroidery software to visualize how each layer interacts with the others. This stage is critical for predicting challenges, like color blending or thread density issues, and addressing them before stitching begins. Whether working on a detailed portrait or a nature inspired scene, a clear blueprint allows for better control over how each layer contributes to the overall composition, ensuring the design remains cohesive from start to finish.

2. Stitch Order and Placement: Creating a Strong Foundation and Detailed Finish
The sequence in which stitches are applied plays a significant role in achieving dimension and realism. In layer embroidery, this process often begins with establishing a solid base layer, typically made of broader, low density stitches. These base stitches set the tone for the entire piece, acting as the foundation upon which more intricate layers are built. For instance, starting with satin stitches to create smooth, even coverage provides a strong visual anchor that subsequent layers can enhance.
As additional layers are added, the stitch types become increasingly detailed. Techniques like long and short stitches, split stitches, or directional satin stitches are introduced to add texture and refinement. The placement of these stitches is carefully considered to control the flow of the design, guiding the eye across the different layers and creating a natural transition between elements. Understanding which areas require emphasis, such as highlights in a portrait or texture in a floral pattern, enables embroiderers to selectively layer stitches for maximum impact.
3. Blending Colors for Depth: Crafting Realistic Transitions and Gradients
Color blending is a central technique in layer embroidery that significantly enhances the sense of depth and realism. By carefully transitioning between thread colors and densities, embroiderers can mimic natural shading and highlights, adding a lifelike quality to their designs. The process begins with selecting a color palette that accommodates subtle gradients. Opting for threads in varying shades of a single color family allows for smoother transitions, while contrasting hues can create bold, dramatic effects.
The key to effective color blending lies in staggered stitch placement and controlled layering. For example, when blending from light to dark tones, the transition is achieved by interspersing lighter stitches within the darker layer, gradually increasing the density of the darker shade. This approach ensures a seamless gradient without abrupt shifts, especially in designs where delicate shading, like skin tones or soft fabric folds, is required. Advanced techniques such as thread mixing, where two colors are stitched together in the same layer, further enhance the depth and dimension of the piece.
4. Texture Variations: Manipulating Stitches to Achieve Diverse Surfaces
Layer embroidery’s unique appeal lies in its ability to replicate a variety of textures, from smooth surfaces to rugged, tactile elements. Achieving this requires a combination of stitch types and layering strategies. The choice of stitch, whether it’s the dense satin stitch, loose split stitch, or the knotted French stitch, directly influences the texture and feel of the design. By experimenting with different stitch techniques, embroiderers can recreate textures like the softness of petals, the roughness of bark, or the smoothness of glass.
In addition to stitch selection, the thickness of the thread and its layering order play a role in texture creation. For instance, adding padded satin stitches beneath the top layers introduces height and volume, resulting in a raised, dimensional effect. Combining standard threads with specialty threads, such as metallic or variegated options, adds another layer of visual interest and texture. This method is especially useful in designs that aim to capture the dynamic interplay of light and surface, like metallic reflections or layered fabrics.

5. Controlling Density and Tension: Balancing Layered Designs
One of the challenges of layer embroidery is managing stitch density and tension across multiple layers. As layers accumulate, the overall density of the design increases, which can lead to issues like puckering, thread bunching, or uneven surfaces. To avoid these pitfalls, embroiderers must carefully control both the tension of their threads and the spacing of their stitches. Utilizing underlay stitches is an effective way to build a stable foundation, ensuring that top layers remain smooth and flat.
Underlay stitches also help control tension by anchoring the fabric and preventing distortion, especially in denser areas of the design. Additionally, varying the stitch length and direction within different layers distributes the tension evenly, reducing the risk of thread pull or puckering. For complex designs that involve multiple overlapping elements, strategically adjusting stitch density across layers ensures that the final piece maintains a polished, professional finish without losing its dimensional quality.
Designing with Depth
Designing with depth is the cornerstone of layer embroidery, as it allows artists to transform flat designs into rich, multi dimensional pieces that captivate the viewer’s attention. Achieving this level of artistry requires more than just skillful stitching, it demands a well rounded approach that considers composition, color theory, stitch techniques, and spatial relationships. Below are essential aspects to consider when designing embroidery pieces that truly come alive with depth.
• Visualizing Layered Composition: Mapping Out the Dimensions
The first step in designing with depth is to reimagine the composition as a series of overlapping elements, each contributing to the overall effect. Unlike traditional flat embroidery, where designs are often viewed as a single plane, layer embroidery breaks this plane into multiple levels. This approach is akin to creating a 3D model, where each element is positioned with careful attention to perspective and spatial arrangement. Visualizing the design as layers of foreground, midground, and background helps establish the hierarchical structure that gives the embroidery its depth.
A practical way to start is by sketching the design and separating it into different layers. Tools like embroidery software can be invaluable for digitally mapping out these layers, allowing you to preview how the elements will interact once stitched. The key is to determine which parts of the design should appear closer to the viewer and which should recede, setting the stage for dynamic contrasts in both texture and color.
• Leveraging Color Theory: Creating Visual Depth through Strategic Shading
Color plays a crucial role in defining depth, with strategic shading being a primary technique in layered designs. By understanding how colors interact, embroiderers can manipulate the perception of depth, making certain elements pop while others fade into the background. Lighter colors, for instance, tend to advance visually, giving the impression that they are closer, while darker colors tend to recede, adding depth to the composition. This principle is particularly effective when layering stitches to build highlights and shadows, as it guides the viewer’s eye naturally through the design.

The color palette selection should include a range of tones that work cohesively across the layers. Gradients are particularly useful, with subtle shifts in hue contributing to smooth transitions between layers. For designs that require a high level of realism, like portraits or detailed landscapes, incorporating analogous colors (those that sit next to each other on the color wheel) helps maintain harmony while still creating distinct layers. Conversely, complementary colors (those opposite each other on the color wheel) can be used sparingly to introduce contrast and focal points, enhancing the perception of depth.
• Controlling Light and Shadow: Emphasizing Layer Interactions
Layer embroidery thrives on the interplay between light and shadow, which is where many designs gain their dimensional appeal. To design effectively with depth, it’s important to incorporate shadowing techniques that align with the light source of the scene. Determining the direction and intensity of light early in the design process ensures consistency across all layers, allowing shadows and highlights to be applied with accuracy.
Techniques like long and short stitches, combined with varying stitch lengths, can mimic the gradation of light and shadow in areas like folds, curves, and textured surfaces. For instance, blending thread colors in shadowed areas while gradually lightening toward the highlights creates a natural progression that adds depth and realism. Additionally, incorporating directional stitches that follow the contours of the object enhances the illusion of form, whether it’s the soft curve of a petal or the sharp edge of a geometric shape.
• Layering for Perspective: Enhancing Spatial Relationships
Designing with depth isn’t just about layering stitches, it’s also about understanding how those layers relate to one another in a spatial context. Perspective is a powerful tool that can be employed to create a sense of distance or proximity within the design. In embroidery, this can be achieved by manipulating the scale, density, and placement of elements. For example, stitching larger, denser elements in the foreground and gradually reducing the size and stitch density as elements move into the background creates a convincing sense of perspective.
Another effective technique involves varying stitch direction and angle to convey the three dimensional form of objects. For instance, curved lines stitched in a concave or convex pattern can suggest rounded surfaces, while straight, parallel lines may indicate flat planes. By adjusting the alignment and overlap of stitches, embroiderers can guide the viewer’s perception of spatial depth, drawing attention to the intended focal points while allowing secondary elements to fade into the background.
• The Role of Texture in Depth Creation: Combining Layered Stitches
Texture is an essential element in layer embroidery, contributing significantly to the perception of depth. In addition to the visual depth created through color and shading, tactile depth is achieved by layering stitches with varying textures. Smooth satin stitches might form the foundation, while additional layers introduce more textured stitches, like French knots, seed stitches, or couching, depending on the design’s requirements. This layering of textures adds both dimension and visual interest, encouraging viewers to engage more deeply with the piece.

For designs that call for distinct textures, such as portraying fur, feathers, or foliage, careful stitch selection is key. The choice of threads also plays a role, with finer threads lending themselves to smooth, delicate textures, while thicker, specialty threads introduce bulk and volume. By combining these elements strategically within the layered composition, the design achieves a balanced mix of smooth and textured areas, enhancing the overall depth and realism.
Troubleshooting Common Challenges
Layer embroidery is a rewarding but intricate technique that can present various challenges, especially for those new to working with complex, multi layered designs. Understanding how to identify and overcome these obstacles is crucial for achieving high quality results. Below, we delve deeper into some common issues embroiderers face and offer comprehensive solutions to keep your projects on track.
A: Managing Fabric Distortion: Preventing Warping and Stretching
One of the most prevalent challenges in layer embroidery is fabric distortion. As multiple layers of stitches build up, the fabric can start to warp, stretch, or even pucker. This distortion occurs because the tension from densely layered stitches can pull on the fabric unevenly, especially if the stabilizer or hooping isn’t properly managed.
To prevent this, selecting the right stabilizer for your fabric is crucial. For dense or multi layered designs, a heavy duty cutaway stabilizer provides the necessary support to maintain fabric integrity throughout the embroidery process. It’s also important to hoop the fabric tightly without over stretching, as this can lead to distortion once the fabric is released from the hoop. Proper tension adjustment on your embroidery machine is another key factor; reducing the tension slightly when working with multiple layers can minimize fabric pull and maintain a smooth finish.
In addition to these preventive measures, using underlay stitches as a foundation helps distribute the stitch density evenly. Underlay not only stabilizes the fabric but also acts as a buffer, reducing the stress exerted by the top layers of stitches. Implementing a basting stitch around the design area before embroidering can further secure the fabric and minimize shifting, allowing you to maintain the design’s intended shape.
B: Avoiding Thread Buildup: Controlling Density in Layered Designs
Thread buildup is a common issue in layer embroidery, particularly in areas where multiple layers overlap or where heavy stitch density is required. This can lead to uneven surfaces, bulky areas, or even thread breakage. Effective design planning and density management are key to avoiding these issues.
When designing your project, carefully consider where layers will overlap and adjust the stitch density accordingly. In highly dense areas, opting for lighter or lower density stitch patterns can reduce bulk without compromising the overall effect. For example, using open fill stitches or running stitches in lower layers allows subsequent layers to build dimension without creating excessive bulk. Additionally, varying the stitch direction and angle across layers prevents thread from piling up in the same areas, which helps maintain a smooth surface.
Thread type also plays a role in managing buildup. Thinner threads, such as 60 weight embroidery threads, allow for finer details and more layering without overwhelming the design. For areas requiring additional bulk, consider using specialized stitches like trapunto or padded stitches, which add dimension while maintaining a balanced thread density. Regularly trimming jump stitches and using thread lubricant can further reduce the risk of thread tangling or breaking.
C: Addressing Design Misalignment: Ensuring Precision with Multi Layered Embroidery
Misalignment is a significant concern in layer embroidery, where precision is key to achieving the intended depth and detail. Even slight shifts in hooping or fabric movement can cause layers to misalign, leading to a distorted final design. To combat this, consistent and accurate hooping is essential. Ensure that the fabric is tightly hooped without stretching, and double check the alignment before starting each layer. For larger designs, using a multi hoop setup or a machine with a repositionable hoop feature can help maintain alignment across different sections.
Marking your fabric with reference points using water soluble pens or chalk can also guide the alignment process. If your design software supports it, print a template of the design and use it to position the fabric accurately within the hoop. Another solution is to utilize registration marks in your digitized design, which act as alignment guides during the stitching process. These marks are stitched outside the design area and can be removed once the embroidery is complete.
If alignment issues still occur during stitching, it’s often due to fabric movement or hoop slippage. Securing the fabric with temporary adhesive spray or double sided embroidery tape can provide extra grip, preventing unwanted shifts. Additionally, some embroiderers find success with floatation techniques, where the fabric is floated above the stabilizer and held in place with clips or adhesive, reducing hoop induced distortion while maintaining alignment.
D: Balancing Tension Across Layers: Avoiding Puckering and Thread Breaks
Balancing thread tension across multiple layers is one of the trickiest aspects of layer embroidery. Incorrect tension settings can cause puckering, thread breakage, or uneven stitching. Each layer you add introduces additional tension on the fabric, so fine tuning your machine settings is critical. Start by running a test stitch out on a scrap piece of fabric using the same layers and density as your final design. This allows you to assess and adjust the tension without risking your main project.
Reducing top thread tension slightly for thicker layers can prevent thread breakage and reduce stress on the fabric. Simultaneously, balancing the bobbin tension ensures that the fabric lies flat and that both sides of the embroidery appear even. Machines with automatic tension adjustment features can be particularly helpful when working with complex designs, as they adapt tension settings based on the stitch type and density.
For extremely dense designs, consider using a thread net or spool cap to control thread feeding and prevent tangling. Slowing down your machine’s stitch speed also gives more time for the thread to lay smoothly and reduces the risk of breaks. Regularly cleaning your machine’s bobbin area and checking for lint buildup can improve performance and consistency across layers.
E: Managing Color Transitions: Preventing Harsh Lines in Layered Shading
In layer embroidery, smooth color transitions are vital for achieving a cohesive look. Harsh lines or abrupt shifts between layers can ruin the depth and realism of your design. To manage color transitions effectively, blending techniques such as staggered stitch placement or alternating colors between layers can help. Instead of ending one color abruptly and starting the next, gradually interlace the stitches of adjacent colors to create a seamless gradient.
Using a varied stitch length within transitional areas also softens color shifts. Shorter stitches can be used for tighter, more controlled blending, while longer stitches provide a gradual fade. Thread choice is another factor, opting for variegated threads or thread blending techniques can introduce subtle color variations that enhance the overall depth without creating visible lines between layers.
If your design features strong contrasting colors, such as dark and light shades, avoid placing them directly next to each other in a single pass. Instead, introduce intermediary tones to bridge the gap and create a more natural transition. For digital embroiderers, adjusting the density of each color layer in your software before stitching can help visualize and refine the blending process.
The Future of Layer Embroidery: Evolving with Technology
The future of layer embroidery is being shaped by technological advancements that are making complex designs more accessible and efficient. AI driven embroidery software is increasingly capable of analyzing intricate patterns, optimizing stitch sequences, and offering real time adjustments for layered designs. These developments allow even novice embroiderers to achieve professional results. Additionally, the growing integration of 3D embroidery with layered techniques is pushing creative boundaries, enabling designs that combine depth and tactile textures through specialized threads and materials.
Innovations in embroidery machines are also enhancing the layer embroidery process. Next generation machines offer multi needle configurations, automated color changes, and faster stitching speeds, making it easier to execute multi layered designs with precision. Advanced hooping technologies, like magnetic hoops and hoopless systems, are minimizing fabric distortion, a common challenge in layered embroidery. Additionally, high definition design previews in digitizing software now offer realistic visualizations of layered effects, allowing for fine tuning before stitching begins.
Cloud based embroidery platforms are transforming how designs are shared, stored, and executed. These platforms support remote access, collaborative design processes, and automated machine settings, making layer embroidery more efficient and streamlined. The global exchange of techniques and ideas facilitated by these platforms is fostering innovation and new trends in layered embroidery. This shift is particularly beneficial for commercial embroiderers, who can now optimize production workflows and enhance creative collaboration.
Sustainability is also influencing the future of layer embroidery. Eco friendly materials, such as biodegradable stabilizers and energy efficient machines, are becoming more prevalent. As demand for environmentally conscious practices grows, future innovations will likely focus on reducing waste while maintaining the artistic integrity of layered designs. The intersection of creativity and technology promises a dynamic evolution in layer embroidery, offering limitless possibilities for those embracing these advancements.
Conclusion
Layer embroidery is a captivating technique that adds depth, texture, and dimension to designs, transforming them into works of art that engage both visually and tactilely. Mastering this approach involves a deep understanding of layering principles, from strategic color placement to effective techniques that ensure smooth transitions and precise detailing. The evolution of embroidery technology, combined with creative ingenuity, has expanded the possibilities, making once complex designs more achievable and allowing embroiderers to experiment with new effects. With the right knowledge and tools, layer embroidery offers endless opportunities for creating intricate and dynamic pieces.
As technology continues to advance, the landscape of layer embroidery is set to evolve even further. From AI enhanced software and cloud based collaboration to more efficient machines and sustainable materials, embroiderers are equipped with tools that not only simplify complex processes but also unlock new creative potential. The integration of these innovations ensures that layer embroidery remains at the forefront of artistic expression, offering a blend of tradition and modernity. Whether for fashion, home décor, or custom projects, mastering layer embroidery provides a pathway to creating visually stunning designs that captivate on multiple levels.
Now that you have read through this article, feel free to SHOP for products we have created. If you are looking for something special which isn’t in our store, feel free to contact us.