Machine Embroidery Troubleshooting
A Beginners Guide to 15 Common Issues and Resolutions
Introduction
Embroidery, with its intricate designs and meticulous stitches, is a captivating art form that allows creators to embellish fabrics with beauty and personality. However, amidst the creativity and precision of the embroidery process, embroiderers often encounter challenges that can hinder their progress and affect the quality of their work. In this comprehensive guide, we’ll explore four fundamental areas of embroidery troubleshooting and provide practical tips to help you overcome 15 common issues with ease.
Embroidery machines offer endless possibilities for creativity, but mastering them requires more than just skill, it demands a deep understanding of the intricacies involved. From the initial setup to the final stitch, every step in the embroidery process plays a crucial role in determining the outcome of your project. In the following sections, we’ll delve into each aspect of machine embroidery, uncovering the potential pitfalls and offering expert advice to guide you through them. Whether you’re a novice embroiderer or an experienced enthusiast, this guide will equip you with the knowledge and techniques needed to tackle any challenge and achieve stunning results.
Troubleshooting Guide To Common Issues
Embroidery troubleshooting is an essential skill for embroiderers seeking to achieve professional quality results with their embroidery machines. By understanding the common issues that may occur during the embroidery process and implementing the tips provided in this guide, you can navigate through challenges with confidence and precision. With patience, practice, and attention to detail, you can overcome any obstacle that comes your way and create beautiful, flawless embroidery projects that showcase your skills and creativity.
Embarking on your embroidery journey may seem daunting at first, but rest assured that every challenge presents an opportunity for growth and mastery. As you encounter each issue and apply the troubleshooting techniques outlined in this guide, you’ll develop a deeper understanding of your machine’s mechanics and gain invaluable insight into the intricacies of embroidery. With each successful resolution, you’ll not only improve your technical skills but also cultivate a sense of confidence and resilience that will serve you well in all your future embroidery endeavors.
Remember, the road to mastery is paved with patience and perseverance. Embrace the process of troubleshooting as a learning experience, and don’t be discouraged by setbacks along the way. With determination and dedication, you’ll soon find yourself navigating through embroidery challenges with ease, turning every stumbling block into a stepping stone on your path to embroidery excellence. So roll up your sleeves, ready your machine, and let’s dive into the world of embroidery troubleshooting together!
Preparation and Setup
1. Poor Pattern Design
Embroidery patterns serve as the blueprint for your creations, dictating the intricacies and aesthetics of your design. However, a poorly designed pattern can introduce a myriad of issues into your embroidery project. From uneven stitching to thread breaks and design distortion, the consequences of a flawed pattern can be frustrating and disheartening. Common problems associated with poor pattern design include jagged edges, inconsistent stitch densities, and overlapping elements that result in a cluttered and unprofessional appearance.
Problem: Poorly designed embroidery patterns can disrupt the stitching process and compromise the quality of your finished project. Uneven stitch lengths, misaligned elements, and excessive thread jumps are just a few of the issues that can arise from a flawed pattern. These problems not only detract from the visual appeal of your embroidery but also compromise its structural integrity, leading to potential durability issues over time.
Troubleshooting Tip: When encountering issues related to poor pattern design, the first step is to carefully evaluate the digitized design file. Look for areas of complexity or excessive detail that may be causing stitching problems, and consider simplifying or optimizing the design if necessary. Pay close attention to stitch densities, ensuring that they are appropriate for the fabric and thread being used. Additionally, double check the design dimensions and alignment to ensure they match the intended placement on the fabric. By addressing these issues at the design stage, you can prevent potential problems during the stitching process and ensure a smoother embroidery experience overall.
2. Improper Hooping
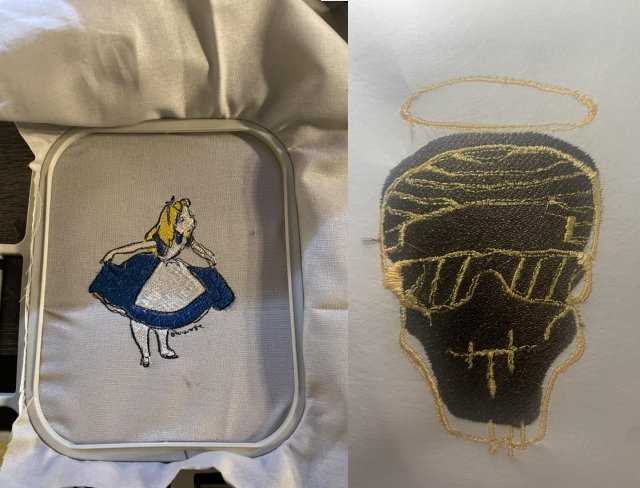
Hooping is a fundamental step in the embroidery process, providing the foundation upon which your design will be stitched. Improper hooping techniques can lead to a variety of issues that affect the quality and accuracy of your embroidery. When the fabric is not hooped evenly or securely, it can result in fabric slippage, misalignment, and distortion during stitching. These problems can manifest as skewed designs, uneven borders, or misplaced elements, detracting from the overall appearance of your finished project.
Problem: Improper hooping can undermine the integrity of your embroidery project, causing misalignment, distortion, and other stitching irregularities. When the fabric is not hooped evenly or securely, it may shift or stretch during stitching, leading to inaccuracies in the design placement and compromised stitch quality. Additionally, insufficient tension in the hooped fabric can result in puckering or wrinkling, further detracting from the visual appeal of the finished embroidery.
Troubleshooting Tip: To address issues related to improper hooping, start by ensuring that the fabric is hooped evenly and securely, with minimal tension but enough to keep the fabric taut. Use appropriate hooping techniques for different types of fabric, taking care to avoid stretching or distorting the material. Additionally, consider using additional stabilizers or adhesive backing to provide extra support and minimize fabric movement during stitching. By hooping the fabric properly and securely, you can create a stable foundation for your embroidery design, ensuring accurate placement and consistent stitch quality throughout the stitching process.
3. Fabric Tearing
Fabric tearing during the embroidery process can be a frustrating setback, compromising the integrity of your project and requiring time consuming repairs. This issue typically occurs when the needle pierces the fabric too forcefully, especially when stitching dense designs on delicate or loosely woven fabrics. The result is unsightly tears or rips in the fabric, which can detract from the overall appearance of the finished embroidery and may necessitate starting the project over from scratch.
Problem: Fabric tearing poses a significant challenge to embroiderers, as it not only damages the fabric but also interrupts the stitching process and can lead to wasted time and resources. Tearing may occur when the needle encounters resistance from dense or tightly woven fabrics, causing the fabric fibers to fray or break under the pressure. Additionally, insufficient stabilizer or backing support can exacerbate the problem, allowing the fabric to distort or stretch excessively during stitching, further increasing the risk of tearing.
Troubleshooting Tip: To address fabric tearing issues, start by selecting a sharp embroidery needle appropriate for the fabric type and design complexity. A sharp needle will penetrate the fabric more easily, reducing the risk of tearing. Additionally, consider adjusting the stitching speed or reducing the stitch density for dense designs to minimize the force exerted on the fabric.
Ensure that you are using an adequate amount of stabilizer or backing to support the fabric during stitching, especially when working with delicate or loosely woven fabrics. By taking these precautions and adjusting your embroidery settings as needed, you can mitigate the risk of fabric tearing and achieve smoother, more successful stitching results.
4. Fabric Pulling
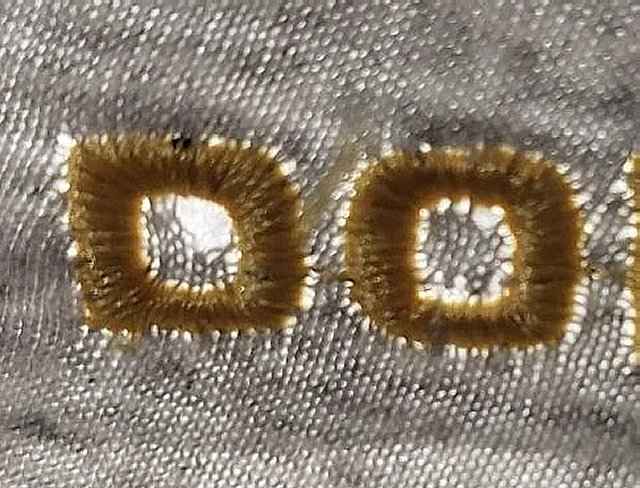
Fabric pulling is a common issue encountered during the embroidery process, which occurs when the tension on the fabric is too tight during hooping. This excess tension can lead to distortion, puckering, and uneven stitching, detracting from the overall quality of the embroidery. Fabric pulling often manifests as visible wrinkles or creases in the fabric, particularly around the edges of the design or in areas with intricate stitching.
Problem: Fabric pulling poses a significant challenge for embroiderers, as it can result in distorted or misshapen designs, compromised stitch quality, and overall dissatisfaction with the finished embroidery. Excessive tension on the fabric during hooping can cause the fabric to stretch or warp, leading to uneven stitching and unsightly puckering. Additionally, fabric pulling can affect the stability of the fabric during stitching, increasing the risk of thread breaks or needle jams.
Troubleshooting Tip: To address fabric pulling issues, start by hooping the fabric with even tension, ensuring that it is taut but not stretched. Avoid over tightening the hoop, as this can put unnecessary strain on the fabric and increase the risk of pulling. Consider using additional stabilizers or basting stitches to provide support and minimize fabric movement during stitching.
If fabric pulling persists, experiment with different hooping techniques or adjust the tension settings on your machine to achieve optimal results. By taking these precautions and fine tuning your embroidery setup, you can minimize fabric pulling and achieve smoother, more professional looking embroidery projects.
Machine Operation and Maintenance
5. Needle Breaks or Burrs
Needle breaks or burrs can be a frustrating occurrence during the embroidery process, disrupting the stitching and potentially damaging both the fabric and the machine. This issue often occurs when the needle encounters resistance from dense fabrics or improperly adjusted tension settings. Needle breaks can result in interrupted stitching, thread jams, and potentially costly repairs to the machine.
Problem: Needle breaks or burrs are a common problem faced by embroiderers, and they can occur for a variety of reasons. Using the wrong needle size or type for the fabric being stitched, or using a dull or damaged needle, can increase the risk of breakage. Additionally, improper tension settings on the machine can put undue strain on the needle, leading to bending or breakage during stitching. Needle burrs, caused by friction with the fabric or machine parts, can also pose a risk of snagging or damaging the fabric and should be addressed promptly to prevent further issues.
Troubleshooting Tip: To address needle breakage issues, start by ensuring that you are using the correct needle size and type for the fabric and design complexity. Sharp, high quality needles are less likely to break or bend during stitching, so be sure to replace dull or damaged needles regularly. Check the tension settings on your machine to ensure they are properly calibrated for the fabric and thread being used, and adjust as needed to reduce strain on the needle.
Additionally, inspect the needle regularly for any signs of burrs or damage, and replace it if necessary to prevent further issues. By taking these precautions and maintaining your machine properly, you can minimize the risk of needle breaks and ensure smoother, more reliable stitching results.
6. Tension Problems
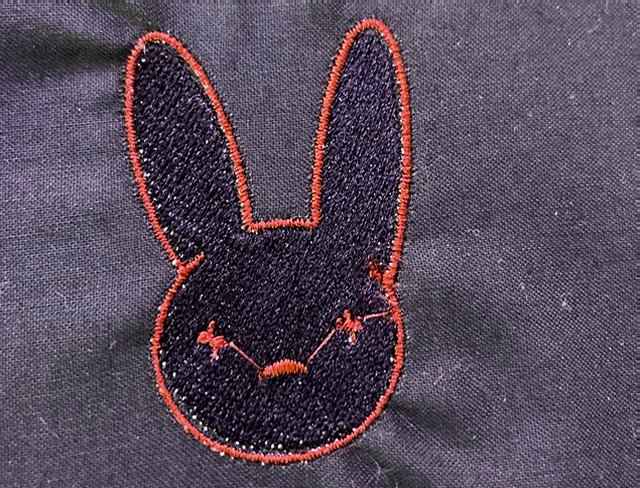
Tension problems are a common source of frustration for embroiderers, as they can result in uneven stitches, thread breaks, and overall poor stitch quality. Tension issues occur when the tension on the machine’s upper and lower threads is not properly balanced, leading to excessive pulling or slack in the stitches. This imbalance can manifest as loose, loopy stitches or tight, puckered stitches, detracting from the overall appearance of the embroidery.
Problem: Tension problems can arise for a variety of reasons, including incorrect tension settings on the machine, improper threading, or debris in the tension discs. When the tension is too tight, the stitches may be pulled too tightly, causing the fabric to pucker or distort. Conversely, when the tension is too loose, the stitches may be too loose or loopy, resulting in poor stitch formation and potential thread breaks. Tension problems can also be exacerbated by using the wrong type or weight of thread, as different threads may require different tension settings for optimal results.
Troubleshooting Tip: To address tension problems, start by checking the tension settings on your machine to ensure they are properly calibrated for the fabric and thread being used. Consult your machine’s manual for guidance on adjusting tension settings, and experiment with small test stitches to achieve the desired results. Ensure that the machine is threaded correctly, with the thread passing through all necessary guides and tension discs.
If tension problems persist, clean the tension discs and check for any debris or thread buildup that may be affecting the tension. Additionally, consider using high quality embroidery thread that is compatible with your machine and fabric to minimize tension issues. By carefully adjusting the tension settings and troubleshooting any underlying issues, you can achieve balanced tension and produce high quality embroidery with ease.
7. Thread Color Changes
Managing thread color changes during embroidery is essential for achieving accurate and visually appealing designs. However, incorrect or untimely thread color changes can result in inconsistencies or errors in the embroidery design, detracting from the overall quality of the finished project. This issue often arises when the embroidery machine fails to change thread colors at the appropriate times, resulting in misplaced or mismatched colors within the design.
Problem: Thread color changes are a critical aspect of embroidery, and errors in this process can lead to significant disruptions in the stitching process. Misplaced or mismatched colors can detract from the visual cohesion of the design, resulting in a disjointed or unprofessional appearance. Additionally, skipping or repeating color changes can cause inconsistencies in the design, further compromising the overall quality of the embroidery.
Troubleshooting Tip: To address thread color change issues, start by double checking the embroidery design and thread sequence before starting the stitching process. Ensure that the correct thread colors are loaded onto the machine and that the machine is programmed to change colors at the appropriate times. Verify that the design file is correctly digitized with clear color change instructions and that any automated color change settings on the machine are enabled.
If inconsistencies persist, manually pause the machine at each color change to verify that the correct thread is loaded and adjust as needed. By carefully managing thread color changes and verifying their accuracy throughout the stitching process, you can ensure consistent and visually stunning embroidery results.
8. Recommended Machine Maintenance
Proper machine maintenance is crucial for ensuring the longevity and performance of your embroidery machine. Neglecting regular maintenance tasks can lead to mechanical issues, poor stitch quality, and premature wear and tear on machine components. This issue often arises when embroiderers fail to follow manufacturer recommended maintenance schedules or overlook routine cleaning and lubrication procedures.
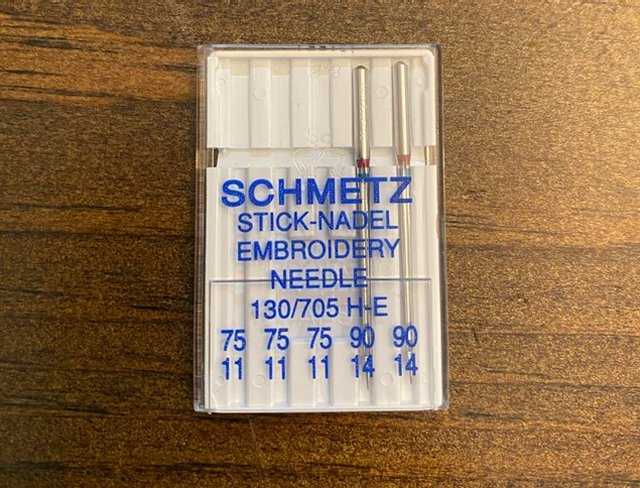
Problem: Neglecting machine maintenance can have serious consequences for the performance and reliability of your embroidery machine. Dust, lint, and debris can accumulate within the machine’s mechanisms over time, causing friction, jamming, and other mechanical issues. Lack of lubrication can also lead to increased wear and tear on moving parts, resulting in decreased stitch quality and potential damage to the machine. Additionally, failure to replace worn or damaged components, such as needles or tension discs, can compromise stitching accuracy and pose safety risks for the operator.
Troubleshooting Tip: To address machine maintenance issues, start by consulting your machine’s manual for recommended maintenance procedures and schedules. Regularly clean the machine’s exterior and interior, removing any dust, lint, or debris that may have accumulated. Lubricate moving parts as recommended by the manufacturer to ensure smooth operation and minimize friction. Check and replace worn or damaged components, such as needles, tension discs, and bobbin cases, as needed to maintain optimal stitching performance.
Additionally, schedule periodic professional servicing to address any underlying issues and ensure the longevity of your embroidery machine. By prioritizing machine maintenance and following recommended procedures, you can maximize the lifespan of your embroidery machine and achieve consistent, high quality stitching results.
Thread and Stitching Issues
9. Thread Nesting
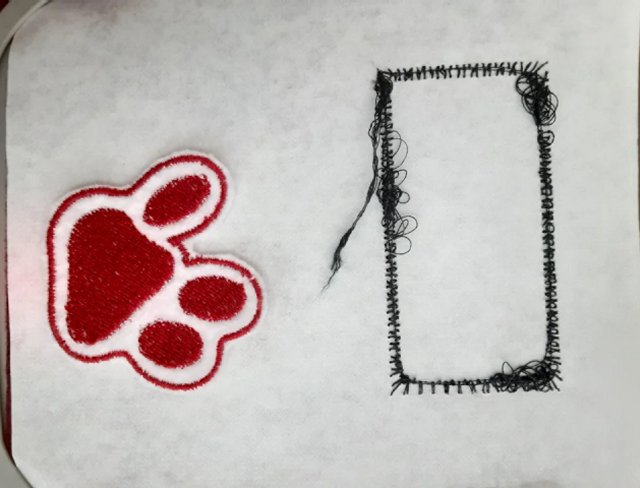
Thread nesting, also known as birdnesting, is a frustrating issue that occurs when excess thread accumulates on the underside of the fabric during embroidery. This phenomenon can result in unsightly knots and loops, detracting from the overall appearance of the embroidery and potentially causing the machine to jam. Thread nesting often occurs when there is a tension imbalance between the upper and lower threads or when the machine’s tension settings are not properly calibrated.
Problem: Thread nesting poses a significant challenge for embroiderers, as it can disrupt the stitching process and compromise the quality of the finished embroidery. Excess thread buildup on the underside of the fabric can lead to thread breaks, uneven stitching, and potential damage to the fabric or machine. Additionally, thread nesting can be time consuming to rectify, requiring the embroiderer to stop the machine, remove the fabric, and manually trim away the excess thread before continuing with the embroidery.
Troubleshooting Tip: To address thread nesting issues, start by checking the tension settings on your machine to ensure they are properly calibrated for the fabric and thread being used. Adjust the tension as needed to achieve a balanced tension between the upper and lower threads, minimizing the risk of thread nesting. Additionally, ensure that the machine’s bobbin is wound evenly and inserted correctly into the bobbin case, as uneven winding or improper insertion can contribute to thread nesting.
If thread nesting persists, try using a different type or weight of thread, as some threads may be more prone to nesting than others. Finally, consider using additional stabilizers or backing to provide support and minimize thread movement during stitching. By addressing these potential causes and implementing troubleshooting techniques, you can minimize the occurrence of thread nesting and achieve smoother, more professional looking embroidery results.
10. Machine Jamming
Machine jamming is a common issue encountered during embroidery, where the machine becomes stuck or unresponsive due to various factors. This problem can occur when the needle becomes lodged in the fabric or when thread tangles around the machine’s moving parts. Machine jamming not only disrupts the embroidery process but can also lead to needle and fabric damage if not addressed promptly.
Problem: Machine jamming can occur for several reasons, including improperly threaded machines, tension issues, or using the wrong type or weight of thread. Additionally, fabric hooping problems, such as uneven tension or fabric bunching, can also contribute to machine jamming. When the machine becomes jammed, it may produce uneven or incomplete stitches, and in severe cases, may require manual intervention to resolve the issue.
Troubleshooting Tip: To troubleshoot machine jamming issues, start by inspecting the machine’s threading to ensure that the upper and lower threads are correctly inserted and tensioned. Check for any tangled thread or debris around the needle, bobbin area, or other moving parts, and carefully remove any obstructions. If the machine is still jammed, try adjusting the tension settings or using a different type of thread to see if that resolves the issue.
Additionally, check the fabric hooping to ensure that it is even and secure, with minimal tension but enough to keep the fabric taut. If the machine continues to jam, consult the manufacturer’s manual for specific troubleshooting steps or consider contacting a professional technician for assistance. By identifying and addressing the underlying causes of machine jamming, you can minimize downtime and ensure smooth, uninterrupted embroidery operations.
11. Thread Fraying
Thread fraying is a common issue encountered during embroidery, where the thread begins to unravel or fray, compromising the quality of the stitches and the overall appearance of the embroidery. This problem typically occurs when the thread is subjected to excessive tension, abrasion, or friction during stitching. Thread fraying can result in uneven stitches, thread breaks, and potential damage to the fabric if not addressed promptly.
Problem: Thread fraying can occur for various reasons, including using the wrong type or weight of thread, improper tension settings, or using dull or damaged needles. Additionally, inadequate lubrication or buildup of debris in the machine’s tension discs can also contribute to thread fraying. When the thread frays, it can lead to inconsistent stitch quality and may require frequent stops to trim and rethread the needle, resulting in downtime and frustration for the embroiderer.
Troubleshooting Tip: To address thread fraying issues, start by ensuring that you are using high quality embroidery thread that is appropriate for the fabric and design complexity. Check the tension settings on your machine to ensure they are properly calibrated, and adjust as needed to reduce tension on the thread. Additionally, inspect the needle regularly for any signs of dullness or damage, and replace it if necessary to prevent fraying.
Keep the machine’s tension discs clean and lubricated to minimize friction and abrasion on the thread during stitching. If thread fraying persists, try using a different type of thread or consider using a thread conditioner to strengthen the thread and reduce fraying. By addressing these potential causes and implementing troubleshooting techniques, you can minimize thread fraying and achieve smoother, more consistent stitching results.

12. Design Registration Errors
Design registration errors occur when the embroidery machine fails to accurately align subsequent stitches with the existing design, resulting in misalignment or distortion of the embroidery. This issue can arise due to various factors, including improper hooping, inaccurate design placement, or mechanical issues with the machine. Design registration errors can lead to uneven or misplaced stitches, detracting from the overall quality and appearance of the embroidery.
Problem: Design registration errors can be frustrating for embroiderers, as they can result in significant disruptions to the stitching process and compromise the integrity of the finished embroidery. Misalignment or distortion of the design can lead to inconsistencies in stitch placement and may require manual intervention to correct. Additionally, design registration errors can be time consuming to rectify, requiring the embroiderer to stop the machine, rehoop the fabric, and realign the design before continuing with the embroidery.
Troubleshooting Tip: To troubleshoot design registration errors, start by ensuring that the fabric is hooped evenly and securely, with the design properly centered and aligned. Check the machine’s settings to ensure that the design coordinates are correctly entered and that any pattern repeats or rotations are accurately programmed. If design registration errors persist, check the machine’s mechanical components, such as the needle bar and hoop positioning system, for any signs of misalignment or damage.
Additionally, consider using additional stabilizers or adhesive backing to provide support and minimize fabric movement during stitching. By addressing these potential causes and implementing troubleshooting techniques, you can minimize design registration errors and achieve more accurate and consistent embroidery results.
13. Fabric Puckering
Fabric puckering is a frustrating issue encountered during embroidery, where the fabric gathers or wrinkles around the stitched areas, detracting from the smoothness and quality of the finished embroidery. This problem typically occurs when the tension on the fabric is uneven or when the fabric is not properly stabilized during stitching. Fabric puckering can result in uneven stitch quality, distorted designs, and potential damage to the fabric if not addressed promptly.
Problem: Fabric puckering can occur for various reasons, including using the wrong type or weight of stabilizer, inadequate tension settings on the machine, or improper hooping techniques. When the fabric is not properly stabilized or tensioned during stitching, it may gather or wrinkle around the stitched areas, leading to puckering. Additionally, excessive needle penetration or stitching speed can exacerbate fabric puckering issues, resulting in unsightly wrinkles and inconsistencies in the embroidery.
Troubleshooting Tip: To address fabric puckering issues, start by ensuring that you are using the correct type and weight of stabilizer for the fabric and design complexity. Experiment with different stabilizer options to find the one that provides optimal support and minimizes fabric movement during stitching. Check the tension settings on your machine to ensure they are properly calibrated, and adjust as needed to achieve balanced tension between the upper and lower threads.
Additionally, ensure that the fabric is hooped evenly and securely, with minimal tension but enough to keep the fabric taut. If fabric puckering persists, consider reducing the needle penetration or stitching speed to minimize fabric distortion. By addressing these potential causes and implementing troubleshooting techniques, you can minimize fabric puckering and achieve smoother, more professional looking embroidery results.
Additional Issues
14. Proper Thread Usage
Proper thread usage is crucial for achieving high quality embroidery results, as using the wrong type or weight of thread can lead to stitching issues and compromised design integrity. This issue often arises when embroiderers overlook the importance of selecting the appropriate thread for their project or fail to consider factors such as thread color, thickness, and composition. Improper thread usage can result in uneven stitches, thread breaks, and overall poor stitch quality, detracting from the visual appeal of the embroidery.
Problem: Improper thread usage can lead to a variety of stitching issues, including thread breaks, tension problems, and thread nesting. Using the wrong type or weight of thread for the fabric and design complexity can strain the machine’s tension system and lead to stitching irregularities. Additionally, mismatched thread colors or inconsistent thread thickness can detract from the overall appearance of the embroidery, resulting in a less polished and professional looking finish.
Troubleshooting Tip: To address proper thread usage issues, start by carefully selecting the appropriate thread type, weight, and color for your embroidery project. Consider factors such as fabric type, design complexity, and intended use when choosing thread, and opt for high quality embroidery thread that is compatible with your machine. Ensure that the thread is properly threaded and tensioned on the machine, and monitor stitching closely for any signs of tension irregularities or thread breaks.
If stitching issues persist, consider adjusting the tension settings or experimenting with different thread options to achieve optimal results. By prioritizing proper thread usage and considering the specific requirements of each embroidery project, you can minimize stitching issues and achieve consistently high quality embroidery results.
15. Fabric Selection
Fabric selection plays a critical role in the success of an embroidery project, as different fabrics behave differently under the stitching process and require specific considerations to achieve optimal results. This issue often arises when embroiderers overlook the importance of selecting the right fabric for their design or fail to consider factors such as fabric weight, weave, and stability. Improper fabric selection can lead to stitching issues, fabric distortion, and overall dissatisfaction with the finished embroidery.
Problem: Choosing the wrong fabric for an embroidery project can result in a variety of issues, including puckering, stretching, and poor stitch quality. Fabrics with a loose or open weave may be prone to distortion and stretching during stitching, leading to uneven stitches and potential fabric damage. Additionally, fabrics with a high degree of stretch or elasticity may be difficult to hoop evenly and may require additional stabilizers to prevent distortion. Failure to consider these factors when selecting fabric can result in frustration and disappointment with the final embroidery outcome.
Troubleshooting Tip: To address fabric selection issues, start by carefully evaluating the requirements of your embroidery project and selecting a fabric that is appropriate for the design and intended use. Consider factors such as fabric weight, stability, and weave when choosing fabric, and opt for high quality materials that will provide a stable and supportive foundation for your embroidery. If working with stretchy or delicate fabrics, consider using additional stabilizers or backing to minimize distortion and ensure smooth stitching.
Additionally, pretreat fabric as needed to minimize shrinkage or distortion during stitching, and test stitch on a scrap piece of fabric before beginning your project to ensure compatibility with your chosen fabric. By prioritizing thoughtful fabric selection and taking the time to address potential issues proactively, you can achieve superior embroidery results with confidence and ease.

Conclusion
Embroidery troubleshooting is an essential skill for embroiderers seeking to achieve professional quality results with their embroidery machines. By addressing common issues related to preparation, machine operation, thread/stitching problems, and additional considerations such as proper thread usage and fabric selection, and implementing the corresponding troubleshooting tips, you can enhance your embroidery experience and achieve flawless results with confidence and precision. With patience, practice, and attention to detail, you can overcome any obstacle and create beautiful, flawless embroidery projects that showcase your skills and creativity.
As you journey through the world of embroidery, remember that troubleshooting is not just about fixing problems—it’s also an opportunity for growth and learning. Each challenge you encounter offers valuable lessons and insights that will deepen your understanding of embroidery techniques and machine operation. Embrace the process of troubleshooting as a chance to refine your skills and expand your knowledge, and approach each issue with curiosity and determination.
With persistence and a positive mindset, you’ll not only overcome any obstacle that comes your way but also emerge as a more skilled and confident embroiderer. So embrace the challenges, celebrate your successes, and continue to push the boundaries of your embroidery skills. The journey may be challenging at times, but the rewards of mastering this timeless craft are well worth the effort.
Now that you have read through this article, feel free to SHOP for products we have created. If you are looking for something special which isn’t in our store, feel free to contact us.


