Introduction
Embarking on the journey to perfect machine embroidery requires understanding the delicate dance between fabric, design, and stabilizer. Let’s delve into the intricacies of this harmonious trinity to unveil the secrets of the Goldilocks Zone.
Throughout this article, we’ll explore the essential elements that contribute to flawless machine embroidery. From selecting the right stabilizer to mastering hooping techniques, each aspect plays a pivotal role in achieving impeccable results. By understanding how fabric characteristics influence stabilizer choice, navigating design density, and troubleshooting common problems, embroiderers gain the knowledge and skills needed to elevate their craft to new heights. Now, armed with this comprehensive understanding, let’s embark on a journey where creativity meets precision, and each stitch becomes a testament to mastery and artistry.
Deciphering the Goldilocks Zone of Stabilizer
Embarking on the journey to perfect machine embroidery is akin to embarking on a quest for the holy grail of textile artistry. It requires a deep understanding of the intricate relationship between fabric, design, and stabilizer. Just as in any dance, each element must move in harmony with the others to achieve a flawless result.
• The fabric sets the stage, dictating the level of delicacy or robustness required from the stabilizer. Whether it’s lightweight chiffon fluttering like a butterfly, sturdy denim holding its ground like a steadfast oak, or anything in between, the stabilizer must complement the fabric’s characteristics.
• The design, with its complexity and stitch density, adds another layer of complexity to the equation. It’s the melody to which the stabilizer and fabric must dance. A dense design may demand more support, while intricate details may require a stabilizer that can handle the intricacies without causing distortion.
Together, this trinity forms what we like to call the “Goldilocks Zone of Stabilizer”, not too heavy, not too light, but just right. Finding this balance is the key to achieving perfect machine embroidery results. In the following sections, we’ll explore each element of this harmonious trinity in detail, unveiling the secrets that will lead you to embroidery excellence.
The Fabric Factor: Matching Fabric with the Right Stabilizer
The foundation of every successful machine embroidery project lies in the careful selection of the appropriate stabilizer that harmonizes with the characteristics of the fabric. Delving into this aspect of the embroidery process is akin to deciphering the language of textiles.
Lightweight fabrics, such as chiffon, organza, and lightweight cotton, possess an ethereal quality that demands a delicate touch. When working with these fabrics, opting for lightweight stabilizers is imperative to provide the necessary support without overwhelming the fabric’s inherent softness and fluidity. Striking the right balance ensures that the fabric maintains its delicate drape, allowing the embroidery design to shine through with grace and elegance.
Medium weight fabrics, including broadcloth, linen, and quilting cotton, offer versatility and durability, requiring stabilizers that can navigate this delicate balance. Medium weight stabilizers provide the ideal blend of support and flexibility, facilitating smooth stitching and impeccable results. This equilibrium enables optimal stitch formation while preserving the fabric’s integrity, ensuring that the finished embroidery stands out with crispness and clarity.
On the other end of the spectrum, heavyweight fabrics such as denim, canvas, and upholstery fabric exude strength and resilience, necessitating stabilizers with substance. Heavy stabilizers or strategically layered options offer the sturdy foundation required to withstand the weight of intricate designs. This robust support ensures that the fabric remains stable and resilient throughout the embroidery process, resulting in finished pieces that are both durable and visually striking.
By understanding the fabric factor and selecting the right stabilizer to complement the unique characteristics of each fabric, embroiderers can unlock the potential for flawless machine embroidery. This strategic pairing lays the groundwork for successful stitching, ensuring that every project achieves the perfect balance of stability, finesse, and beauty.
Choosing the Right Stabilizer: Understanding the Types
Selecting the appropriate stabilizer is akin to choosing the right tool for the job, it’s a critical decision that can significantly impact the outcome of your machine embroidery project. Understanding the various types of stabilizers and their respective applications is essential for achieving flawless results.
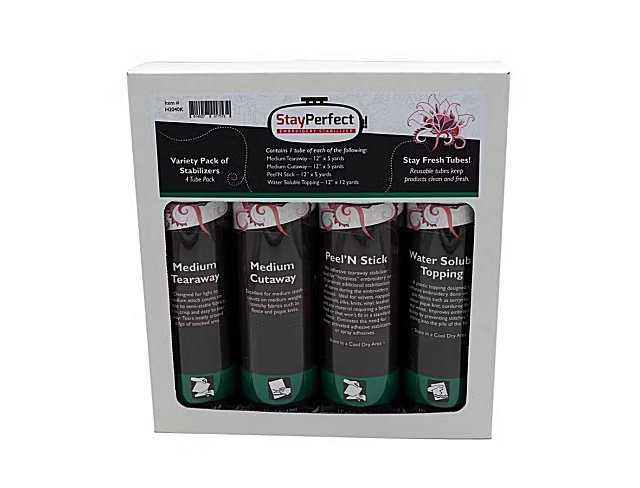
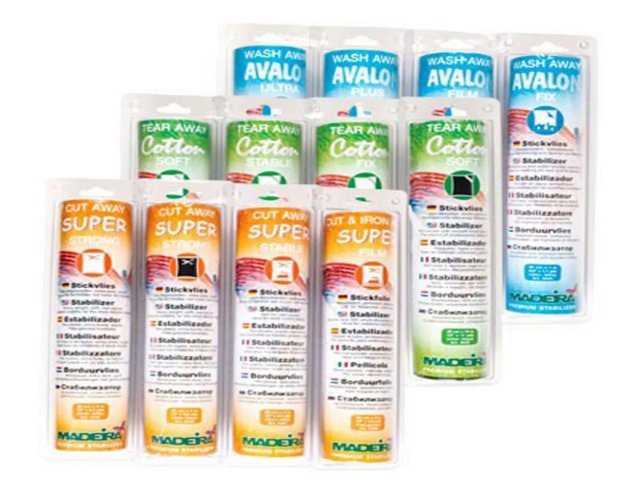
Tear away Stabilizers: These versatile stabilizers are perfect for lightweight to medium weight fabrics and designs with modest stitch density. They offer easy removal post stitching, leaving behind a flawless finish. Tear away stabilizers provide temporary support, allowing for clean and precise stitching without leaving behind any residue. They are ideal for projects where the stabilizer needs to be removed cleanly without any remnants interfering with the final embroidery.
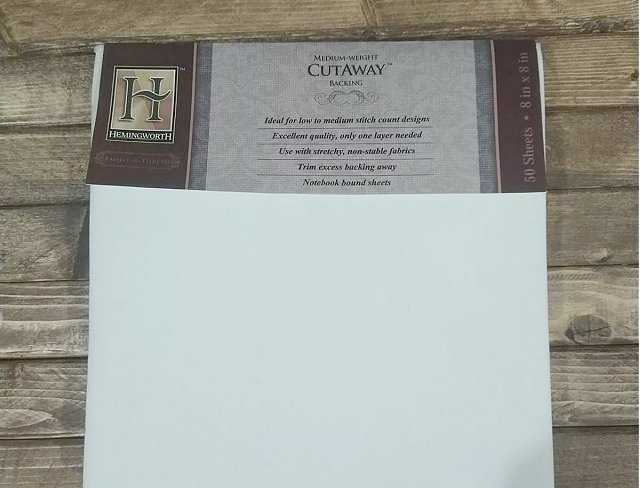
Cut away Stabilizers: Indispensable for medium to heavyweight fabrics and designs boasting intricate details, cut away stabilizers provide enduring support, ensuring your embroidery withstands the test of time. By permanently stabilizing the fabric, cut away stabilizers offer long term stability and prevent the fabric from stretching or distorting. They are particularly useful for designs with high stitch counts or intricate details that require robust support throughout the embroidery process.
Wash away Stabilizers: These soluble wonders are perfect for delicate fabrics and intricate designs. Wash away stabilizers vanish with a splash, leaving behind a pristine masterpiece. They are ideal for delicate fabrics where the stabilizer needs to be completely removed, leaving behind a soft and supple finish. Wash away stabilizers dissolve in water, making them an excellent choice for projects that require a clean, residue free finish, such as lace or freestanding embroidery designs.
Understanding the characteristics and applications of each type of stabilizer empowers embroiderers to make informed decisions based on the specific requirements of their projects. By choosing the right stabilizer, you can ensure optimal results, with each stitch contributing to a flawless masterpiece that showcases your creativity and skill.
Understanding Stabilizer Weight
Stabilizer weight plays a pivotal role in the success of machine embroidery projects, influencing the stability, texture, and overall appearance of the final embroidered design. To achieve optimal results, it’s crucial to understand the characteristics and applications of different stabilizer weights.
Lightweight stabilizers are specifically designed for delicate fabrics and intricate designs. These stabilizers provide essential support without adding unnecessary bulk, ensuring that the fabric’s natural drape and texture are preserved. They are ideal for lightweight and sheer fabrics such as chiffon, organza, and lightweight cotton. Using lightweight stabilizers allows the embroidery to shine through with clarity and finesse, maintaining the fabric’s delicate appearance while providing the necessary reinforcement for intricate stitching.
Medium weight stabilizers offer a balanced level of support and flexibility, making them suitable for a wide range of fabrics and designs. These stabilizers provide sufficient stability for medium weight fabrics like broadcloth, linen, and quilting cotton. They strike the perfect balance between support and flexibility, ensuring smooth stitching and impeccable results. Medium weight stabilizers are versatile and adaptable, allowing embroiderers to achieve crisp and well defined embroidery on a variety of fabric types and designs.
Heavyweight stabilizers are designed to provide robust support for heavyweight fabrics and intricate designs that require extra stability. These stabilizers offer a sturdy foundation that can withstand the weight of heavy fabrics such as denim, canvas, and upholstery fabric. They provide the stability needed to prevent fabric distortion and ensure that the embroidery maintains its shape and integrity over time. Heavyweight stabilizers are particularly useful for designs with high stitch counts or complex details that demand a strong and durable stabilizing foundation.
By carefully selecting the appropriate stabilizer weight for each embroidery project, embroiderers can ensure optimal results and achieve the desired level of stability, texture, and visual impact. Understanding the role of stabilizer weight empowers embroiderers to make informed decisions that enhance the quality and aesthetics of their machine embroidery work.
Exploring Specialty Stabilizers
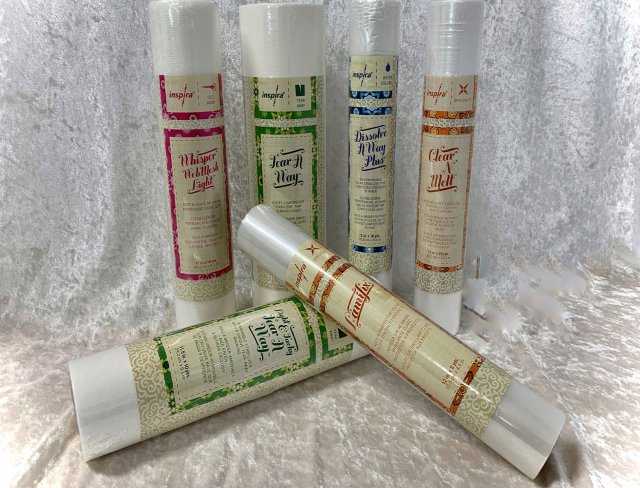
In addition to the standard tear away, cut away, and wash away stabilizers, there exists a range of specialty stabilizers tailored to address specific embroidery challenges and enhance creative possibilities. These innovative stabilizers offer unique characteristics and applications, providing embroiderers with versatile solutions to achieve exceptional results.
Adhesive Stabilizers: Adhesive stabilizers, also known as sticky back stabilizers, feature a peel and stick backing that adheres securely to the fabric, eliminating the need for hooping. This type of stabilizer is particularly useful for small or irregularly shaped projects where traditional hooping may be challenging. Adhesive stabilizers provide a firm foundation for embroidery, preventing shifting or puckering during stitching. They are ideal for appliqué work, freestanding lace, and other projects that require precise placement and stability.
Heat away Stabilizers: Heat away stabilizers dissolve when exposed to heat, leaving behind a clean and residue free finish. These stabilizers are perfect for delicate fabrics and intricate designs where traditional removal methods may be difficult or impractical. By simply applying heat with an iron or heat press, heat away stabilizers vanish, leaving the embroidery soft, supple, and free from any stabilizer residue. This makes them an excellent choice for projects that require a seamless and professional looking finish.
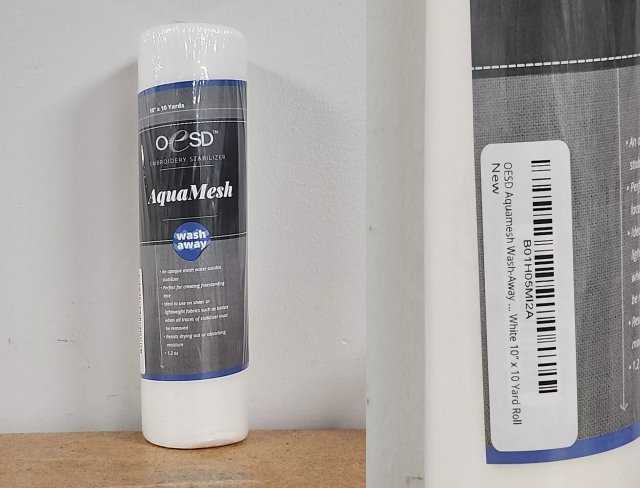
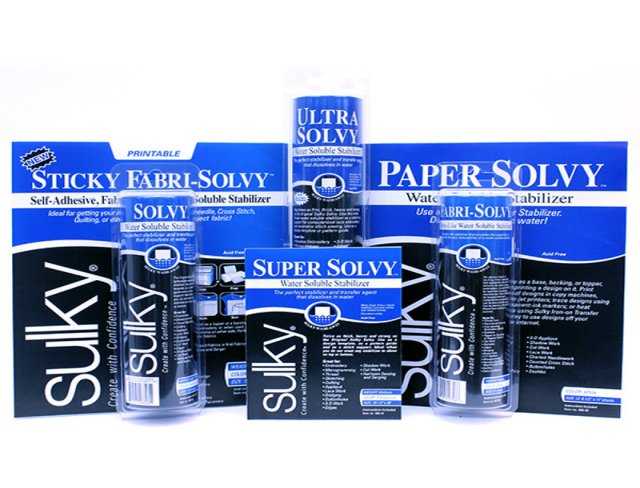
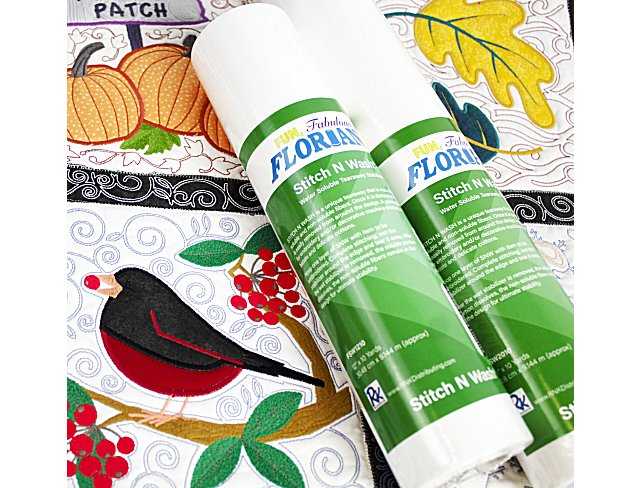
Water soluble Stabilizers: Water soluble stabilizers dissolve completely in water, making them ideal for projects that require temporary support or a clean, residue free finish. These stabilizers are commonly used for free standing lace, cutwork, and other techniques where the stabilizer needs to be completely removed from the finished embroidery. Water soluble stabilizers come in various forms, including films, sheets, and toppers, providing embroiderers with versatile options to suit their specific project requirements.
Fabric based Stabilizers: Fabric based stabilizers are made from woven or non woven fabric materials and offer a unique alternative to traditional stabilizers. These stabilizers provide excellent support and stability while remaining soft and flexible, making them ideal for projects where comfort and flexibility are essential, such as wearables and accessories. Fabric based stabilizers come in a range of weights and thicknesses, allowing embroiderers to choose the most suitable option for their project.
Light sensitive Stabilizers: Light sensitive stabilizers, also known as photochromic stabilizers, react to UV light and change color when exposed to sunlight or artificial UV light sources. These stabilizers are particularly useful for projects that require precise alignment and positioning of embroidery designs. By using light sensitive stabilizers, embroiderers can easily visualize the design placement and make adjustments before stitching, ensuring accurate and professional results.
Exploring the world of specialty stabilizers opens up a wealth of creative possibilities and allows embroiderers to push the boundaries of traditional machine embroidery techniques. Whether you’re working on intricate lace designs, appliqué projects, or innovative fabric embellishments, specialty stabilizers provide the support and versatility you need to bring your creative vision to life with precision and flair.
Navigating Design Density: Balancing Stabilizer and Design Complexity
Design density plays a pivotal role in determining the amount of stabilizer required to support an embroidery project effectively. As the complexity and density of the design increase, so does the demand for stabilizer to ensure the integrity of the stitching and the fabric.
Embroidery designs with high stitch counts or intricate details require robust stabilizing support to prevent distortion and ensure precise stitch placement. When working with densely digitized designs, it’s essential to select a stabilizer that can withstand the intensity of the stitching without compromising the fabric’s texture or structure.
For designs with a high stitch density, such as intricate floral motifs or intricate lace patterns, a heavy weight stabilizer or multiple layers of stabilizer may be necessary to provide adequate support. This additional stability helps to distribute the tension of the stitches evenly across the fabric, minimizing the risk of puckering or distortion.
Conversely, designs with lower stitch counts or open, airy motifs may require less stabilizer to achieve satisfactory results. However, even with lighter designs, it’s crucial to strike the right balance between stability and flexibility to ensure that the fabric maintains its natural drape and texture.
To navigate design density effectively, consider the following factors:
1. Stitch Type: Different types of stitches, such as satin stitches, fill stitches, and complex decorative stitches, can vary significantly in density. Designs with predominantly dense stitch types may require more stabilizer to support the weight and tension of the stitching.
2. Stitch Complexity: Intricate designs with numerous details and fine lines often have a higher stitch density, requiring additional stabilizer to maintain structural integrity and prevent distortion.
3. Fabric Type: The type of fabric being embroidered also influences the amount of stabilizer needed. Lighter, more delicate fabrics may require lighter stabilizers to avoid overpowering the fabric’s natural drape, while heavier fabrics may necessitate heavier stabilizers for adequate support.
By carefully evaluating the density and complexity of the embroidery design, embroiderers can select the appropriate stabilizer and achieve optimal results. Balancing stabilizer and design complexity is a delicate process that requires attention to detail and a thorough understanding of the interplay between stitching, fabric, and stabilizer. With the right approach, embroiderers can navigate design density effectively, ensuring that every stitch contributes to a flawless and professional looking embroidery project.
Mastering the Hooping Technique: Ensuring Stability and Alignment
Mastering the hooping technique is a fundamental skill that significantly impacts the stability, alignment, and overall quality of machine embroidery projects. Proper hooping ensures that the fabric and stabilizer are securely held in place throughout the stitching process, minimizing the risk of shifting, puckering, or misalignment.
To achieve optimal stability and alignment, begin by selecting a hoop that is appropriately sized for the embroidery design and the fabric being used. A hoop that is too small may distort the fabric and restrict the movement of the embroidery machine, while a hoop that is too large may not provide adequate tension, resulting in loose stitches and fabric shifting during stitching.
Once the hoop size has been determined, place the bottom hoop on a flat surface and position the fabric over it, ensuring that it is taut and free from wrinkles or folds. Lay the top hoop over the fabric, aligning it carefully with the bottom hoop to ensure that the fabric remains evenly tensioned. Tighten the hoop screw or clasp firmly to secure the fabric in place, being careful not to over tighten, which could distort the fabric or cause hoop marks.
When hooping delicate or stretchy fabrics, such as knits or lightweight cotton, consider using a stabilizer with a temporary adhesive backing to provide additional support and stability. Spray a light mist of temporary adhesive on the stabilizer before placing the fabric over it, ensuring that the fabric adheres securely without stretching or distorting.

For fabrics that are too delicate or bulky to hoop traditionally, such as velvet or terry cloth, consider using a “floating” or “hoopless” embroidery technique. Instead of hooping the fabric, place a piece of adhesive stabilizer directly on the machine’s embroidery bed and gently press the fabric onto the stabilizer, ensuring that it remains flat and taut. This technique allows for precise stitching without the risk of hoop marks or fabric distortion.
Throughout the hooping process, pay close attention to the alignment of the fabric and the embroidery design. Use reference points on the fabric, such as center marks or fabric grain lines, to ensure that the design is positioned correctly within the hoop. Take the time to double check the alignment before starting the embroidery machine to avoid costly mistakes or misaligned stitching.
By mastering the hooping technique and ensuring stability and alignment, embroiderers can lay a solid foundation for successful machine embroidery projects. With careful attention to detail and proper technique, every stitch will contribute to a flawless and professional looking embroidery design, showcasing the embroiderer’s skill and craftsmanship.
Layering with Purpose: Strategically Adding Support
Layering stabilizers is a valuable technique that allows embroiderers to tailor the level of support to the specific requirements of the fabric and design. By strategically adding multiple layers of stabilizer, embroiderers can enhance stability, minimize distortion, and ensure the integrity of the embroidery stitches.
Begin by assessing the fabric and design to determine the level of support required. For delicate or lightweight fabrics that may require additional reinforcement, consider layering a lightweight stabilizer with a higher density stabilizer. This combination provides the necessary support without compromising the fabric’s natural drape and texture.
To layer stabilizers effectively, start by hooping the fabric with the first layer of stabilizer as usual. Next, add a second layer of stabilizer on top of the hooped fabric, ensuring that it covers the entire embroidery area. Use a temporary adhesive spray to secure the layers together, ensuring that they remain flat and stable throughout the stitching process.
When layering stabilizers, it’s essential to consider the direction of the stabilizer’s grain. Align the grain of each layer to ensure that they are parallel, minimizing the risk of distortion and ensuring consistent stitch quality. Additionally, be mindful of the weight and thickness of each stabilizer layer, adjusting as needed to maintain the proper balance between stability and flexibility.
For designs with intricate details or high stitch counts, consider using a combination of tear away and cut away stabilizers to provide comprehensive support. Start by hooping the fabric with a tear away stabilizer to provide temporary support during stitching. Then, add a layer of cut away stabilizer on top to provide long term stability and prevent fabric stretching or distortion.
Layering stabilizers is particularly beneficial for projects that require extra reinforcement, such as dense or heavily textured designs, appliqué work, or embroidery on stretchy or unstable fabrics. By strategically adding support where needed, embroiderers can ensure that every stitch is executed with precision and clarity, resulting in flawless and professional looking embroidery projects.
Tips for Stabilizer Removal
Stabilizer removal is a critical step in the machine embroidery process that, when done correctly, ensures a clean and professional finish to your project. Whether you’ve used tear away, cut away, or wash away stabilizers, here are some tips and techniques to help you remove the stabilizer effectively without damaging your embroidered masterpiece.
• Tear away Stabilizers:
1. Gentle Tear Method: After completing the embroidery, gently tear away the excess stabilizer around the design. Start tearing from the edges and work your way towards the center to prevent any stress on the stitches.
2. Use a Pin or Tweezers: For intricate designs or small areas, use a fine pin or tweezers to lift the edge of the stabilizer. Carefully tear along the edges, ensuring not to pull or distort the stitches.
3. Moisten the Stabilizer: Lightly misting the stabilizer with water can soften it, making it easier to tear away without leaving behind any residue. Be cautious not to over wet the fabric, especially if it’s delicate or prone to water stains.
• Cut away Stabilizers:
1. Trim Close to the Stitches: Use a pair of sharp embroidery scissors to trim the excess cut away stabilizer as close to the stitches as possible without cutting into the embroidery. Take care to avoid cutting the fabric or the stitches.
2. Gradual Removal: Instead of cutting all the excess stabilizer at once, trim it gradually in small sections around the design. This method allows for more precise trimming and minimizes the risk of accidentally cutting into the fabric.
3. Steam Ironing Method: Place a piece of plain paper or a pressing cloth over the embroidered area and lightly press with a steam iron. The steam will help soften the cut away stabilizer, making it easier to trim away without leaving any residue behind.
• Wash away Stabilizers:
1. Soak in Warm Water: Submerge the embroidered piece in a bowl of lukewarm water, allowing the water soluble stabilizer to dissolve completely. Gently agitate the water to help speed up the process.
2. Rinse Thoroughly: After the stabilizer has dissolved, rinse the embroidered piece under running water to remove any remaining residue. Be gentle to avoid stressing the stitches or distorting the fabric.
3. Blot Dry with a Towel: Carefully blot the excess water from the embroidered piece using a clean, dry towel. Avoid wringing or twisting the fabric, as this could cause the stitches to distort or the fabric to stretch.
• General Tips for Stabilizer Removal:
1. Test on Scrap Fabric: Before removing the stabilizer from your embroidered piece, test the removal process on a scrap piece of fabric with a similar stabilizer. This allows you to gauge the best method and ensure that it won’t damage your finished embroidery.
2. Take Your Time: Stabilizer removal requires patience and attention to detail. Take your time and work slowly, especially around intricate designs or delicate fabrics, to avoid accidentally damaging the stitches or the fabric.
3. Inspect Carefully: After removing the stabilizer, inspect the embroidered piece carefully to ensure that all traces of the stabilizer have been removed. Look for any remaining residue or stiffness, and address it before finishing the project.
By following these tips and techniques, you can confidently remove the stabilizer from your machine embroidery projects, leaving behind a clean, professional looking finish that showcases your craftsmanship and attention to detail.
Heeding Manufacturer Recommendations: Unlocking the Wisdom
One of the most valuable resources for embroiderers is the manufacturer’s guidelines and recommendations for stabilizer usage. These guidelines are the culmination of extensive research, testing, and expertise, providing invaluable insights into the optimal stabilizer types and techniques for achieving the best possible results with your embroidery machine.
First and foremost, it’s essential to carefully review the manufacturer’s instructions that accompany your embroidery machine, as well as those provided with the stabilizers you plan to use. These instructions typically include recommendations for the types of stabilizers best suited for different fabric types and designs, as well as specific guidelines for hooping, stitching, and stabilizer removal.
When selecting a stabilizer for your embroidery project, take heed of the manufacturer’s recommendations regarding the appropriate stabilizer type, weight, and application method. Each embroidery machine is engineered to perform optimally with certain types of stabilizers, so following these recommendations will help ensure smooth stitching, precise design placement, and excellent stitch quality.
Additionally, pay attention to any specific instructions regarding stabilizer placement and hooping techniques. The manufacturer’s guidelines may recommend certain hooping methods or stabilizer layering techniques to optimize stability, minimize distortion, and prevent fabric puckering. By following these instructions, you can achieve optimal tension and stability, resulting in flawless embroidery results.
The manufacturer’s recommendations often include valuable tips and troubleshooting advice for common stabilizer related issues. Whether you’re experiencing puckering, thread breakage, or difficulty with stabilizer removal, the manufacturer’s guidelines likely offer solutions to help you address these challenges effectively and achieve the desired results.
Heeding the manufacturer’s recommendations for stabilizer usage is essential for unlocking the wisdom and expertise that comes from years of research and development in the field of machine embroidery. By following these guidelines, you can leverage the manufacturer’s expertise to achieve optimal results with your embroidery projects, ensuring professional quality stitching, impeccable design placement, and long lasting durability.
Troubleshooting: Common Stabilizer Problems
Even with careful planning and execution, embroiderers may encounter various challenges related to stabilizer usage. Understanding how to troubleshoot common stabilizer problems is essential for overcoming these obstacles and achieving flawless embroidery results. Here are some of the most common stabilizer issues and effective solutions for resolving them:
Problem 1: Fabric Puckering
Cause: Fabric puckering occurs when the stabilizer fails to provide adequate support or tension during the embroidery process. This can result from using the wrong type or weight of stabilizer for the fabric, improper hooping technique, or excessive tension on the embroidery machine.
Solution:
- Review the manufacturer’s recommendations for stabilizer selection based on the fabric type and design complexity.
- Ensure that the fabric is properly hooped and tensioned, with the stabilizer securely in place.
- Adjust the tension settings on the embroidery machine to reduce the risk of fabric puckering. Test different tension settings on scrap fabric to find the optimal balance between tension and stitch quality.
Problem 2: Stabilizer Residue
Cause: Stabilizer residue can occur when the stabilizer does not dissolve or tear away cleanly after embroidery, leaving behind unsightly remnants on the fabric.
Solution:
- Check the stabilizer type and ensure that it is compatible with the fabric and design.
- Use the appropriate removal method for the type of stabilizer used (tear away, cut away, or wash away).
- Avoid over stabilizing the fabric or using multiple layers of stabilizer unnecessarily, as this can increase the likelihood of residue buildup.
- If using a wash away stabilizer, ensure that the fabric is thoroughly rinsed and dried after embroidery to remove any remaining residue.
Problem 3: Stiff or Crunchy Texture
Cause: A stiff or crunchy texture on the fabric after embroidery can result from using too much stabilizer or failing to remove it properly.
Solution:
- Follow the manufacturer’s recommendations for stabilizer application and removal, ensuring that you use the correct type and amount of stabilizer for the fabric and design.
- Avoid over stabilizing the fabric or using heavy weight stabilizers unnecessarily, as this can lead to stiffness or crunchiness.
- If using a wash away stabilizer, ensure that the fabric is thoroughly rinsed and dried after embroidery to remove any residue and restore its natural texture.
Problem 4: Thread Breakage
Cause: Thread breakage during embroidery can be caused by a variety of factors, including inadequate stabilizer support, improper tension settings, or stitching too densely.
Solution:
- Ensure that the fabric is properly stabilized and tensioned in the hoop to provide adequate support for the stitches.
- Check the tension settings on the embroidery machine and adjust them as needed to reduce the risk of thread breakage.
- Avoid stitching too densely, especially on delicate fabrics, as this can put excessive strain on the thread and increase the likelihood of breakage.
By understanding the root causes of common stabilizer problems and implementing effective solutions, embroiderers can overcome these challenges and achieve flawless embroidery results. Remember to consult the manufacturer’s recommendations and test different techniques on scrap fabric before applying them to your final embroidery projects. With patience, practice, and attention to detail, you can troubleshoot stabilizer problems effectively and create stunning embroidery pieces that showcase your skill and craftsmanship.
Conclusion
Mastering the art of machine embroidery requires a deep understanding of the intricate relationship between fabric, design, and stabilizer. By delving into the nuances of this harmonious trinity and unlocking the secrets of the Goldilocks Zone, embroiderers can achieve flawless results with every stitch.
From matching fabric with the right stabilizer to navigating design density and mastering hooping techniques, every aspect of the embroidery process plays a crucial role in achieving perfection. By heeding manufacturer recommendations, troubleshooting common stabilizer problems, and utilizing advanced techniques such as layering and strategic support, embroiderers can elevate their craft to new heights.
Moreover, this journey isn’t just about producing beautiful pieces of embroidery; it’s also about developing a keen eye for detail, patience, and a deep appreciation for the craft. By embracing the principles outlined in this article and integrating them into their practice, embroiderers embark on a transformative journey where each stitch becomes a testament to their dedication and expertise. With the right knowledge and techniques at their disposal, embroiderers can confidently explore the boundless possibilities of machine embroidery, turning their creative visions into stunning realities that captivate and inspire.
Now that you have read through this article, feel free to SHOP for products we have created. If you are looking for something special which isn’t in our store, feel free to contact us.