Turn Up The Talent
Embroidery Machine Optimization Techniques
Introduction
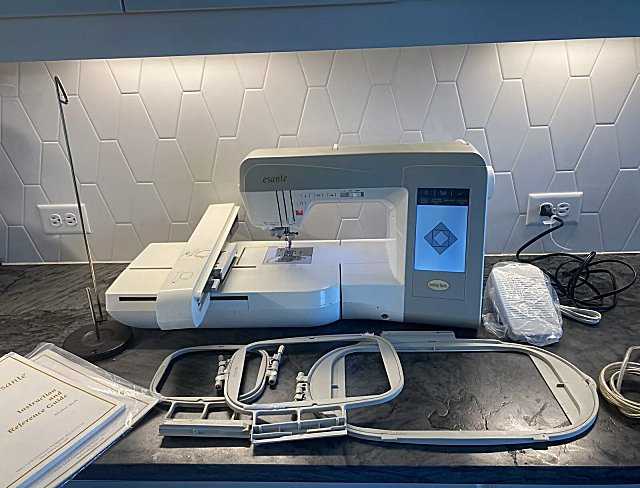
Embroidery machine optimization lies at the heart of achieving superior stitching results, regardless of the fabric or design complexity. This comprehensive guide explores key strategies and techniques essential for maximizing the performance of your embroidery machine. From understanding the nuances of thread management and tension adjustments to implementing effective maintenance practices and troubleshooting methods, each aspect is designed to enhance the precision and consistency of your embroidery projects.
By mastering the intricacies of thread path management, bobbin tension adjustments, and calibration settings, embroiderers can address common challenges such as thread breakage, fabric puckering, and uneven stitching. Regular maintenance routines, including cleaning, lubrication, and meticulous calibration, ensure that your machine operates at its peak efficiency, prolonging its lifespan and minimizing downtime during embroidery sessions. Whether you’re embroidering delicate silks, sturdy denims, or specialty fabrics like velvet or leather, adapting these techniques ensures that every stitch is executed with reliability and finesse, setting the stage for impeccable embroidery craftsmanship.
Understanding Embroidery Machine Optimization
Embroidery machine optimization is fundamental to achieving high quality stitching across a variety of threads and fabrics. It involves fine tuning machine settings to ensure optimal performance and impeccable results. This process revolves around adjusting settings such as tension, needle selection, and machine speed calibration. Each of these elements plays a crucial role in determining the quality and precision of embroidery stitches.
Proper tension adjustment is critical for preventing thread breakage, puckering, or loose stitches. It ensures that threads interlock smoothly to create clean and professional embroidery designs. Tension settings should be adjusted based on the fabric type and thread thickness to achieve consistent and balanced stitch formation.
Choosing the right needle is essential for achieving optimal embroidery results. Needles come in various sizes and types, each designed to handle specific fabrics and threads effectively. Fine needles are suitable for lightweight fabrics and intricate designs, while heavy duty needles provide durability and strength for dense materials. Specialized needles, such as those for metallic threads or knit fabrics, cater to specific embroidery challenges, enhancing stitch clarity and minimizing thread breakage.
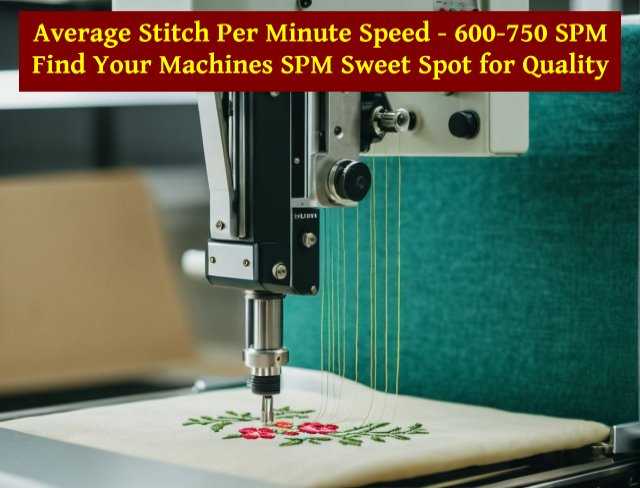
Calibrating machine speed according to the complexity of the design and the characteristics of the fabric is crucial for achieving accurate and efficient embroidery. Adjustable speed settings allow embroiderers to control the pace of stitching, ensuring precise placement of stitches while maintaining productivity. Slower speeds are ideal for intricate designs or delicate fabrics, whereas faster speeds expedite production for simpler designs or sturdy materials.
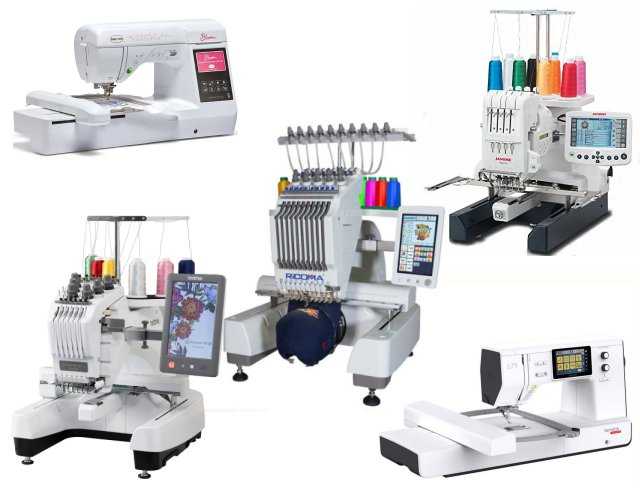
Mastering embroidery machine optimization empowers embroiderers to enhance their craftsmanship and produce superior quality embroidery projects. Whether using a home embroidery machine or a commercial multi needle system, understanding these fundamental principles enables artisans to tailor settings for each project’s unique requirements. By focusing on tension, needle selection, and machine speed calibration, embroiderers can confidently tackle diverse materials and intricate designs, achieving professional grade results with precision and consistency.
Tension Adjustment Techniques
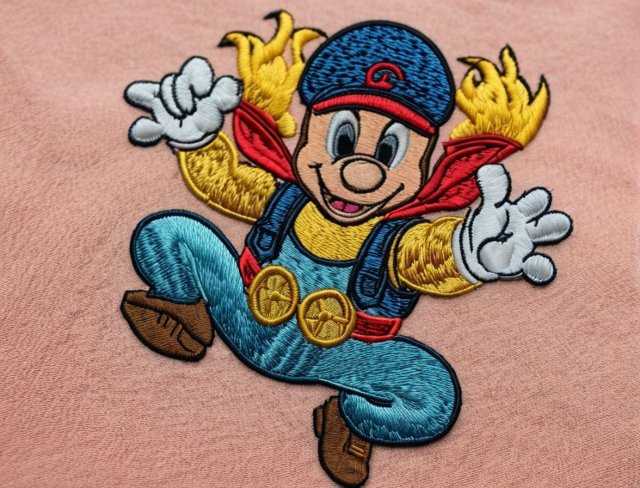
Tension adjustment is a critical aspect of embroidery machine optimization, influencing the quality and appearance of stitches. Proper tension ensures that threads interlock smoothly without puckering, looping, or breakage, resulting in clean and professional embroidery designs. Understanding and mastering tension adjustment techniques is essential for embroiderers to achieve consistent and high quality results across various fabrics and thread types.
Understanding Tension Basics: Tension refers to the amount of pull or resistance applied to the top and bobbin threads during stitching. Each embroidery machine has tension mechanisms that control these threads’ tension levels. Proper tension settings balance the pull between the top thread (needle thread) and the bobbin thread, ensuring that they lock together correctly in the fabric’s layers.
Factors Affecting Tension:
• Thread Type and Weight: Different threads, such as polyester, rayon, metallic, or specialty threads, may require specific tension adjustments. Thicker threads generally require looser tension, while finer threads may need tighter tension settings to prevent breakage and ensure proper stitch formation.
• Fabric Type and Thickness: Fabric characteristics, such as thickness, density, and stretch, affect how tension should be adjusted. Delicate fabrics like silk or chiffon require lower tension to avoid puckering or pulling, whereas heavy fabrics like denim or canvas may need higher tension to secure stitches.
• Needle Size and Type: The needle used in embroidery also affects tension adjustment. Fine needles create smaller punctures in the fabric, requiring less tension to hold the thread in place. Conversely, thicker needles may necessitate slightly higher tension to ensure thread stability and stitch integrity.
Adjustment Techniques:
1. Start with Manufacturer’s Recommendations: Begin with the tension settings recommended by the embroidery machine manufacturer. These settings serve as a baseline but may need adjustments based on specific project requirements.
2. Test on Scrap Fabric: Before starting a new embroidery project, always test tension settings on scrap fabric similar to the project material. This allows you to observe how the threads interact and adjust tension accordingly without risking the final piece.
3. Make Incremental Adjustments: Fine tune tension settings gradually. Small adjustments, such as turning the tension dial or knob slightly clockwise or counterclockwise, can significantly impact stitch quality. Keep track of adjustments made to replicate successful settings for future projects.
4. Monitor Stitch Quality: Regularly inspect stitched samples during embroidery. Look for signs of thread breakage, loose stitches, or puckering. Adjust tension if stitches appear uneven or if the thread is not properly securing into the fabric layers.
5. Consider Thread Path and Bobbin Tension: Ensure that the thread path is clear and free of obstructions, allowing threads to flow smoothly from the spool to the needle. Adjust bobbin tension to complement top thread settings, ensuring balanced tension between both threads for consistent stitch quality.
Fine Tuning for Specific Situations: Certain embroidery techniques or design elements may require unique tension adjustments. For instance, satin stitching or dense fill areas may benefit from slightly looser tension to prevent thread buildup and ensure smooth coverage. Experiment with tension settings to achieve desired effects while maintaining overall stitch integrity.
Recording Successful Settings: Keep a record of successful tension settings for different fabrics, threads, and project types. This reference helps streamline future embroidery projects and ensures consistent results across various materials and designs.
Mastering tension adjustment techniques is a hallmark of skilled embroiderers. By understanding the principles of tension, experimenting with adjustments, and maintaining meticulous attention to stitch quality, embroiderers can achieve professional grade embroidery results with precision and confidence.
Needle Selection for Optimal Results
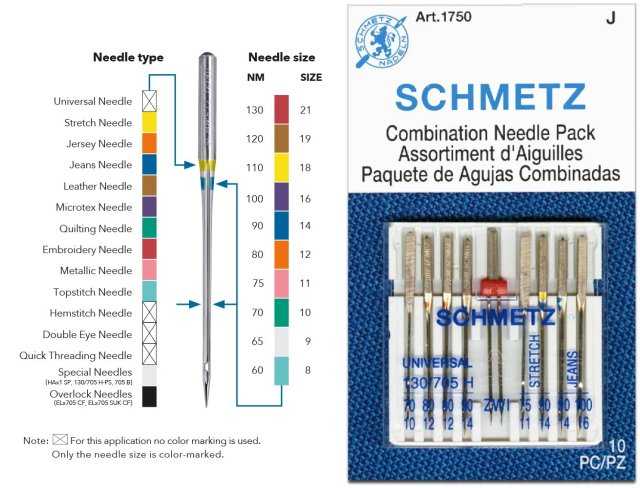
Choosing the right needle is crucial for achieving superior embroidery results. Needles come in various sizes, types, and coatings, each designed to address specific fabric characteristics and thread types. Understanding the nuances of needle selection empowers embroiderers to enhance stitch quality, prevent thread breakage, and ensure smooth embroidery operations.
Embroidery needles are categorized based on their size and type. The size of the needle refers to its diameter, with smaller numbers indicating finer needles and larger numbers denoting thicker needles. Needle types include:
• Sharp Needles: Also known as standard needles, sharp needles feature a slender, tapered point designed for precise penetration of woven fabrics like cotton or linen. They create small punctures in the fabric, making them ideal for lightweight materials and intricate designs.
• Ballpoint Needles: Ballpoint needles have a rounded tip that slides between fabric threads rather than piercing them. This design prevents snagging or damaging knitted fabrics like jersey or fleece, making them suitable for stretchy or delicate materials.
• Universal Needles: Universal needles combine features of both sharp and ballpoint needles, making them versatile for a wide range of fabrics. They are suitable for medium weight woven and knit fabrics, offering balanced performance across different material types.
• Specialty Needles: Specialty needles cater to specific embroidery challenges. For instance, metallic needles have a larger eye and a special coating to reduce friction when sewing with metallic threads, minimizing thread breakage and ensuring smooth stitching. Twin needles create parallel rows of stitches simultaneously, ideal for decorative effects or twin needle embroidery.
Choosing the Right Needle:
• Fabric Compatibility: Select needles based on the fabric’s characteristics. For lightweight fabrics like silk or chiffon, use fine needles to avoid visible puncture marks. Heavy fabrics such as denim or canvas require stronger needles that can penetrate multiple layers without bending or breaking.
• Thread Type: Consider the type of thread being used. Fine threads like rayon or silk benefit from smaller needles to prevent thread shredding or breakage. Thicker threads such as cotton or metallics may require larger needles with wider eyes to accommodate their size and prevent friction.
• Project Complexity: Evaluate the intricacy of the embroidery design. Detailed designs or dense fill areas may necessitate finer needles to maintain stitch clarity and accuracy. Conversely, simpler designs or outline stitching may tolerate larger needles for faster production.
Needle Coatings and Features: Some needles are coated with titanium or chrome to enhance durability and reduce friction. Titanium coated needles are particularly suitable for metallic threads, minimizing wear and ensuring smooth thread flow. Chrome plated needles offer longevity and resistance to rust or corrosion, ideal for prolonged embroidery sessions.
Regular Needle Maintenance: Ensure needles are clean and sharp before each embroidery session. Replace needles periodically, as dull or damaged needles can cause skipped stitches, fabric pulls, or thread breakage. Proper needle maintenance prolongs their lifespan and ensures consistent embroidery quality.
Testing and Adjustments: Before starting a new project, conduct a test run with different needle types to determine the most suitable option. Evaluate stitch quality, fabric handling, and thread performance to select the optimal needle for achieving desired embroidery results.
Mastering needle selection techniques is essential for embroiderers aiming to achieve professional grade results across various fabrics and embroidery designs. By understanding needle types, sizes, and their specific applications, embroiderers can optimize their equipment for superior stitching quality and project success.
Adjusting Machine Speed for Precision
Machine speed adjustment is crucial in achieving accurate and high quality embroidery results. Controlling the speed of your embroidery machine allows you to tailor the stitching pace to the complexity of the design and the characteristics of the fabric. Understanding the nuances of machine speed adjustment empowers embroiderers to optimize production efficiency while maintaining stitch precision and ensuring consistent embroidery quality.
Importance of Machine Speed: The speed at which an embroidery machine operates directly impacts stitch formation, thread tension, and overall stitching quality. Properly adjusting machine speed according to project requirements is essential for achieving uniform stitches, preventing thread breakage, and minimizing needle deflection.
Factors Influencing Speed Adjustment:
• Design Complexity: Intricate designs with fine details or dense fill areas typically require slower machine speeds. This allows the needle to accurately place stitches and navigate complex patterns without compromising stitch clarity or alignment.
• Fabric Characteristics: Different fabrics react differently to machine speed. Delicate fabrics like silk or organza benefit from slower speeds to prevent fabric distortion or tearing. In contrast, sturdy fabrics such as denim or canvas can withstand faster speeds for efficient production without compromising stitch quality.
• Thread Type and Thickness: The type and thickness of the thread used in embroidery also influence speed adjustment. Fine threads like rayon or polyester may require slower speeds to prevent thread breakage or shredding. Thicker threads such as cotton or metallics may necessitate slower speeds to accommodate their size and ensure smooth thread flow.
Adjustment Techniques:
1. Utilize Adjustable Speed Settings: Modern embroidery machines offer adjustable speed settings, allowing embroiderers to control the pace of stitching. Experiment with different speed settings during test runs to determine the optimal speed for each project.
2. Start with a Baseline: Begin with a moderate speed setting recommended by the embroidery machine manufacturer. Fine tune speed adjustments based on fabric handling, stitch quality, and design complexity observed during test embroidery.
3. Monitor Stitch Quality: Regularly monitor stitched samples during embroidery. Assess stitch formation, tension consistency, and thread alignment to gauge the effectiveness of the current speed setting. Make adjustments as needed to maintain uniform stitch quality across the entire design.
4. Consider Production Efficiency: Balance stitch precision with production efficiency when adjusting machine speed. Faster speeds can increase productivity for simpler designs or larger production runs. However, slower speeds may be necessary for achieving intricate details or working with delicate materials.
Fine Tuning for Specific Situations: Tailor speed adjustments to specific embroidery techniques or design elements. For instance, satin stitching or outline detailing may require slower speeds to ensure precise stitch placement and coverage. Experiment with speed settings to achieve desired embroidery effects while maintaining overall stitch integrity.
Machine Specific Features: Familiarize yourself with additional features on your embroidery machine that may enhance speed control and stitching precision. Some machines offer programmable speed settings, stitch regulation modes, or automatic adjustments based on design complexity, optimizing embroidery workflow and quality.
Testing and Calibration: Before starting a new project, conduct thorough testing and calibration of machine speed settings. Evaluate stitch quality, thread tension, and fabric handling during test runs to identify and adjust speed settings for optimal embroidery results.
Mastering machine speed adjustment techniques allows embroiderers to achieve professional grade results with precision and efficiency. By understanding the impact of speed on stitch quality and production outcomes, embroiderers can optimize their embroidery machine settings for diverse projects and materials, ensuring consistent and exceptional embroidery craftsmanship.
Optimizing Settings for Different Purposes:
Optimizing embroidery machine settings for different types of threads and fabrics is essential for achieving superior stitching quality and ensuring successful embroidery projects. Each thread and fabric type presents unique challenges and requirements that necessitate specific adjustments in machine settings. By understanding how to tailor settings to accommodate various materials, embroiderers can achieve consistent and professional grade results across a wide range of embroidery applications.
Thread Types and Adjustments:
• Polyester Threads: Polyester threads are versatile and commonly used in embroidery due to their durability and colorfastness. Adjust machine settings to moderate speeds and standard tension levels suitable for medium weight fabrics. Polyester threads typically perform well with universal or sharp needles, providing smooth stitching results.
• Rayon Threads: Rayon threads are known for their high sheen and soft texture, making them ideal for decorative embroidery. Optimize machine settings by reducing tension slightly and using finer needles to prevent thread breakage or puckering on delicate fabrics. Adjust speed settings to slower speeds for intricate designs to ensure precise stitch placement.
• Metallic Threads: Metallic threads add shimmer and dimension to embroidery designs but require special considerations. Use needles designed for metallic threads with larger eyes to accommodate their thickness. Lower tension settings are necessary to prevent thread breakage and ensure smooth thread flow. Adjust machine speed to slower settings to minimize friction and maintain thread integrity.
• Specialty Threads (e.g., Silk, Cotton): Specialty threads like silk or cotton require specific adjustments to achieve optimal results. Use fine needles appropriate for delicate fabrics to avoid visible puncture marks. Adjust tension settings based on thread thickness and fabric type, ensuring balanced tension for secure stitch formation. Adapt machine speed to slower settings for intricate designs or lightweight fabrics to maintain stitch clarity and prevent fabric distortion.
Fabric Types and Adjustments:
• Delicate Fabrics (e.g., Silk, Chiffon): Delicate fabrics require gentle handling to prevent damage or distortion during embroidery. Adjust machine settings to lower tension levels and slower speeds to minimize the risk of fabric puckering or tearing. Use fine needles designed for lightweight fabrics to ensure smooth needle penetration without leaving noticeable puncture marks.
• Heavy Duty Fabrics (e.g., Denim, Canvas): Heavy duty fabrics require robust machine settings to penetrate multiple layers and achieve secure stitch formation. Use stronger needles with sharper points to penetrate dense materials effectively. Adjust tension settings to higher levels to ensure thread stability and prevent skipped stitches. Increase machine speed to faster settings for efficient production while maintaining stitch precision.
General Optimization Tips:
• Test on Scrap Fabric: Before starting a new embroidery project, conduct test runs on scrap fabric using the chosen thread and fabric combination. Evaluate stitch quality, tension consistency, and fabric handling to fine tune machine settings for optimal results.
• Record Successful Settings: Keep a record of successful machine settings for different thread and fabric combinations. This reference helps streamline future embroidery projects and ensures consistent stitching quality across various materials.
• Monitor and Adjust: Regularly monitor stitched samples during embroidery to identify any issues such as thread breakage, uneven tension, or fabric puckering. Make real time adjustments to machine settings as needed to maintain desired embroidery quality.
By mastering the art of optimizing settings for different types of threads and fabrics, embroiderers can elevate their craftsmanship and achieve professional grade results with precision and consistency. Understanding the unique characteristics and requirements of each thread and fabric type allows for tailored adjustments in machine settings, ensuring successful and visually appealing embroidery projects.
Thread Path and Bobbin Adjustments
Optimizing the thread path and bobbin tension in your embroidery machine is crucial for achieving consistent and high quality stitching results. Proper thread path management ensures smooth thread flow from the spool to the needle, while balanced bobbin tension complements top thread tension for secure stitch formation. Understanding and fine tuning these adjustments empower embroiderers to enhance stitch precision, prevent thread breakage, and optimize embroidery machine performance.
Managing Thread Path:
• Clear and Unobstructed Path: Ensure the thread path is free of obstructions or tangled threads that could disrupt smooth thread flow. Check the thread guides, tension disks, and thread spool positioning to maintain a clear and uninterrupted thread path.
• Thread Guide Alignment: Proper alignment of thread guides is essential for guiding threads accurately from the spool through tension disks and ultimately to the needle. Misaligned or improperly threaded guides can cause uneven tension or thread entanglement, affecting stitch quality.
• Thread Tension Disk Adjustment: Adjust tension disks according to thread type and thickness. Ensure threads are securely seated between tension disks to achieve balanced tension levels. Fine tune tension disk settings based on fabric and thread characteristics to prevent thread breakage or puckering during embroidery.
Balancing Bobbin Tension:
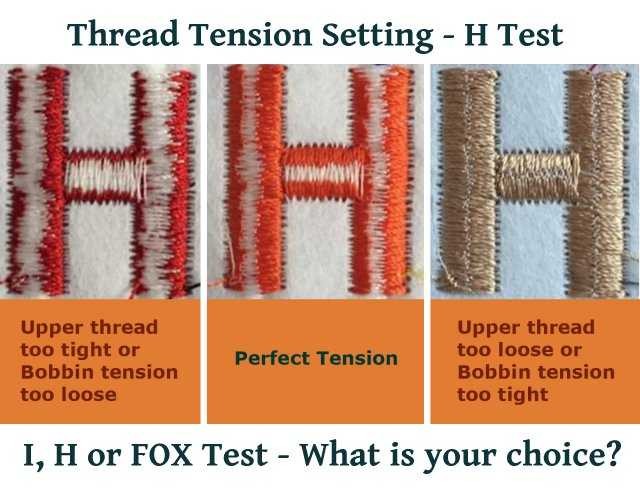
• Understanding Bobbin Tension: Bobbin tension regulates the amount of thread released from the bobbin during stitching. Balanced bobbin tension complements top thread tension, ensuring both threads interlock smoothly to create uniform and secure stitches.
• Adjusting Bobbin Tension: Begin by referencing the embroidery machine manual for recommended bobbin tension settings. Make minor adjustments to bobbin tension using the tension screw or knob. Clockwise turns increase tension, while counterclockwise turns decrease tension.
• Testing Bobbin Tension: Conduct test stitches on scrap fabric using the chosen thread and fabric combination. Evaluate stitch quality and tension consistency to determine the optimal bobbin tension setting. Aim for a balanced stitch appearance with neither thread pulling through to the opposite side of the fabric.

Maintaining Consistency and Quality:
• Regular Maintenance: Periodically clean and lubricate the bobbin case and surrounding areas to ensure smooth bobbin thread delivery. Remove lint, dust, or debris that may affect bobbin tension or thread path integrity.
• Monitoring During Embroidery: Monitor stitched samples during embroidery to identify any issues such as loose stitches, thread nests, or bobbin thread showing on the top side of the fabric. Adjust thread path or bobbin tension settings as needed to maintain consistent embroidery quality.
Advanced Techniques and Troubleshooting:
• Specialty Threads: Adjust thread path and bobbin tension settings for specialty threads such as metallics or high density threads. These threads may require looser tension and careful thread path management to prevent breakage and ensure smooth stitching.
• Real Time Adjustments: Make real time adjustments to thread path or bobbin tension settings based on observed stitch quality during embroidery. Address issues promptly to prevent further stitching inconsistencies or project delays.
By mastering thread path and bobbin tension adjustments, embroiderers can optimize embroidery machine performance and achieve professional grade results with precision and consistency. Understanding the mechanics of thread management and tension control enhances craftsmanship and ensures successful execution of intricate embroidery projects.
Material Specific Tips
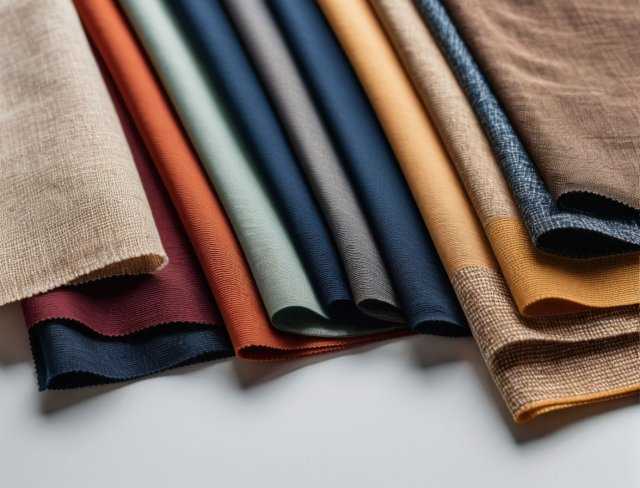
Embroidering different materials requires careful consideration of their unique characteristics to achieve optimal results. Each type of fabric presents specific challenges and opportunities that influence embroidery settings and techniques. By understanding material specific tips and adjustments, embroiderers can enhance stitch quality, prevent fabric distortion, and ensure successful embroidery outcomes across diverse fabric types.
Cotton and Linen Fabrics:
Cotton and linen fabrics are commonly used for embroidery due to their durability and versatility. When embroidering these natural fibers, use sharp needles to create precise stitches without causing excessive fabric pulls. Adjust tension settings to medium levels to ensure secure stitch formation without puckering. Consider using thicker threads for bold designs on cotton and linen, adjusting machine speed to accommodate denser stitching without compromising thread integrity.
Silk and Satin Fabrics:
Silk and satin fabrics require delicate handling to preserve their smooth texture and sheen during embroidery. Use fine needles with a sharp point to penetrate these delicate materials without leaving visible puncture marks. Adjust tension settings to low levels to prevent fabric puckering or distortion. Reduce machine speed for intricate designs to ensure precise stitch placement and minimize thread tension on fragile fibers. Test embroidery settings on scrap silk or satin fabric to refine adjustments before beginning a project.
Knit Fabrics (e.g., Jersey, Fleece):
Knit fabrics are stretchy and prone to snagging during embroidery. Use ballpoint needles with rounded tips to slide between fabric threads without damaging fibers. Adjust tension settings to low levels to accommodate stretch and prevent stitches from pulling or skipping. Increase machine speed slightly to maintain consistent stitch formation on knit fabrics, ensuring smooth embroidery without compromising fabric elasticity. Test stitch settings on scrap knit fabric to assess thread tension and stitch quality before proceeding with embroidery.
Denim and Canvas Fabrics:
Denim and canvas fabrics are sturdy and require robust embroidery settings to penetrate multiple layers effectively. Use universal or denim needles with a sharp point to sew through thick layers without bending or breaking. Adjust tension settings to higher levels to ensure secure stitch formation and prevent skipped stitches on dense materials. Increase machine speed for efficient production, but monitor stitch quality to avoid thread breakage or fabric puckering. Test embroidery settings on scrap denim or canvas fabric to fine tune adjustments for optimal stitching results.
Specialty Fabrics (e.g., Velvet, Leather):
Specialty fabrics like velvet or leather require specialized embroidery techniques to achieve professional results. Use sharp or wedge point needles designed for dense or textured materials to minimize fabric damage and ensure precise stitching. Adjust tension settings carefully to prevent thread breakage and maintain fabric integrity. Reduce machine speed to low levels for intricate designs or textured surfaces to ensure smooth stitch placement and prevent needle deflection. Test embroidery settings on scrap specialty fabric to evaluate thread tension and adjust settings accordingly for flawless embroidery execution.
General Tips for All Fabrics:
• Test Stitching: Before embroidering on a new fabric type, conduct test stitches on scrap fabric to evaluate thread tension, needle penetration, and stitch quality.
• Adjust Settings Gradually: Fine tune machine settings such as tension, needle type, and speed gradually to achieve optimal results without compromising fabric or thread integrity.
• Monitor Throughout Embroidery: Regularly monitor stitched samples during embroidery to identify and address any issues such as thread breakage, fabric puckering, or uneven stitches promptly.
• Record Successful Settings: Keep a record of successful embroidery settings for different fabric types to streamline future projects and ensure consistent stitching quality.
By incorporating material specific tips into embroidery practices, embroiderers can effectively navigate the challenges posed by different fabric types and achieve professional grade results with precision and confidence.
Maintenance and Calibration
Regular maintenance and calibration of your embroidery machine are essential for ensuring consistent performance, prolonging machine lifespan, and achieving high quality embroidery results. By implementing thorough maintenance practices and periodic calibration adjustments, embroiderers can optimize machine functionality, prevent mechanical issues, and enhance overall embroidery efficiency.
Proper cleaning and lubrication are fundamental aspects of embroidery machine maintenance. Clean the bobbin case, thread path, and needle area regularly to remove dust, lint, or debris that can accumulate during embroidery sessions. Use a soft brush or lint free cloth to gently clean machine components without causing damage. Apply sewing machine oil or lubricant to designated points following manufacturer guidelines to ensure smooth machine operation and reduce friction.
Maintain needle and thread integrity to prevent stitching issues and optimize embroidery quality. Replace needles regularly, especially if dull or damaged, to ensure precise stitch formation and prevent fabric pulls or thread breakage. Use high quality embroidery threads compatible with your machine and project requirements to minimize thread shredding or tension inconsistencies. Store threads in a cool, dry place to maintain their integrity and prevent moisture related issues that can affect thread performance.
Periodically check and adjust bobbin tension to complement top thread tension for balanced stitch formation. Refer to the embroidery machine manual for recommended bobbin tension settings and use a small screwdriver to make incremental adjustments as needed. Test bobbin tension adjustments on scrap fabric to ensure stitches interlock securely without visible thread loops on the fabric surface. Fine tune tension settings based on thread type, fabric thickness, and embroidery design complexity to achieve optimal stitch quality.
Calibrate embroidery machine settings regularly to maintain stitch accuracy and alignment across various embroidery projects. Follow manufacturer instructions for adjusting machine settings such as stitch length, density, and needle position to match specific embroidery requirements. Use test stitches on scrap fabric to verify calibration adjustments and make necessary tweaks to achieve desired stitch clarity and definition. Calibration ensures consistent embroidery results and minimizes the need for manual corrections during embroidery production.
Verify the integrity of the thread path from the spool to the needle to ensure smooth thread flow and prevent thread entanglement or breakage. Check thread guides, tension disks, and bobbin case alignment regularly to maintain a clear and unobstructed thread path. Adjust thread tension disks as needed to accommodate different thread types and ensure balanced tension levels throughout the embroidery process. Monitor thread path during embroidery sessions and make real time adjustments to prevent stitching issues and maintain embroidery quality.
Keep a detailed log of maintenance activities, including cleaning schedules, needle replacements, and calibration adjustments. Document any stitching issues or mechanical malfunctions encountered during embroidery sessions, along with corresponding troubleshooting steps and resolutions. Review maintenance logs periodically to identify recurring issues or patterns that may require further attention or professional servicing. Maintaining comprehensive maintenance records facilitates proactive machine care and ensures consistent embroidery performance over time.
Schedule periodic professional servicing or inspections by certified technicians to address complex mechanical issues or perform routine maintenance tasks beyond your expertise. Professional servicing ensures thorough machine diagnostics, lubrication of internal components, and alignment adjustments to optimize embroidery machine functionality and longevity. Consult with authorized service providers for preventative maintenance recommendations and adhere to manufacturer guidelines for optimal machine care.
By prioritizing maintenance and calibration practices, embroiderers can sustain peak performance of their embroidery machines, minimize downtime due to mechanical issues, and consistently deliver high quality embroidery projects with precision and reliability.

Troubleshooting for Consistent Results
Troubleshooting embroidery issues is essential for maintaining consistent stitch quality and resolving common challenges that may arise during embroidery projects. By identifying and addressing stitching issues promptly, embroiderers can optimize machine settings, prevent production delays, and ensure seamless execution of embroidery designs. Understanding effective troubleshooting techniques empowers embroiderers to achieve professional grade results with precision and reliability.
Identifying Common Stitching Issues:
• Thread Breakage: Thread breakage can occur due to improper tension settings, thread quality, or machine speed. Inspect thread path for obstacles and ensure threads are securely seated between tension disks. Adjust tension settings gradually, ensuring balance between top and bobbin thread tensions. Use high quality embroidery threads suitable for machine embroidery to minimize breakage.
• Uneven Stitching or Skipped Stitches: Uneven stitching or skipped stitches may result from needle dullness, incorrect needle size, or fabric thickness. Replace needles regularly to maintain sharpness and prevent fabric pulls. Use appropriate needle size and type for fabric thickness and embroidery design complexity. Increase machine speed slightly for consistent stitch formation, adjusting tension settings as needed.
• Fabric Puckering or Distortion: Fabric puckering or distortion can occur due to excessive tension, improper needle selection, or inadequate stabilizer use. Reduce tension settings for delicate fabrics and adjust needle type to minimize fabric puncture marks. Use suitable stabilizers to support fabric during embroidery, ensuring smooth stitch placement and preventing fabric stretching or distortion.
• Thread Nests or Bird’s Nests: Thread nests, also known as bird’s nests, are tangled thread accumulations beneath the fabric surface. Clean bobbin case regularly to remove lint or debris that may obstruct bobbin thread flow. Adjust bobbin tension gradually and ensure correct threading of bobbin case and thread path. Monitor thread path during embroidery to prevent thread entanglement and maintain smooth thread flow.
Step by Step Troubleshooting Techniques:
1. Review Machine Settings: Verify embroidery machine settings such as tension, needle type, and speed settings. Refer to machine manual for recommended settings based on fabric type and embroidery design complexity.
2. Inspect Thread Path: Check thread path from spool to needle for obstacles or tangled threads. Ensure thread guides, tension disks, and bobbin case are aligned and functioning properly. Clear any thread jams or obstructions that may disrupt smooth thread flow.
3. Test Stitch on Scrap Fabric: Conduct test stitches on scrap fabric using the same thread and fabric combination. Evaluate stitch quality, tension consistency, and fabric handling to identify potential issues and adjust machine settings accordingly.
4. Adjust Needle and Thread: Replace dull or damaged needles with new ones appropriate for fabric type and thickness. Use high quality embroidery threads compatible with machine specifications and project requirements.
5. Calibrate Machine: Perform machine calibration adjustments for stitch length, density, and needle position. Test calibration settings on scrap fabric to ensure accurate stitch alignment and definition.
Recording and Analyzing Issues:
• Maintain Detailed Logs: Keep a troubleshooting log documenting encountered issues, corresponding troubleshooting steps, and resolutions. Note any recurring problems or patterns that may require further adjustment or professional servicing.
• Consult Manufacturer Resources: Refer to manufacturer resources, including machine manuals, online support forums, or customer service representatives for technical assistance and troubleshooting guidance.
Seeking Professional Support:
• Professional Servicing: If troubleshooting efforts do not resolve stitching issues, consider scheduling professional servicing by certified technicians. Professional servicing includes comprehensive machine diagnostics, lubrication, and mechanical adjustments to optimize embroidery machine performance and resolve complex issues.
By applying systematic troubleshooting techniques and proactive maintenance practices, embroiderers can effectively address stitching challenges, maintain consistent embroidery quality, and maximize the performance and longevity of their embroidery machines.

Conclusion
Mastering embroidery machine optimization is crucial for achieving professional quality results across diverse fabrics and designs. This guide has covered essential techniques from thread management and tension adjustments to maintenance and troubleshooting. By fine tuning machine settings, selecting appropriate needles and threads, and maintaining a clear thread path, embroiderers can overcome common challenges such as thread breakage and uneven stitching.
Regular maintenance, including cleaning, lubrication, and calibration, ensures machine longevity and reliable performance. Adapting techniques to suit different fabrics, whether delicate silks or robust denims, allows for flawless embroidery execution. Integrating these practices into your routine empowers you to create intricate designs with precision and confidence, elevating your embroidery craftsmanship and ensuring consistent, exceptional results in every project.
Now that you have read through this article, feel free to SHOP for products we have created. If you are looking for something special which isn’t in our store, feel free to contact us.
