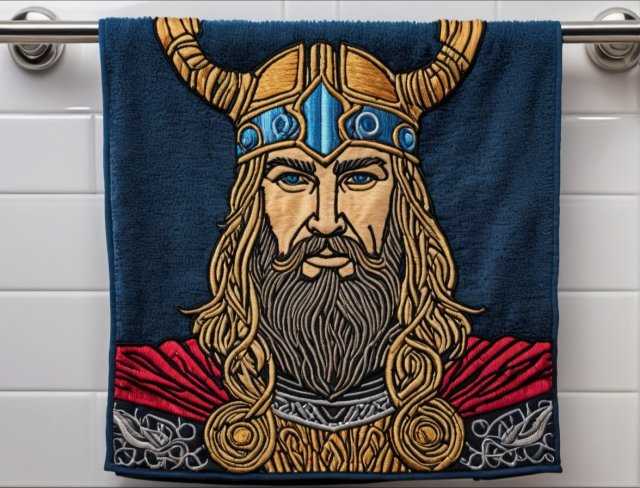
Embroidered Fantasy and/or Mythology
A Step-by-Step Guide to Crafting Mystical Designs
Introduction
Embroidery, with its rich history and endless possibilities, offers a captivating avenue for artistic expression. In this comprehensive guide, we embark on a journey into the realms of mythology and fantasy, unlocking the secrets to crafting mystical designs with machine embroidery. Whether you’re a novice or seasoned enthusiast, prepare to immerse yourself in a world where imagination knows no bounds.
As we delve into the enchanting realms of mythology and fantasy, we discover more than just threads and needles; we uncover the threads of human imagination woven throughout history. From the epic tales of gods and heroes to the whimsical landscapes of fantastical realms, mythology and fantasy have served as timeless sources of inspiration for artists and dreamers alike. In exploring these themes through the medium of embroidery, we not only honor ancient traditions but also breathe new life into age old narratives, creating tangible works of art that resonate with modern audiences. Join us as we embark on a journey where every stitch tells a story, and every design unlocks a world of wonder and magic.
1. Understanding Embroidered Fantasy and/or Mythology
Embarking on our embroidery journey begins with a deep dive into the multifaceted worlds of embroidered fantasy and mythology. These realms are not merely sources of inspiration but reservoirs of cultural heritage and human imagination that have transcended generations. Let’s unravel the layers of meaning and significance behind these captivating themes.
• Mythology: Mythology encompasses a vast array of narratives, beliefs, and traditions passed down through oral and written traditions over centuries. These stories often revolve around gods, goddesses, heroes, and mythical creatures and serve as explanations for natural phenomena, moral lessons, or reflections of societal values. From the grandeur of Greek and Roman mythology to the mysticism of Norse and Egyptian pantheons, each culture has its own rich tapestry of myths that shape its identity and worldview.
Delving into mythology involves understanding the symbolism embedded within its stories. For example, the Greek myth of Prometheus, who stole fire from the gods to benefit humanity, symbolizes the quest for knowledge and the defiance against divine authority. Similarly, the story of Pandora’s box serves as a cautionary tale about the consequences of curiosity and the unpredictability of human nature.
The realm of mythology also unveils the universal themes and archetypes that resonate across cultures. The hero’s journey, a recurring motif in mythological narratives, follows a protagonist’s transformational quest filled with trials, challenges, and ultimately, self discovery. Whether it’s the epic adventures of Odysseus in Homer’s “The Odyssey” or the spiritual enlightenment of Siddhartha Gautama in Buddhist mythology, the hero’s journey reflects humanity’s eternal quest for meaning and purpose.
• Fantasy: In contrast to mythology, which draws from cultural traditions and beliefs, fantasy transports us to imaginary worlds fueled by creativity and imagination. Fantasy literature, art, and media often feature elements such as magic, mythical creatures, and epic quests set in fantastical realms detached from reality. From J.R.R. Tolkien’s Middle earth to J.K. Rowling’s Wizarding World, fantasy worlds offer an escape into realms where anything is possible.
Fantasy allows for boundless creativity and exploration of themes that transcend the constraints of reality. It offers a platform for authors and artists to challenge conventions, question societal norms, and envision alternative realities. Through fantastical allegories and metaphors, fantasy literature often addresses contemporary issues and universal truths in ways that resonate with readers of all ages.
Understanding fantasy involves recognizing its power as a storytelling device and its capacity to ignite the imagination. Whether it’s the awe inspiring landscapes of distant realms, the camaraderie forged through epic quests, or the triumph of good over evil, fantasy narratives evoke a sense of wonder and possibility that captivates audiences worldwide.
Delving into the realms of mythology and fantasy unveils layers of meaning, symbolism, and cultural significance that enrich our understanding of human experience. By exploring these themes through the art of embroidery, we not only pay homage to ancient traditions but also tap into the collective unconsciousness of humanity, where dreams and reality intertwine in a tapestry of endless creativity and imagination.
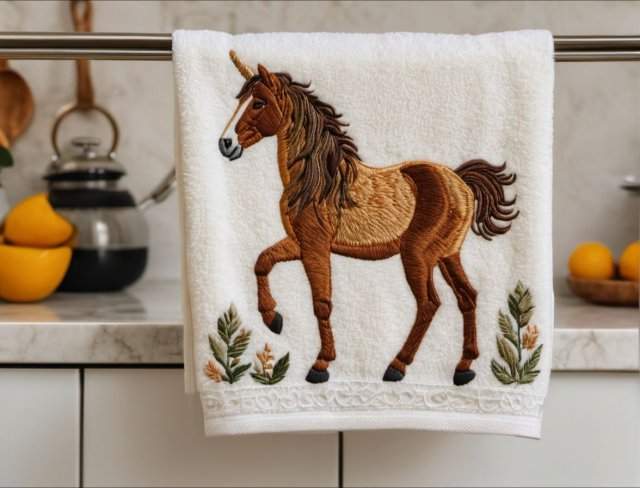
2. Choosing Your Design
Selecting the perfect design is a pivotal step in your embroidered fantasy and/or mythology journey, as it sets the foundation for your creative expression and storytelling. When exploring the realms of mythology and fantasy, the possibilities are as vast as the cosmos themselves. Let’s delve into the intricate process of choosing a design that resonates with your artistic vision and captures the essence of mystical storytelling.
• Research and Inspiration: Before diving into the world of embroidered fantasy and/or mythology, take time to immerse yourself in the rich tapestry of mythology and fantasy. Engage in research to familiarize yourself with the diverse cultures, legends, and iconic characters that populate these realms. Delve into ancient texts, folklore, and modern interpretations to gain insight into the symbolism and significance behind various motifs.
Draw inspiration from a myriad of sources, including literature, art, film, and folklore. Explore classic myths such as the Greek tales of gods and heroes, the Norse sagas of mighty warriors and legendary beasts, or the whimsical worlds created by contemporary fantasy authors. Pay attention to recurring themes, motifs, and visual imagery that resonate with your personal interests and artistic style.
• Symbolism and Meaning: Each mythological or fantastical motif carries its own symbolism and narrative significance, reflecting universal themes and cultural values. When choosing a design, consider the deeper meanings behind the characters, creatures, and symbols you wish to incorporate. Reflect on the archetypal motifs that speak to your own journey and resonate with the message you wish to convey through your embroidered fantasy and/or mythology artwork.
For example, a depiction of the majestic phoenix rising from the ashes symbolizes renewal, resilience, and transformation—a potent motif for those embarking on a journey of personal growth and self discovery. Similarly, the imagery of the Tree of Life found in various mythologies represents interconnectedness, balance, and the cyclical nature of existence—an emblem of harmony and unity with nature.
• Personal Connection: Beyond the historical and symbolic significance, selecting a design that holds personal meaning and resonance is essential for imbuing your embroidery with authenticity and passion. Consider your own cultural heritage, life experiences, and spiritual beliefs when choosing a motif that speaks to your soul and ignites your creative spark.
Perhaps you feel drawn to a particular mythological figure or creature due to its role in shaping your childhood imagination or inspiring your dreams. Maybe a fantastical landscape evokes memories of cherished stories shared with loved ones or sparks a sense of wanderlust and adventure within your heart. Whatever the case may be, let your intuition guide you in selecting a design that resonates with your innermost thoughts, emotions, and aspirations.
• Adaptation and Interpretation: Once you’ve chosen a design that captivates your imagination, consider how to adapt and interpret it to suit your embroidered fantasy and/or mythology project’s size, complexity, and aesthetic preferences. Experiment with different compositions, scales, and color schemes to bring your vision to life on the fabric canvas. Don’t be afraid to inject your own creativity and unique perspective into the design, adding personal touches and embellishments that enhance its beauty and narrative impact.
In summary, choosing the perfect design for your embroidered fantasy and/or mythology inspired project is a deeply personal and transformative process. By immersing yourself in research, symbolism, personal reflection, and creative exploration, you’ll embark on a journey of artistic discovery that transcends mere craftsmanship, weaving tales of wonder and magic with every stitch.

3. Gathering Supplies
Equipping yourself with the right tools and materials is essential for bringing your embroidered fantasy and/or mythology vision to life with precision and finesse. From quality threads to specialized needles and fabric, assembling the necessary supplies ensures a smooth and enjoyable embroidery experience. Let’s explore the essential items you’ll need to create stunning mythology and fantasy inspired designs.
• Embroidery Threads: Selecting the right embroidery threads is crucial for achieving vibrant colors, smooth stitches, and long lasting results. Opt for high quality embroidery threads made from durable materials such as cotton, polyester, or rayon. Consider the color palette of your design and choose threads that complement each other harmoniously. Additionally, ensure that the thread weight is suitable for your chosen fabric and embroidery techniques to prevent breakage and achieve optimal coverage.
• Needles: Investing in quality embroidery needles is paramount for achieving precise stitching and minimizing fabric damage. Choose needles specifically designed for embroidery, with sharp points and large eyes to accommodate multiple strands of thread. Consider the fabric weight and texture when selecting needle sizes, opting for finer needles for delicate fabrics and thicker needles for heavier materials. Keep a variety of needle sizes on hand to accommodate different thread thicknesses and embroidery techniques.
• Fabric: Selecting the right fabric forms the foundation of your embroidered fantasy and/or mythology project, providing a stable canvas for your stitches and enhancing the overall aesthetic appeal. Choose fabrics that are suitable for embroidery, such as cotton, linen, or even specialty fabrics like felt or velvet for added texture and dimension. Consider the fabric’s weight, weave, and color when making your selection, ensuring it complements the intricacy of your design and offers the desired level of durability and stability.
• Embroidery Machine: If you’re embarking on machine embroidery, investing in a reliable embroidery machine is essential for achieving consistent results and unlocking a wide range of creative possibilities. Choose a machine that suits your skill level, budget, and embroidery requirements, whether it’s a basic entry level model or a more advanced computerized system with built in design libraries and customization options. Familiarize yourself with your embroidery machine’s features, settings, and maintenance procedures to ensure optimal performance and longevity.
• Embroidery Hoops and Frames: Proper hooping and framing are essential for securing your fabric during the embroidered fantasy and/or mythology process and preventing distortion or puckering. Invest in a variety of embroidery hoops and frames in different sizes and shapes to accommodate various project dimensions and embroidery techniques. Choose hoops made from durable materials such as wood or plastic, with secure locking mechanisms to hold the fabric taut without causing damage. Additionally, consider using specialized frames such as magnetic or spring loaded hoops for added convenience and stability.
• Embroidery Stabilizers: Stabilizers play a crucial role in supporting the fabric during the embroidered fantasy and/or mythology process, preventing stretching, puckering, and distortion of stitches. Choose stabilizers that are compatible with your fabric type and design complexity, such as tear away, cut away, or water soluble varieties. Experiment with different stabilizer weights and techniques to achieve optimal results, adjusting the placement and layering as needed to enhance stability and embroidery quality.
• Additional Tools and Accessories: In addition to the essential supplies mentioned above, consider stocking up on additional tools and accessories to streamline your embroidered fantasy and/or mythology crafting and enhance your creativity. This may include embroidery scissors, thread snips, marking pens, embroidery design software, and specialty embellishments such as beads, sequins, or appliqués. Organize your supplies in a dedicated embroidery kit or storage system to keep everything neatly organized and easily accessible during your stitching sessions.
In summary, gathering the right supplies is the first step towards creating stunning embroidered fantasy and/or mythology designs. By investing in quality materials, mastering essential techniques, and exploring your creative potential, you’ll embark on a journey of artistic exploration and self expression that transcends mere craftsmanship, weaving tales of wonder and magic with every stitch.

4. Preparing Your Workspace
Creating a conducive workspace is essential for nurturing your creativity, enhancing focus, and optimizing efficiency during your embroidered fantasy and/or mythology process. By establishing an organized and comfortable environment, you’ll ensure a smooth and enjoyable stitching experience while minimizing distractions and maximizing productivity. Let’s delve into the essential steps for preparing your embroidery workspace with great detail.
• Clearing and Organizing: Begin by decluttering your workspace to create a clean and clutter free environment conducive to creativity and concentration. Remove any unnecessary items, supplies, or debris that may clutter your workspace and impede your movement or workflow. Organize your embroidery supplies, tools, and materials in designated storage containers, drawers, or shelves to keep them within reach and neatly organized.
• Creating Adequate Space: Ensure that your workspace provides ample room for maneuvering fabric, thread, and embroidery hoops without feeling cramped or restricted. Clear a sufficient area on your work surface to accommodate your embroidery machine, hooping station, and other essential tools and accessories. Consider the ergonomic layout of your workspace, arranging equipment and supplies in a way that promotes ease of access and efficient workflow.
• Optimizing Lighting Conditions: Proper lighting is essential for enhancing visibility, reducing eye strain, and ensuring accurate stitching during your embroidered fantasy and/or mythology process. Position your workspace near a natural light source, such as a window or skylight, to benefit from natural daylight whenever possible. Supplement natural light with task lighting, such as adjustable desk lamps or overhead lighting fixtures, to illuminate your work surface and eliminate shadows or glare that may interfere with your stitching.
• Ergonomic Considerations: Prioritize comfort and ergonomics when setting up your embroidery workspace to minimize fatigue and discomfort during extended stitching sessions. Invest in a supportive and adjustable chair that promotes good posture and reduces strain on your back, neck, and shoulders. Position your embroidery machine and work surface at a comfortable height and angle to maintain a relaxed and natural position while stitching. Consider using ergonomic accessories such as wrist rests, foot pedals, or padded matting to further enhance comfort and reduce repetitive strain injuries.
• Organizing Thread and Color Palettes: Organize your embroidery thread collection in a systematic manner to facilitate easy access and color coordination during stitching. Consider organizing threads by color, shade, or brand in labeled storage containers, thread racks, or thread organizers. Create a color palette or thread chart that corresponds to your embroidered fantasy and/or mythology design, allowing you to quickly identify and select the appropriate thread colors for each section of your design.
• Minimizing Distractions: Create a quiet and peaceful atmosphere in your embroidery workspace to minimize distractions and promote focus and concentration. Turn off or mute electronic devices such as phones, televisions, or radios that may interrupt your stitching flow. Establish boundaries with family members, roommates, or pets to ensure uninterrupted stitching sessions and maintain a sense of creative immersion and engagement.
• Personalizing Your Space: Infuse your embroidery workspace with personal touches, inspirational decor, and motivational elements that reflect your unique style and creative vision. Display artwork, photographs, or mementos that inspire and uplift you, creating a visually stimulating and emotionally supportive environment. Surround yourself with plants, candles, or soothing music to create a calming and nurturing atmosphere that enhances your creativity and fosters a sense of joy and fulfillment.
In summary, preparing your embroidery workspace involves creating a clean, organized, and comfortable environment that promotes creativity, concentration, and efficiency. By optimizing lighting conditions, prioritizing ergonomic considerations, and minimizing distractions, you’ll create an inviting and inspiring space where your embroidered fantasy and/or mythology projects can flourish and your artistic vision can come to life with each stitch.
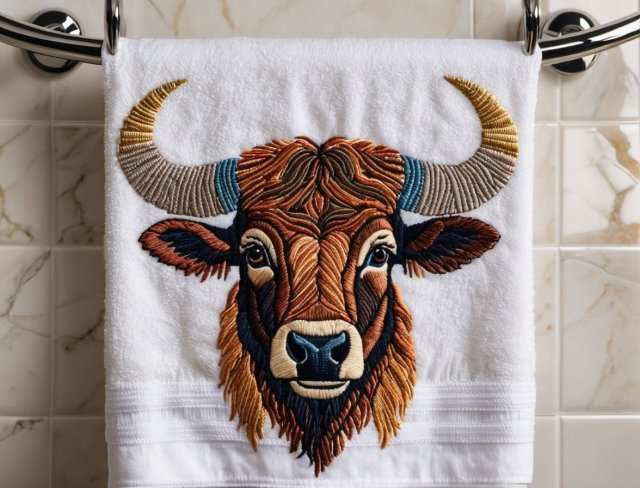
5. Digitizing Your Design
Digitizing your chosen design is a pivotal step in the embroidered fantasy and/or mythology process, transforming your creative vision into a digital format that can be interpreted and stitched by your embroidery machine. This intricate process involves converting artwork or images into stitch data, specifying stitch types, densities, and sequences to achieve desired textures, shapes, and details. Let’s explore the multifaceted aspects of digitizing your design with great detail.
• Selecting Design Software: Begin by selecting reliable and user friendly embroidery design software that suits your skill level, budget, and design requirements. Choose software programs equipped with advanced digitizing tools, editing features, and customization options that allow for precise control over stitch placement, density, and direction. Popular software options include Wilcom EmbroideryStudio, Hatch Embroidery, and Embrilliance Essentials, and Ink/Stitch among others.
• Importing and Tracing Artwork: Import your chosen design artwork or image into the embroidery software, ensuring that it is in a compatible file format such as JPEG, PNG, or SVG. Use the software’s tracing tools to convert the artwork into a digital embroidery design, outlining shapes, lines, and details with vector based graphics. Adjust tracing parameters such as threshold, color sensitivity, and smoothing to achieve accurate and clean outlines that capture the essence of your original artwork.
• Editing and Refining Design Elements: Fine tune your digitized design by editing and refining individual elements, shapes, and details to enhance visual clarity and stitching quality. Use editing tools such as node editing, node smoothing, and object manipulation to adjust stitch paths, angles, and densities, ensuring smooth transitions and crisp outlines. Remove unnecessary or overlapping stitches, simplify complex shapes, and optimize stitch sequences for efficient embroidered fantasy and/or mythology production.
• Adding Stitch Details and Effects: Enhance your digitized design with intricate stitch details, textures, and effects that elevate its visual appeal and realism. Experiment with stitch types such as satin stitches, fill stitches, and specialty stitches to create depth, dimension, and surface textures that mimic the look and feel of your original artwork. Incorporate decorative effects such as gradients, shading, and embossing to add depth and realism to your embroidered fantasy and/or mythology design.
• Customizing Stitch Parameters: Customize stitch parameters such as stitch length, density, underlay, and direction to achieve desired effects and optimize stitching quality. Adjust stitch settings based on fabric type, design complexity, and desired embroidered fantasy and/or mythology outcome, ensuring optimal coverage, stability, and durability. Fine tune stitch parameters for intricate details, sharp corners, and smooth curves, balancing aesthetic appeal with practical considerations such as thread usage and production efficiency.
• Testing and Refining: Perform test stitches or stitch simulations to evaluate the appearance and performance of your digitized design on actual fabric. Identify any areas of concern such as thread breaks, puckering, or distortion, and make necessary adjustments to stitch parameters, densities, or sequencing to address issues and improve overall stitching quality. Iterate on your design as needed, refining details and optimizing settings until you achieve satisfactory results.
• Saving and Exporting Design Files: Once you’re satisfied with your digitized design, save it in the appropriate file format supported by your embroidery machine, such as DST, EXP, or PES. Organize your design files in a logical and accessible manner, creating folders or directories to categorize designs by theme, size, or complexity. Export your finalized design files to a USB drive or transfer them directly to your embroidery machine for stitching, ensuring seamless integration and compatibility.
In summary, digitizing your design is a meticulous and creative process that requires attention to detail, technical proficiency, and artistic vision. By utilizing advanced digitizing tools and techniques, you can transform your original artwork or images into stunning embroidered fantasy and/or mythology designs that captivate the imagination and bring your creative vision to life with every stitch.
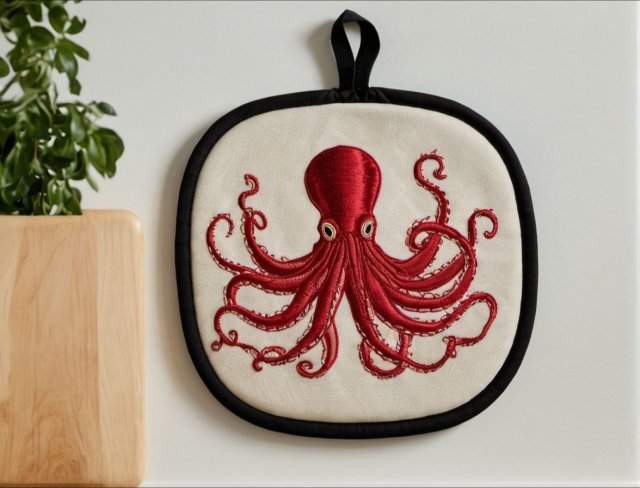
6. Hooping and Stabilizing
Proper hooping and stabilizing are fundamental aspects of successful embroidery, ensuring that your fabric remains taut and stable throughout the stitching process. By meticulously hooping and stabilizing your fabric, you’ll minimize distortion, puckering, and shifting, resulting in clean and professional looking embroidered fantasy and/or mythology designs. Let’s delve into the intricacies of hooping and stabilizing with great detail.
• Selecting the Right Hoop: Begin by selecting the appropriate hoop size and type for your embroidered fantasy and/or mythology project, taking into account the dimensions of your design and the size of your fabric. Choose a hoop that comfortably accommodates the entire design area without crowding or overlapping, ensuring sufficient space for stitching without stretching or distorting the fabric. Opt for high quality hoops made from durable materials such as plastic, wood, or metal, with secure locking mechanisms to hold the fabric firmly in place.
• Preparing the Fabric: Before hooping, prepare your fabric by pressing it to remove any wrinkles or creases and ensuring that it is clean and free of debris. Place the fabric on a flat surface, smoothing out any wrinkles or folds to create a smooth and even surface for stitching. If necessary, stabilize the fabric with temporary adhesive spray or pins to prevent shifting during hooping and stitching.
• Hooping the Fabric: Carefully position the inner hoop (also known as the bottom hoop) on the flat surface with the fabric centered over it, ensuring that the fabric is taut and smooth. Place the outer hoop (also known as the top hoop) over the fabric and inner hoop, aligning the hoop edges and tightening the screw or clasp to secure the fabric in place. Adjust the tension of the hoop as needed to achieve optimal tightness, ensuring that the fabric remains securely held without excessive stretching or distortion.
• Checking Hoop Alignment: Verify that the fabric is properly centered and aligned within the hoop by visually inspecting the edges and corners for symmetry and uniform tension. Use a ruler or measuring tape to ensure that the design area is positioned correctly within the hoop boundaries, allowing sufficient clearance for stitching without encroaching on the hoop edges. Make any necessary adjustments to the hoop tension or fabric alignment to achieve optimal hooping conditions.
• Selecting Stabilizer Types: Choose the appropriate stabilizer type and weight based on your fabric type, design complexity, and desired embroidery outcome. Common types of stabilizers include tear away, cut away, and water soluble stabilizers, each offering different levels of support, stability, and ease of removal. Consider using multiple layers or combinations of stabilizers to enhance stability and minimize distortion, especially for complex or dense embroidery designs.
• Hooping with Stabilizer: After hooping the fabric, prepare the stabilizer by cutting it to fit within the hoop dimensions, ensuring that it extends beyond the design area to provide adequate support. Place the stabilizer beneath the hooped fabric, aligning it with the fabric edges and ensuring that it lies flat and smooth. Secure the stabilizer in place by lightly pressing it to adhere to the fabric or by pinning it along the edges to prevent shifting during stitching.
• Testing Hoop and Stabilizer Tension: Perform a test stitch or trial run to evaluate the tension and stability of the hooped fabric and stabilizer combination. Monitor the stitching process for any signs of puckering, stretching, or distortion, and adjust the hoop tension or stabilizer type as needed to achieve optimal results. Fine tune the tension settings to balance tightness and stability with flexibility and ease of stitching, ensuring smooth and even embroidery coverage without compromising fabric integrity.
• Removing Hoop and Stabilizer: Upon completing the embroidered fantasy and/or mythology artwork, carefully remove the hoop from the embroidery machine, taking care not to disturb the fabric or stabilizer. Gently loosen the hoop tension and carefully release the fabric from the hoop, avoiding excessive stretching or distortion. Remove any excess stabilizer from the fabric edges by tearing away or cutting away the excess material, leaving behind a clean and professional looking embroidered fantasy and/or mythology design.
In summary, hooping and stabilizing are essential steps in the embroidered fantasy and/or mythology process that require precision, attention to detail, and careful consideration of fabric and design factors. By selecting the right hoop size, preparing the fabric and stabilizer, and ensuring optimal tension and alignment, you’ll create a stable and supportive foundation for flawless embroidery results that showcase your creativity and craftsmanship with every stitch.
7. Commencing Embroidery
With your design digitized, fabric hooped, and stabilizer in place, it’s time to embark on the embroidery process. Commencing embroidery requires attention to detail, patience, and precision to ensure flawless stitching and impeccable results. Let’s explore the step by step process of commencing embroidery with great detail.
• Thread Selection: Begin by selecting the appropriate embroidery thread colors for your design, ensuring that they complement each other harmoniously and align with your artistic vision. Refer to your digitized design and color chart to identify the thread colors needed for each section or element of the design. Load the selected thread colors onto your embroidery machine’s thread spools, threading each color through the machine’s tension disks and guides according to manufacturer instructions.
• Machine Setup: Prepare your embroidery machine for stitching by selecting the correct design file and adjusting machine settings to match your embroidery project’s specifications. Ensure that the machine’s needle, bobbin, and thread tensions are properly calibrated for the chosen fabric and thread types. Adjust embroidery machine settings such as stitch speed, density, and needle position to achieve optimal stitching quality and accuracy.
• Thread Trimming and Start Point: Trim any excess thread tails from the fabric surface and secure the starting point of your embroidery design to prevent unraveling or tangling during stitching. Use a thread snip or small scissors to trim thread tails to a short length, ensuring that they do not interfere with the embroidery process. Secure the starting point of the design by stitching a few securing stitches or using adhesive stabilizer to anchor the threads in place.
• Test Stitching: Perform a test stitch or trial run on a scrap piece of fabric to verify thread colors, tension, and embroidery machine settings before stitching your design onto the final fabric. Monitor the test stitch for any signs of thread breaks, tension issues, or misalignment, and make necessary adjustments to settings or thread tensions to correct any issues. Use this opportunity to fine tune stitch parameters and ensure optimal stitching quality before proceeding to the final embroidery.
• Embroidery Start Sequence: Once you’ve verified that your embroidery machine is properly set up and calibrated, initiate the embroidery start sequence to begin stitching your design onto the hooped fabric. Use the machine’s control panel or software interface to start the stitching process, ensuring that the needle is properly positioned over the starting point of the design. Monitor the stitching progress closely, adjusting machine settings or stopping the machine if any issues arise during stitching.
• Stitching Progress Monitoring: Throughout the embroidery process, closely monitor the stitching progress to ensure that the design is being stitched accurately and evenly. Check for any signs of thread breaks, tension issues, or fabric distortion, and address them promptly to prevent stitching errors or defects. If necessary, pause the embroidery machine to address any issues, such as rethreading the needle, adjusting tension settings, or trimming thread tails.
• Stitching Completion: Once the embroidery design is complete, carefully remove the fabric from the embroidery hoop, taking care not to disturb the stitches or fabric surface. Inspect the embroidery for any loose threads, tension issues, or stitching defects, and make any necessary corrections or touch ups to ensure a flawless finish. Trim any excess thread tails from the fabric surface and remove any remaining stabilizer material from the back of the embroidery, leaving behind a clean and professional looking design.
• Final Inspection and Finishing: Before completing the embroidery process, perform a final inspection of the stitched design to ensure that it meets your quality standards and artistic vision. Check for any missed stitches, thread breaks, or alignment issues, and make any final adjustments or repairs as needed. Once satisfied with the embroidery results, consider adding finishing touches such as embellishments, appliqués, or additional stitching details to enhance the design’s visual appeal and narrative impact.
In summary, commencing embroidery involves meticulous preparation, attention to detail, and precise execution to achieve flawless stitching and impeccable results. By following these detailed steps and closely monitoring the stitching progress, you’ll embark on a rewarding embroidery journey that brings your creative vision to life with every stitch.

8. Adding Finishing Touches
As your embroidery design nears completion, adding finishing touches elevates its visual appeal and enhances its overall quality. These final steps involve careful attention to detail and creative flair to ensure that your embroidered masterpiece shines. Let’s explore the process of adding finishing touches with great detail.
• Trim Excess Threads: Begin by carefully inspecting the embroidered design for any stray or excess threads that may detract from its appearance. Use sharp embroidery scissors or thread snips to trim any loose threads or thread tails, ensuring clean and neat edges around the design. Pay attention to areas where thread colors change or where jump stitches occur, trimming threads close to the fabric surface without cutting into the stitches.
• Clean Fabric Surface: After trimming excess threads, gently clean the fabric surface to remove any dust, lint, or debris that may have accumulated during the embroidery process. Use a lint roller, soft brush, or compressed air to gently remove particles from the fabric surface, taking care not to damage or disturb the stitched design. Ensure that the fabric is clean and free of any foreign substances before proceeding with further finishing touches.
• Pressing or Steaming: If necessary, press or steam the embroidered fabric to smooth out any wrinkles or creases and restore its pristine appearance. Use a low temperature setting on your iron or steamer and place a pressing cloth or towel over the embroidered area to protect delicate stitches from heat damage. Gently press or steam the fabric surface in a downward motion, avoiding excessive pressure or prolonged exposure to heat to prevent distortion or flattening of the stitches.
• Adding Embellishments: Consider enhancing your embroidered design with additional embellishments such as beads, sequins, or appliqués to add texture, dimension, and visual interest. Select embellishments that complement your design theme and color palette, arranging them strategically within the design to create focal points or highlights. Use a small amount of fabric glue or hand stitching to secure embellishments in place, ensuring they adhere firmly without interfering with the embroidery stitches.
• Appliqué or Layering: Explore the possibility of incorporating appliqué or layering techniques to add depth and complexity to your embroidered design. Cut out fabric shapes or motifs from coordinating fabrics and appliqué them onto the embroidered surface using fusible webbing or adhesive stabilizer. Experiment with different fabrics, textures, and colors to create layered effects that enhance the design’s visual impact and narrative depth.
• Stitch Detailing or Accenting: Enhance the intricate details of your embroidered design by adding additional stitching or accenting to highlight key elements or create emphasis. Use contrasting thread colors or specialty stitches to outline shapes, add texture, or create shading effects that bring your design to life. Employ techniques such as satin stitching, seed stitching, or French knots to add depth and dimension to specific areas of the design, enhancing its overall realism and visual appeal.
• Framing or Mounting: Once all finishing touches are complete, consider framing or mounting your embroidered design to showcase it as a work of art. Select a suitable frame or mounting board that complements the design’s style and dimensions, ensuring that it provides adequate support and protection for the embroidered fabric. Carefully mount the fabric within the frame or onto the board, securing it in place with acid free mounting tape or pins to preserve its integrity and prevent sagging or wrinkling.
• Final Inspection and Display: Before displaying your finished embroidered design, perform a final inspection to ensure that all finishing touches are complete and that the design meets your quality standards. Check for any loose threads, stitching defects, or alignment issues, making any final adjustments or repairs as needed. Once satisfied with the finished result, proudly display your embroidered masterpiece in a prominent location where it can be admired and appreciated by others.
In summary, adding finishing touches to your embroidered design involves a combination of precision, creativity, and attention to detail to achieve a polished and professional looking result. By incorporating these final steps into your embroidery process, you’ll elevate your design to new heights of beauty and craftsmanship, creating a stunning work of art that reflects your skill and passion for embroidery.

9. Tips and Troubleshooting
Embroidery, like any craft, requires patience, practice, and attention to detail. Along the way, you may encounter challenges or uncertainties that can impede your progress. However, armed with the right tips and troubleshooting techniques, you can overcome obstacles and elevate your embroidery skills to new heights. Let’s explore a comprehensive guide to tips and troubleshooting in embroidery with great detail.
• Tip: Start with Simple Designs When you’re new to embroidery, start with simple designs that feature basic shapes, lines, and stitches. This allows you to master fundamental embroidery techniques such as satin stitch, backstitch, and running stitch before tackling more complex designs.
Troubleshooting: Thread Breaks If you’re experiencing frequent thread breaks during embroidery, check for several potential causes. Ensure that your thread tension is properly adjusted, your needle is sharp and suitable for your fabric, and your thread path is free of obstructions or tangles. Additionally, try using high quality embroidery thread and consider reducing your machine’s stitching speed to prevent thread stress.
• Tip: Use Quality Materials Invest in high quality embroidery materials, including threads, needles, and fabric, to achieve the best results. Quality materials are more durable, produce cleaner stitches, and enhance the overall appearance of your embroidery.
Troubleshooting: Puckering Puckering occurs when fabric tension is uneven or excessive during embroidery. To troubleshoot puckering, ensure that your fabric is properly hooped and stabilized, your tension settings are adjusted correctly, and your needle size and type are appropriate for your fabric weight.
• Tip: Practice Proper Hooping Techniques Mastering proper hooping techniques is essential for achieving crisp and even embroidery results. Take the time to hoop your fabric evenly, ensuring that it is taut but not stretched, and that the design area is centered within the hoop.
Troubleshooting: Misalignment If your embroidery design is misaligned or off center, double check your hooping technique and fabric placement. Ensure that your fabric is hooped straight and that the design is aligned with the center of the hoop before starting the embroidery process.
• Tip: Maintain Your Embroidery Machine Regular maintenance of your embroidery machine is key to ensuring optimal performance and longevity. Clean your machine regularly, lubricate moving parts as needed, and have it serviced by a professional technician annually to prevent issues and extend its lifespan.
Troubleshooting: Skipped Stitches Skipped stitches can occur due to various factors, including a dull or damaged needle, improper thread tension, or a misaligned needle or bobbin. Troubleshoot skipped stitches by replacing your needle, adjusting tension settings, and ensuring proper needle and bobbin alignment.
• Tip: Experiment with Stitch Variations Explore different stitch variations and combinations to add depth, texture, and visual interest to your embroidery designs. Experiment with stitch lengths, densities, and patterns to achieve unique and creative effects.
Troubleshooting: Thread Nesting Thread nesting, also known as birdnesting, occurs when thread accumulates underneath the fabric during embroidery, resulting in messy stitches and uneven tension. To troubleshoot thread nesting, check your bobbin tension, ensure that your bobbin is wound correctly, and clean any lint or debris from the bobbin area.
• Tip: Practice Proper Thread Management Proper thread management is essential for preventing tangles, knots, and thread breaks during embroidery. Keep your thread spools organized and untangled, use thread nets or caps to prevent unraveling, and store thread away from direct sunlight and moisture to maintain its quality.
Troubleshooting: Fabric Distortion Fabric distortion can occur when fabric is stretched or pulled during hooping or stitching, resulting in misshapen or uneven embroidery. To troubleshoot fabric distortion, ensure that your fabric is properly stabilized and hooped, and avoid excessive tension or pressure on the fabric during stitching.
• Tip: Take Breaks and Stay Patient Embroidery requires concentration and precision, so it’s important to take regular breaks to rest your eyes and hands and prevent fatigue. Stay patient and persistent, and don’t be discouraged by setbacks or mistakes. With practice and perseverance, your embroidery skills will improve over time.
Troubleshooting: Design Scaling Issues If your embroidery design appears distorted or disproportionate, double check your design scaling settings and make sure they match the dimensions of your fabric and hoop. Adjust your design scaling as needed to ensure accurate and proportional stitching.
Mastering embroidered fantasy and/or mythology is a multifaceted journey that requires dedication, patience, and a willingness to learn and adapt. It involves honing your skills, mastering various techniques, and developing problem solving abilities to overcome the challenges that arise along the way. By implementing the tips and troubleshooting techniques outlined in this guide, you’ll equip yourself with valuable knowledge and strategies to address common issues and enhance your embroidery practice.
It’s important to note that the tips and troubleshooting techniques provided here cover only a subset of the potential challenges you may encounter in embroidery. As you delve deeper into the craft, you’ll inevitably encounter new situations and obstacles that require creative solutions and experimentation. Embrace these challenges as opportunities for growth and learning, and don’t hesitate to seek guidance from fellow embroiderers, online resources, or professional instructors when needed.
With perseverance, practice, and a willingness to explore new techniques and approaches, you’ll gradually build confidence in your embroidery skills and achieve stunning results with every stitch. Remember that mastery is a journey rather than a destination, and each embroidery project offers an opportunity to refine your craft and express your unique artistic vision. Keep pushing the boundaries of your creativity, and enjoy the rewarding process of bringing your embroidery designs to life.
Conclusion
Embroidery is a timeless art form that offers endless possibilities for creativity and self expression. Whether you’re a beginner or an experienced embroiderer, the journey of mastering this craft is filled with discovery, innovation, and personal growth. By incorporating the knowledge, techniques, and tips shared in this guide into your embroidery practice, you’ll not only enhance your skills but also deepen your appreciation for the intricate beauty of embroidered designs.
As you continue your embroidery journey, remember to embrace the joy of experimentation and exploration. Allow yourself the freedom to push boundaries, try new stitches, and embark on creative adventures that challenge and inspire you. Celebrate the imperfections as part of the learning process and cherish the moments of triumph as you witness your skills evolve and your designs flourish.
Above all, let passion be your guiding force in embroidery. Whether you’re stitching a cherished heirloom, creating bespoke gifts for loved ones, or simply indulging in the meditative rhythm of needle and thread, let your love for the craft shine through in every stitch. With dedication, perseverance, and a touch of imagination, you’ll continue to create breathtaking works of art that resonate with beauty, meaning, and the essence of your creative spirit.
Now that you have read through this article, feel free to SHOP for products we have created. If you are looking for something special which isn’t in our store, feel free to contact us.

