Introduction
Push and pull compensation is a crucial concept in the field of embroidery that directly affects the quality and appearance of finished designs. These forces arise during the stitching process due to the tension of the embroidery threads and the characteristics of the fabric being used. When a design is embroidered, the fabric can distort in response to these forces, leading to issues such as misaligned lettering, uneven shapes, and overall distortion of the intended design. Understanding the dynamics of push and pull is essential for any embroiderer aiming to produce professional quality work.
Throughout this article, we will delve into the intricacies of push and pull compensation, exploring its definition, its impact on design integrity, and effective compensation techniques tailored to different fabric types. We will also discuss the specific challenges presented by lettering and how proper compensation can enhance clarity and aesthetics.
By grasping these principles, embroiderers can ensure their designs remain true to their vision, resulting in embroidery that not only meets but exceeds expectations. As we explore the essential strategies for managing these forces, readers will gain valuable insights that can be applied to their own projects, elevating their embroidery skills to new heights.
What is Push and Pull in Embroidery?
In machine embroidery, push and pull refer to two distinct forces that influence the behavior of fabric as it undergoes the stitching process. These forces stem from the interaction between the thread, needle, fabric, and the embroidery machine’s mechanical movements, often leading to design distortion if not properly managed. Understanding push and pull is fundamental to achieving high quality embroidery because these forces can affect both the aesthetic and structural integrity of the design.
Push occurs when the fabric is shifted outward or away from the needle’s point of entry as multiple stitches are laid down in the same direction. This phenomenon is especially prominent when using denser stitches or when working with heavy thread or fabrics with minimal stretch. The repeated force of the needle entering and pulling thread through the fabric pushes it outward from the center, causing areas such as the edges of letters or shapes to expand.
As a result, parts of the design may appear longer, wider, or disproportionate, especially around the periphery. This can be particularly problematic in designs where precision is critical, such as geometric shapes, borders, or detailed typography. Without compensation, push can cause even simple shapes like circles to look stretched or flattened.
Pull, on the other hand, works in the opposite direction. This force happens when the stitches pull the fabric inward, toward the center of the design. As the needle penetrates the fabric and the thread tightens, the fabric naturally contracts due to the tension applied by the thread. Pull tends to shrink elements of a design, particularly in areas where stitches run parallel.
This contraction can lead to significant gaps between design elements or cause intricate patterns to lose their clarity and sharpness. Text, for instance, can become compressed, making it look cramped or uneven. Pull is often most pronounced in long, straight stitches, where the fabric is pulled taut, but it can also affect curved areas, leading to a more subtle, yet equally impactful distortion.
The interplay between push and pull is dynamic and influenced by several factors, such as the type of stitches used, their density, the type and thickness of the fabric, and the overall structure of the design. For example, satin stitches, which are typically long and closely spaced, exert more pull than shorter fill stitches, while fill stitches may cause more push due to the accumulation of thread. The direction of the stitches also plays a role in determining where and how push and pull will manifest within a design. Horizontal and vertical stitches can pull or push the fabric in different directions, further complicating the potential for distortion.
Moreover, the type of fabric can magnify or mitigate the effects of these forces. Stretchy fabrics, like knits, tend to exaggerate pull due to their flexible nature, while more rigid materials, like canvas or denim, are more resistant to push but still prone to certain distortions depending on the stitch density. Similarly, fabric weight and weave also determine how much the fabric moves under the needle, affecting how push and pull forces manifest.
Without compensating for push and pull, embroidery can suffer from visible misalignments, especially in designs with closely connected elements, detailed outlines, or multi color layers. Gaps may form between sections that were intended to touch, or parts of the design may overlap unexpectedly. For example, in multi colored designs, each color layer must be precisely aligned to avoid color bleeding or noticeable gaps, which is where controlling push and pull becomes critical.
Effectively managing push and pull is vital for maintaining the integrity of a design. Compensating for these forces allows you to preemptively adjust your designs to ensure that, once stitched, they look exactly as intended. Failure to account for push and pull can result in distorted, uneven embroidery that detracts from the quality of the final product. By understanding how and why these forces occur, embroiderers can employ compensation techniques to correct distortions, ensuring that shapes remain true, text stays legible, and designs look polished.
The Impact of Push and Pull on Designs
Push and pull compensation is crucial in machine embroidery, as these forces can dramatically alter the outcome of a design. Ignoring or underestimating their effects can lead to distorted shapes, misaligned colors, and overall poor quality embroidery. Here’s an in depth look at how push and pull can impact various aspects of a design:
1. Shape Distortion
One of the most noticeable effects of push and pull is the distortion of shapes. For example:
- Circles become ovals: When circular shapes are embroidered, the pull force on the horizontal stitches tends to compress the circle, while the push force on the vertical stitches stretches it. This combination often results in a design that looks more like an oval than a perfect circle.
- Squares turn into rectangles: Similar to circles, squares may also get stretched or compressed depending on the direction of the stitches. Horizontal or vertical stitches in particular can exaggerate the pull or push effects, leading to a disproportionate shape.
- Geometric patterns lose precision: In more intricate designs, such as stars, triangles, or polygons, the pull of the stitches may cause the lines and angles to shift slightly, disrupting the intended symmetry or clean lines.
2. Lettering Challenges
Lettering is particularly vulnerable to push and pull distortions:
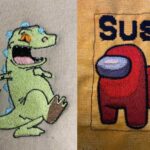
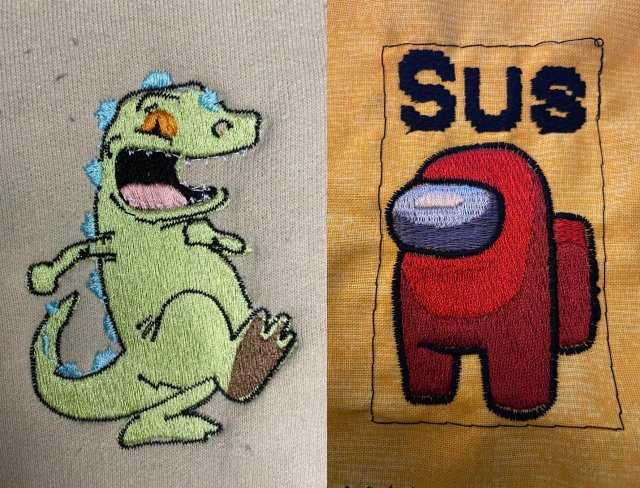
- Text stretching or compressing: The horizontal pull force can make letters appear too narrow, while the vertical push force can stretch the tops and bottoms of the letters, leading to elongated or squashed text. This can be especially problematic when embroidering small or thin fonts, where even slight distortions are easily visible.
- Letters with serifs: For serif fonts, where small decorative elements are added to the ends of the strokes, push and pull can cause these fine details to become disproportionately larger or smaller than intended. This can lead to jagged or uneven text, reducing legibility and aesthetics.
- Misaligned letters: The varying effects of push and pull on different parts of a letter can also cause individual letters to shift out of alignment. When this happens, the text looks unprofessional and can be difficult to read, particularly in dense fonts or large blocks of text.
3. Color Alignment and Registration Issues
When embroidering multi color designs or elements with fine borders, push and pull can lead to misregistration problems:
- Gaps between colors: If push and pull forces are not accounted for, areas where colors should meet might end up with noticeable gaps. This is because one section of the design may shrink (due to pull) while the adjacent section expands (due to push), leaving unsightly spaces.
- Overlapping colors: On the opposite end, some parts of a design might stretch too much, causing one color to overlap onto another. This can lead to bleeding of colors, especially if contrasting thread colors are used, resulting in a messy or unfinished appearance.
- Outline misalignment: Designs with outlines are highly susceptible to the impact of push and pull. Often, outlines that are meant to sit perfectly around a shape may shift due to the push or pull of the base stitches, causing the outline to sit unevenly around the design, either leaving part of the shape unbordered or cutting into the design itself.
4. Fabric Stretch and Skewing
Different fabrics respond to push and pull forces in various ways, contributing to how distorted the design becomes:
- Stretchy fabrics: Knit fabrics or those with some degree of elasticity tend to exaggerate the effects of pull. As the stitches tighten, the fabric can contract significantly, making the design much smaller than intended. Without proper compensation, the final design may look condensed, affecting the overall visual balance.
- Heavy fabrics: Conversely, denser, non stretch fabrics like denim or canvas resist pull more effectively but are more vulnerable to push. The stiffness of these fabrics can lead to an expansion of design elements, especially along the outer edges, making them appear larger or bulkier than planned.
- Lightweight fabrics: On lightweight, delicate fabrics such as silk or sheer fabrics, the movement caused by push and pull is more subtle, but any misalignment is highly visible. Small shifts in stitch density or direction can lead to puckering or wrinkling, which can mar the fabric’s smooth surface and create tension spots that alter the flow of the design.
5. Fine Details and Intricate Designs
Push and pull have a particularly strong impact on designs with intricate details or complex patterns:
- Tiny details disappear: In highly detailed designs, such as those featuring small floral motifs, intricate patterns, or delicate lines, pull compensation is vital. If not adjusted, the fine details may get “pulled” out of alignment or compressed to the point where they disappear entirely. Fine satin stitches, for example, may become too narrow and lose their impact.
- Design overcrowding: If push forces are too strong, areas with densely packed stitches can expand outward, causing elements within a design to crowd into each other. This can blur the distinction between design elements, leading to a cluttered appearance where individual sections lose their definition.
- Jagged or uneven lines: In designs that rely on precise lines and curves, such as scrollwork or filigree, push and pull can create jagged or uneven results. The intended smoothness of the lines may be disrupted by the fabric’s shifting, leading to a rough or amateur finish.
6. Logos and Brand Imagery
For logos and brand designs, where accuracy is paramount, push and pull can compromise the design’s professionalism:
- Logos losing proportions: Corporate logos often rely on specific proportions and dimensions to maintain brand consistency. When push and pull are not properly compensated for, logos can lose their balance, with some elements appearing distorted or off center.
- Degraded brand image: A poorly embroidered logo or brand image due to push and pull distortion can reflect negatively on a company or brand. Maintaining the exact dimensions and alignment is critical, and any deviation can lead to a perception of lower quality or lack of attention to detail.
7. Layered Designs
In designs that use multiple layers, such as those combining fill stitches, satin stitches, and running stitches, push and pull can dramatically affect the layering process:
- Shifting layers: When one layer of the design pulls inward and another pushes outward, the misalignment between layers can be stark. This creates inconsistencies in how the layers sit on top of each other, leading to an uneven or jagged appearance, especially when working with textured layers like appliqué or 3D embroidery.
- Layer gaps or overlaps: The interaction of push and pull across different stitch types within the same design can lead to areas where layers either fail to meet (creating gaps) or overlap (causing overcrowding). Ensuring the layers are accurately aligned and visually harmonious requires careful planning and compensation strategies.
Understanding Compensation Techniques
Compensation techniques are essential in counteracting the effects of push and pull in embroidery, ensuring that designs maintain their intended shape, proportions, and alignment. These techniques involve making precise adjustments to stitch lengths, widths, and densities to counterbalance the fabric’s movement and the natural tendencies of the thread.
Without employing proper compensation, the final embroidered design may suffer from distortions such as uneven borders, misshapen elements, or misaligned colors. To achieve high quality results, embroiderers must consider several critical compensation strategies that can vary based on the type of design, fabric, and thread being used.
One of the most fundamental compensation techniques is adjusting stitch length and width to allow for the natural pull that occurs during stitching. For instance, longer stitches may require more compensation than shorter stitches because the extended thread has a greater tendency to shrink horizontally. Embroiderers must preemptively widen certain parts of a design, especially along horizontal stitch lines, to account for the pull effect.
This widening ensures that when the design is stitched, the resulting compression from the pull will bring the design back to its correct size and shape. Conversely, areas where push occurs, such as vertical stitch lines, may need slight narrowing to prevent expansion beyond the intended boundaries.
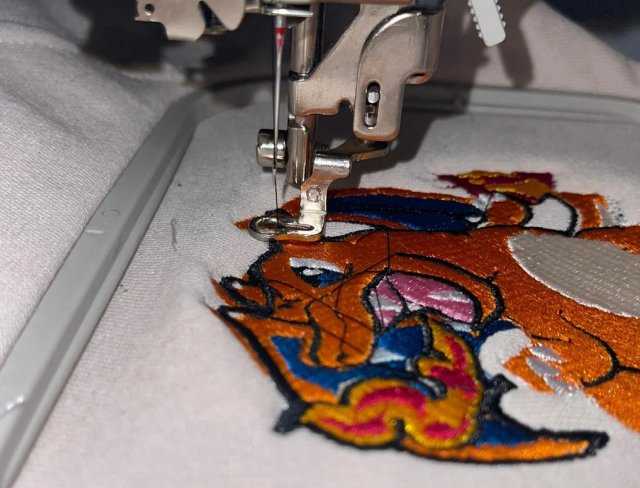
Another technique involves underlay stitching, which is used as a foundational layer beneath the main design to stabilize the fabric and control the movement caused by push and pull forces. Underlay stitches help secure the fabric and provide a stable base for the top stitches to rest on, reducing the likelihood of distortion. Different types of underlay stitches can be employed depending on the fabric and design. For example, a zigzag underlay is often used for larger, satin stitched designs to support the fabric and evenly distribute the thread tension. On the other hand, a mesh underlay may be applied to delicate fabrics to prevent stretching and maintain the integrity of the design.
Density compensation is another crucial factor. Embroiderers must adjust the stitch density to accommodate the effects of push and pull without overcrowding or overstretching the fabric. Increasing the density of stitches in areas prone to pull forces helps to anchor the design more securely and prevent unwanted shrinking. However, if the stitch density is too high, it can cause puckering, particularly in lightweight or stretchy fabrics. On the flip side, reducing the density in areas affected by push helps prevent the fabric from bunching up or becoming too stiff. Balancing the density of stitches is an intricate process that requires careful observation of both the fabric and the design.
Compensation values can also be programmed directly into embroidery software, allowing digitizers to make automatic adjustments to a design before it is stitched. By setting specific compensation values, the software will add or subtract stitch width or length based on the digitizer’s preferences, reducing the need for manual adjustments during the embroidery process. These values are particularly useful for designs that are repeatedly embroidered on the same type of fabric, as the digitizer can save the settings and use them for future projects, ensuring consistent results.
Fabric selection plays a significant role in determining the appropriate compensation technique. Stiffer fabrics such as denim or canvas are less prone to pull forces but may still require compensation for push, particularly along outer edges where stitch buildup can occur. In contrast, stretchy fabrics like knit or spandex demand more robust pull compensation because the fabric naturally contracts as the stitches tighten. Understanding the unique properties of each fabric allows embroiderers to apply compensation more effectively, ensuring that the final design remains true to the original concept regardless of fabric type.
Lastly, the choice of thread type and thickness influences compensation needs. Thicker threads exert more force on the fabric, increasing both push and pull effects, while finer threads are less aggressive but may require higher density settings to achieve full coverage. Metallic threads, for example, are notoriously difficult to work with due to their stiffness and tendency to push fabric outward, requiring extra compensation to maintain the design’s integrity. Embroiderers must account for these variables when planning compensation strategies, tailoring their approach based on the specific characteristics of the thread they are using.
Mastering compensation techniques is a delicate balance between anticipating how the fabric and thread will behave under the influence of push and pull and making the necessary adjustments to counteract these forces. By modifying stitch length, density, underlay, and compensation values, embroiderers can ensure that their designs remain sharp, accurate, and visually appealing, regardless of the complexity of the pattern or the material being used.
Compensation Strategies Based on Fabric Types
When embroidering on different fabric types, the compensation strategies vary greatly depending on the material’s elasticity, density, and behavior under tension. Each fabric type requires a tailored approach to ensure the design doesn’t suffer from distortion. Here’s a breakdown of the most common fabric categories and the compensation techniques best suited for them:
1. Stable Fabrics (e.g., Denim, Canvas, Twill)
Stable fabrics such as denim, canvas, and twill are less prone to stretching and distortion because of their dense weave and rigid nature. However, they still require some level of compensation to address the push effects.
- Push Compensation: On stable fabrics, push forces are more likely to cause outward movement at the edges of the design. Adding compensation along the outer stitch lines helps prevent expansion and distortion at the edges.
- Underlay Stitches: Use a zigzag or double layered underlay to stabilize the surface and prevent thread from pushing the fabric outward, especially for larger designs.
- Stitch Density: Since stable fabrics can handle denser stitching, slightly increasing stitch density in areas prone to pull is recommended. However, avoid overpacking stitches as it may cause puckering, even on a stiff fabric.
Best Practices:
♦ Opt for medium to long stitches to allow the design to settle naturally into the fabric without pulling too tightly.
♦ Increase push compensation for borders and areas with sharp angles.
2. Delicate Fabrics (e.g., Silk, Organza, Chiffon)
Delicate fabrics are light and easily distorted, making them susceptible to both push and pull. Special care must be taken when compensating on these fabrics.
- Pull Compensation: Pulling is especially pronounced on delicate fabrics. You’ll need to increase the pull compensation to prevent the design from shrinking inward.
- Underlay Stitches: Use a light density mesh underlay or edge underlay to support delicate fabrics without adding too much bulk.
- Stitch Density: Lower stitch density is crucial to prevent puckering. Delicate fabrics can’t support heavy stitching without warping.
Best Practices:
♦ Choose thinner, lighter threads such as rayon or polyester for better fabric integrity.
♦ Reduce stitch density and apply moderate compensation to avoid the fabric being overwhelmed by heavy stitching.
3. Stretchy Fabrics (e.g., Knit, Jersey, Lycra)
Stretchy fabrics such as knit, jersey, and lycra are some of the most challenging materials for embroidery. Their elasticity makes them highly prone to pull distortion, as the fabric contracts when under tension.
- Pull Compensation: Stretchy fabrics are highly susceptible to pull distortion, so ample pull compensation is critical. Stretchier fabrics will demand wider stitch allowances to account for the fabric’s contraction.
- Underlay Stitches: A contour or edge underlay is ideal for stretchy fabrics to create a stable framework that keeps the fabric from pulling too tightly during stitching.
- Hooping Tension: Proper hooping is just as important as compensation. The fabric should be taut but not overstretched, allowing for natural movement without excessive stretching.
Best Practices:
♦ Use ballpoint needles for stretchy fabrics to reduce damage while stitching.
♦ Keep stitch density moderate to avoid excessive thread buildup that can further stretch the fabric.
4. Lightweight Fabrics (e.g., Cotton, Linen, Poplin)
Lightweight woven fabrics, like cotton or linen, tend to have moderate push and pull tendencies. These fabrics offer a balance between rigidity and flexibility, but they still require specific compensation techniques.
- Pull Compensation: Slightly increase pull compensation for finer details to account for minor shrinking caused by pull forces.
- Underlay Stitches: Run stitch underlays are often sufficient for lightweight fabrics. A single layer of underlay can help anchor the fabric without making it too stiff.
- Stitch Density: Maintain a medium stitch density to avoid overwhelming the fabric, which can lead to buckling or wrinkling.
Best Practices:
♦ Ensure hoop tension is even, as uneven hooping can easily cause wrinkling or pull in lightweight fabrics.
♦ Use lighter threads and keep compensation adjustments minimal to match the fabric’s characteristics.
5. Textured Fabrics (e.g., Terrycloth, Fleece, Velvet)
Textured fabrics present unique challenges because of their pile and uneven surface. These materials can distort under push and pull forces, but they also require attention to how the fabric’s texture interacts with the thread.
- Push Compensation: The pile of fabrics like terrycloth or fleece tends to push back against the stitches. Therefore, generous push compensation is needed along the edges to prevent the design from sinking into the texture.
- Underlay Stitches: A high density tatami underlay or zigzag underlay is necessary to compress the fabric pile and create a smoother surface for the top stitches.
- Stitch Density: You’ll need a higher stitch density on textured fabrics to ensure the thread stands out against the background, but be mindful not to overcompensate, as it can make the design too rigid.
Best Practices:
♦ Consider using water soluble topping to prevent stitches from sinking into the fabric’s pile.
♦ Keep push compensation on the higher end, particularly along design borders.
6. Sheer Fabrics (e.g., Tulle, Organza, Mesh)
Sheer fabrics are fragile and transparent, requiring delicate compensation techniques to avoid overwhelming the material.
- Pull Compensation: Pull compensation should be used sparingly, as sheer fabrics are easily distorted by excessive stitching. Designs need to be open and light to prevent distortion.
- Underlay Stitches: A minimal run stitch underlay is ideal for sheer fabrics, providing just enough stabilization without adding bulk.
- Stitch Density: Keep stitch density very low to prevent the fabric from puckering. Lighter designs with fewer stitches are more suitable for sheer materials.
Best Practices:
♦ Choose fine, lightweight threads to avoid overwhelming the delicate fabric.
♦ Reduce compensation slightly for sheer fabrics to avoid creating holes or damage in the material.
Lettering Push and Pull Compensation
Push and Pull Compensation in Lettering is one of the most critical aspects of achieving clean, professional results in embroidery. Due to the unique shapes and proportions of individual letters, embroidery lettering is particularly prone to distortion from push and pull forces. Each letter’s curves, angles, and straight lines react differently under the stress of stitching, making compensation essential for maintaining legibility and aesthetic appeal.
One of the main challenges with lettering is its small size. When embroidering small text, the pull effect becomes more pronounced because fewer stitches are available to distribute the tension, leading to the letters pulling inward, becoming narrower, or distorting entirely. To address this, pull compensation should be carefully applied by widening the columns of the letters slightly, ensuring that when the pull force occurs, the letters retain their intended width and clarity. This is especially important in vertical and diagonal strokes, which are more likely to shrink inwards due to tension during stitching.
Conversely, push forces tend to cause letters to expand outward, especially at the bottom and top of vertical columns and at the ends of horizontal strokes. This is noticeable in letters like “T,” “L,” and “E,” where the horizontal bars can appear to lengthen or become thicker. Push compensation helps control this outward movement by shortening the ends of the letter strokes slightly, so when the push force occurs, the design remains balanced, and the letters don’t look too thick or elongated.
Additionally, underlay stitches play a vital role in managing push and pull compensation in lettering. By stabilizing the fabric underneath the letters, underlay helps minimize the movement caused by these forces. The choice of underlay can vary depending on the size of the lettering and the fabric being used. A zigzag underlay may be used to hold down wider areas, while a center run underlay is more effective for narrow columns or small text. The right underlay provides a solid foundation for the top stitching, reducing the impact of push and pull.
The type of fabric also influences how much compensation is required for lettering. On stretchy or delicate fabrics, where pull forces are stronger, extra compensation may be needed, and stitch density should be carefully controlled to avoid overloading the fabric. On stable fabrics, the lettering may require less compensation since the material will not stretch or shrink as much. Regardless of the fabric type, ensuring proper hooping and tension is key to controlling push and pull forces in lettering.
Overall, achieving crisp and clear embroidered lettering requires a delicate balance of push and pull compensation. Without this adjustment, text can easily become distorted, reducing its legibility and visual appeal. By carefully adjusting the width and length of letter strokes, using the right underlay, and considering the fabric’s behavior under tension, embroiderers can ensure that their lettering remains readable and visually appealing, even in challenging designs.
Conclusion
In the world of embroidery, understanding and implementing push and pull compensation is essential for achieving high quality results, especially when it comes to intricate designs and lettering. This article has explored the fundamental concepts of push and pull, examining how these forces impact the overall appearance of embroidery and emphasizing the importance of compensation techniques tailored to various fabric types. From stable materials to delicate sheers, each fabric requires a unique approach to ensure that designs maintain their integrity, clarity, and aesthetic appeal.
By applying the right compensation strategies, such as adjusting stitch density, utilizing effective underlay techniques, and considering the properties of the chosen fabric, embroiderers can prevent distortions that compromise their work. Whether tackling complex designs or simple lettering, mastering push and pull compensation empowers embroiderers to enhance their craft and produce professional, polished results. Ultimately, a thorough understanding of these principles not only elevates the quality of embroidery projects but also fosters greater creativity and confidence in the art of machine embroidery.
Now that you have read through this article, feel free to SHOP for products we have created. If you are looking for something special which isn’t in our store, feel free to contact us.