Realistic Effects
Creating Fur and Feathers with Machine Embroidery
Introduction
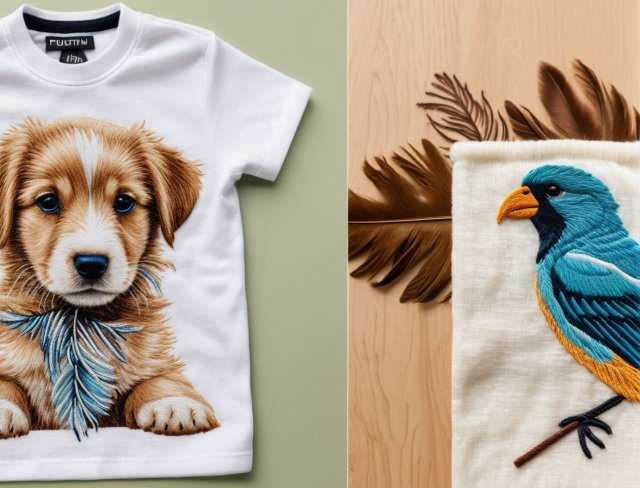
Creating realistic fur and feathers with machine embroidery is an exciting and intricate endeavor that brings designs to life with astonishing detail. This advanced embroidery technique involves a comprehensive understanding of various stitch types, layering methods, and color blending strategies. Whether you’re aiming to replicate the fluffy texture of animal fur or the delicate structure of feathers, mastering these elements can significantly enhance the realism and vibrancy of your work.
In this article, we delve deep into the essential techniques and stitches required to achieve these effects. We’ll explore the basics of fur and feathers in embroidery, detailing the specific methods used to create authentic textures. From the long and short stitch to the fishbone stitch, each technique is explained in detail to help you achieve the desired look. We also cover practical application tips, troubleshooting common issues, and combining fur and feather techniques for mixed media projects.
By the end of this guide, you’ll have a wealth of knowledge and practical insights to elevate your embroidery skills. Whether you’re a seasoned embroiderer or just starting, this comprehensive resource will help you create stunning, lifelike designs that truly stand out.
Understanding the Basics of Fur and Feathers in Embroidery
Understanding the basics of creating realistic fur and feathers in embroidery requires an appreciation of their distinct physical characteristics and how these can be translated through stitches. Fur, typically found on mammals, is dense and multi layered, providing warmth and protection. This density is achieved in embroidery by using various stitch lengths and densities, which mimic the way fur naturally lies in layers. By employing a mix of long and short stitches, embroiderers can simulate the randomness of fur, giving it a more authentic look. Additionally, blending different shades of thread within these layers can replicate the natural color variations found in real animal fur, adding to its depth and dimension.
Feathers, on the other hand, are more structured and detailed. They consist of a central shaft, known as the rachis, with barbs branching out to form the vane. This intricate structure requires precision in embroidery to achieve a realistic effect. Techniques such as the stem stitch for the rachis and fishbone or split stitches for the barbs are essential. The fine details of feathers, including their delicate barbs and subtle color gradients, demand a careful selection of stitches and colors. Using multiple thread colors can replicate the iridescent quality of some feathers, while maintaining consistent stitch lengths helps in preserving their natural appearance.
Furthermore, both fur and feathers have directional qualities that must be respected in embroidery. Fur typically grows in specific directions depending on the body part, and this directionality must be mirrored in the stitching process to maintain realism. Similarly, the vanes of feathers follow a distinct pattern that should guide the embroiderer’s hand. This attention to direction ensures that the final embroidered piece looks natural and lifelike.
In addition to technical stitching considerations, understanding the physical properties of fur and feathers also involves a comprehension of their role and movement in real life. Fur moves with the body of the animal, creating shadows and highlights as it shifts. Feather movement, particularly in flight, can create unique patterns and reflections. Capturing these elements in embroidery involves not just the static placement of stitches but also an understanding of how to create the illusion of movement and light. This can be achieved by varying the density of stitches, using metallic or glossy threads to catch light, and layering stitches to suggest depth and texture.
Mastering the basics of fur and feather embroidery thus lies in the ability to translate these complex physical properties into thread. It involves a combination of technical skill, artistic vision, and a deep understanding of the subject matter. This foundation sets the stage for more advanced techniques and allows embroiderers to create pieces that are not only visually stunning but also rich in texture and realism. By continually studying and practicing these basics, embroiderers can push the boundaries of their craft, bringing their designs to life in new and exciting ways.
Fur Embroidery Techniques and Stitch Types
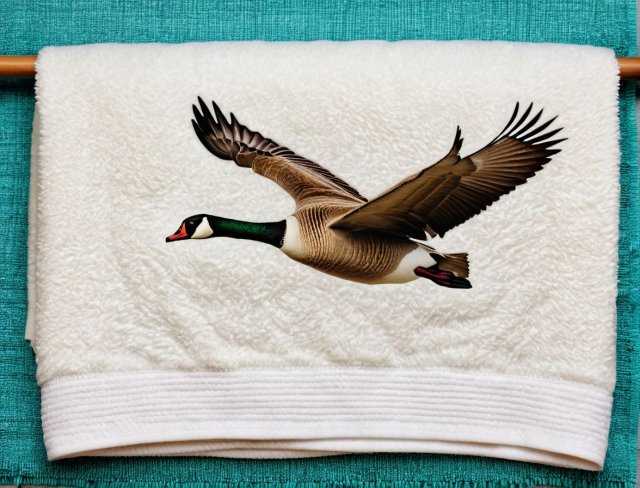
Creating realistic fur in machine embroidery is an art that requires a meticulous approach to detail and texture. The goal is to mimic the layered and fluffy appearance of animal hair, capturing its natural flow and dimensionality. This involves using a variety of stitches that can replicate the depth, movement, and subtle variations found in real fur. Understanding and mastering these stitches is crucial for achieving a lifelike result. By skillfully combining different stitch types and techniques, you can create fur that appears soft, dense, and richly textured, adding a new level of realism to your embroidery projects. Key techniques include:
• Long and Short Stitch
The long and short stitch is one of the most fundamental techniques for creating realistic fur textures in embroidery. This stitch involves alternating long and short stitches to mimic the natural irregularity found in animal fur. By varying the lengths of stitches, you can replicate the randomness and layered appearance of fur, which is essential for achieving a lifelike effect. This technique is particularly effective for representing the flow and direction of fur, allowing you to create a sense of movement and depth.
To effectively use the long and short stitch, start by sketching the direction in which the fur flows. Begin stitching at the base of the fur area, using longer stitches to represent the underlayer of fur. As you work upwards, intersperse shorter stitches to create the impression of overlapping layers. This method not only adds texture but also helps in building the density needed to replicate the fullness of real fur. Additionally, incorporating slight variations in stitch direction can enhance the natural look, making the fur appear more dynamic and realistic.
• Satin Stitch
The satin stitch is another crucial technique for creating smooth and shiny fur textures. This stitch involves placing parallel stitches closely together to form a solid, smooth surface. While typically used for smoother areas of fur, such as the ears or tails of animals, the satin stitch can also be used to highlight certain parts of the fur, adding a sleek and polished appearance.
To achieve a realistic effect with the satin stitch, pay attention to the direction of the fur growth. Align your stitches to follow this natural direction, ensuring that the fur looks cohesive and continuous. The smoothness of the satin stitch can be enhanced by using threads with a slight sheen, which will reflect light and give the fur a more lifelike appearance. This technique is particularly useful for creating contrast within the fur, distinguishing different textures, and adding a sense of depth and dimension to your embroidery.
• Thread Blending
Thread blending is a technique that involves combining multiple shades of thread to create a gradient effect, adding depth and dimension to your embroidery. This is particularly important for replicating the natural color variations found in real animal fur. By carefully selecting and blending threads of different colors, you can achieve a more realistic and nuanced appearance.
To effectively blend threads, start with a base color that represents the primary shade of the fur. Gradually introduce additional colors by interspersing stitches of varying shades. This can be done by either switching threads frequently or using a method known as “needle painting,” where multiple threads are threaded through the needle at once. The key to successful thread blending is subtlety; avoid abrupt color changes, and aim for smooth transitions between shades. This technique allows you to replicate the complex interplay of light and shadow on fur, enhancing the overall realism of your embroidery.
When blending threads, consider the natural highlights and shadows within the fur. Use lighter shades to highlight areas where light would naturally hit, and darker shades to create shadows and depth. This will not only add realism but also give your embroidery a three dimensional quality. Experimenting with different color combinations and blending techniques can yield impressive results, transforming your embroidered fur into a vibrant, lifelike element of your design.
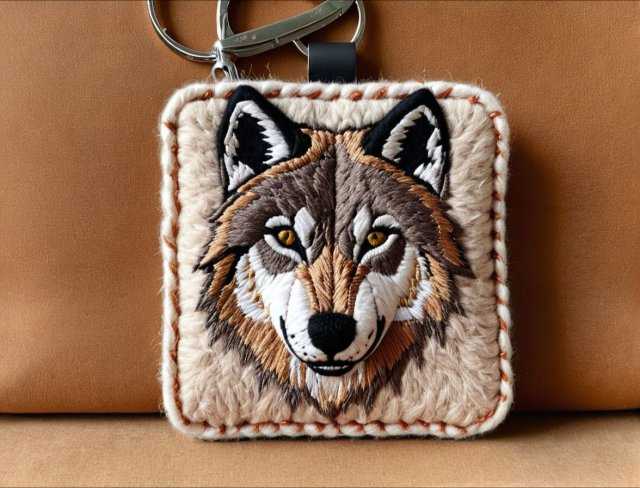
Mastering these techniques—long and short stitch, satin stitch, and thread blending—requires practice and attention to detail. Each technique plays a vital role in creating the overall texture and appearance of realistic fur in embroidery. By combining these methods, you can achieve a rich, dynamic, and lifelike fur texture that enhances the visual appeal of your projects.
Understanding the principles behind these techniques is the first step. Applying them with precision and creativity will allow you to replicate the complexity and beauty of real animal fur. As you gain experience and confidence, you will be able to experiment with different stitches, threads, and blending methods, continually improving your skills and expanding your artistic possibilities. The result will be embroidery that not only captures the essence of fur but also elevates your work to new levels of realism and sophistication.
Applying Fur Techniques in Your Designs
Once you’ve mastered the fundamental techniques for creating realistic fur, the next step is to apply these techniques strategically in your designs. The success of your embroidery relies not only on your technical skills but also on how effectively you can integrate these techniques into your work. Here are some in depth strategies for applying fur techniques in your designs:
• Layering
Layering is a critical technique for creating depth and realism in embroidered fur. This process involves stitching multiple layers of fur, starting with the base layer and gradually building up to the topmost layer. Each layer should add to the overall texture and density, mimicking the natural way fur lies on an animal’s body.
To begin, choose a dark base color that represents the underlayer of fur. This layer provides a foundation and helps create the illusion of depth. Stitch the base layer using longer stitches to cover more area quickly and create a dense background. Next, introduce a mid tone color for the middle layer. These stitches should be slightly shorter and more varied in direction to replicate the natural randomness of fur. Finally, use a lighter shade for the top layer, focusing on shorter, fine stitches that add detail and highlight the outermost fur.
By carefully layering stitches in this manner, you can create a rich, textured look that closely resembles real fur. The key to successful layering is subtlety and gradual transition between layers, ensuring that each layer blends seamlessly into the next. This technique not only adds depth but also helps in achieving a more natural, three dimensional appearance.
• Directional Stitching
Directional stitching is essential for replicating the natural flow and growth patterns of fur. Fur grows in specific directions depending on the animal and body part, and capturing this directionality in your embroidery is crucial for achieving realism.
To begin, study reference images of the animal you are embroidering. Observe the direction in which the fur grows and how it changes across different areas. Sketch the fur direction lightly on your fabric using a washable fabric pen or pencil. This guide will help you maintain consistency and ensure that your stitches follow the natural fur patterns.
When stitching, always follow the marked direction. Use longer stitches for areas where the fur is longer and shorter stitches for areas with shorter fur. Pay attention to the way fur transitions between body parts, such as from the back to the sides or around joints. This attention to detail will make your embroidery look more cohesive and realistic.
Directional stitching also involves varying the angle of your stitches to replicate the natural flow of fur. For example, the fur on an animal’s back might flow in a straight line, while the fur on its legs may have a more curved or angled direction. By adjusting your stitch angles accordingly, you can create a more lifelike and dynamic appearance.
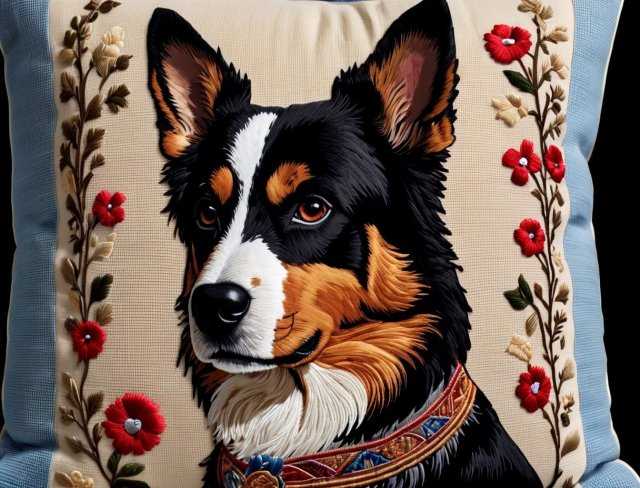
• Highlights and Shadows
Incorporating highlights and shadows is a powerful technique for adding depth and dimension to your embroidered fur. These elements help create the illusion of light interacting with the fur, enhancing its realism and visual impact.
To create highlights, use lighter shades of thread in areas where light would naturally hit the fur. These areas might include the top of the head, the back, or any raised parts of the body. Lighter stitches can be shorter and more densely packed to create a bright, illuminated effect. For an added touch of realism, consider using threads with a slight sheen to reflect light and give the fur a glossy appearance.
Shadows, on the other hand, are created using darker shades of thread. These areas are typically found where the fur is denser or where it naturally falls into shadow, such as under the belly, between limbs, or around the neck. Use longer, looser stitches in these areas to create the impression of depth and thickness. Combining different shades of dark thread can add complexity to the shadowed areas, making them look more natural.
Balancing highlights and shadows is crucial for achieving a three dimensional look. The contrast between light and dark areas gives the fur a sense of volume and texture. When planning your highlights and shadows, consider the light source’s position and how it would interact with the fur. This will help you place your stitches more accurately and achieve a more realistic effect.
By combining layering, directional stitching, and highlights and shadows, you can create fur that looks incredibly realistic and lifelike. These techniques work together to build depth, texture, and dimension, transforming your embroidery from flat and static to dynamic and engaging.
When applying these techniques, it’s essential to approach your work with patience and attention to detail. Take your time to build up the layers, carefully following the natural direction of the fur and thoughtfully placing your highlights and shadows. Practice and experimentation will help you refine your skills and develop your unique style.
The result will be embroidered fur that not only captures the essence of the animal but also adds a new level of artistry and sophistication to your designs. This comprehensive approach to applying fur techniques will elevate your embroidery projects, making them more captivating and realistic.
Feather Embroidery Techniques and Stitch Types
Creating realistic feathers in machine embroidery involves using a variety of stitch types to capture their intricate structure and delicate details. Feathers, unlike fur, have a more defined shape and require precise stitching to replicate their natural beauty. Key techniques include:
• Stem Stitch
The stem stitch is an essential technique for creating the central shaft, or rachis, of a feather. This stitch forms a smooth, slightly raised line that perfectly mimics the rigid structure of the rachis. The stem stitch is ideal for this purpose because of its ability to create a consistent and slightly textured line, which is critical for the authenticity of the feather’s appearance.
To execute the stem stitch, start by bringing the needle up through the fabric at the base of the feather. Then, insert the needle back into the fabric a short distance along the intended path of the stitch and bring it back up midway between the start and end points. Continue this process, always keeping the working thread to the same side of the needle, to create a continuous line. The key to a successful stem stitch is maintaining consistent tension and spacing, which ensures that the rachis looks smooth and uniform.
The thickness of the stem stitch can be adjusted by changing the length of the stitches and the number of strands of thread used. For more prominent feathers, using more strands will create a thicker rachis, while fewer strands are suitable for delicate feathers. The stem stitch can also be used in varying colors to reflect the natural gradients found in real feathers, adding to their realism.
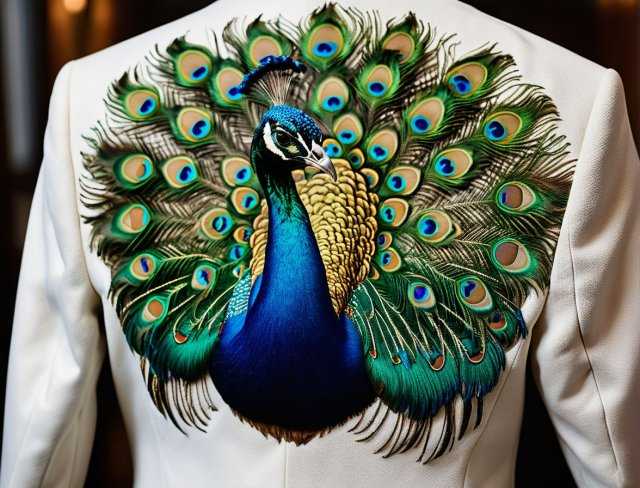
• Fishbone Stitch
The fishbone stitch is particularly effective for replicating the vanes of a feather, which are the barbs branching out from the rachis. This stitch creates a dense, herringbone pattern that closely resembles the fine structure of a feather’s vanes. The fishbone stitch not only adds texture but also provides a sense of directionality and flow, which are crucial for realistic feather representation.
To create the fishbone stitch, start by drawing the outline of the feather and marking the rachis. Begin at the base of the feather, bringing the needle up through the fabric and making a small stitch across the rachis. Then, bring the needle up just to the side of the rachis and slightly above the previous stitch, inserting it back into the fabric on the opposite side of the rachis. Continue this process, alternating sides and overlapping each stitch slightly with the previous one. This technique creates a tight, interlocking pattern that fills the feather shape effectively.
The fishbone stitch is highly versatile and can be adjusted to create different effects. Varying the stitch length and angle can produce different textures, from the soft, downy feathers of a chick to the sleek, firm feathers of a bird of prey. Additionally, using multiple shades of thread within the fishbone stitch can mimic the natural color variations and iridescence seen in feathers, adding depth and dimension to the design.
• Split Stitch
The split stitch is another valuable technique for adding fine details and texture to feather embroidery. This stitch involves splitting the thread of the previous stitch, creating a textured line that is ideal for the delicate barbs and finer details within the feather.
To execute the split stitch, start by bringing the needle up through the fabric and making a short, straight stitch. Then, bring the needle up again, splitting the previous stitch by piercing the middle of the thread. Continue this process, ensuring that each new stitch splits the last one. The result is a textured, slightly raised line that can be used to add intricate details to the feather.
The split stitch is particularly useful for adding finer barbs and subtle variations within the feather. By varying the length and direction of the split stitches, you can create a realistic representation of the feather’s intricate structure. This technique is also effective for adding texture to areas where the fishbone stitch might be too dense or where additional detail is required.
Using different thread colors with the split stitch can enhance the realism of the feather, allowing for subtle color changes and shading. This technique is excellent for highlighting specific parts of the feather, such as the tips or edges, and for creating the appearance of light reflecting off the feather’s surface.
Mastering Feather Techniques
Mastering these techniques—stem stitch, fishbone stitch, and split stitch—requires practice and attention to detail. Each technique plays a crucial role in creating the overall texture and appearance of realistic feathers in embroidery. By combining these methods, you can achieve a rich, dynamic, and lifelike feather texture that enhances the visual appeal of your projects.
Understanding the principles behind these techniques is the first step. Applying them with precision and creativity will allow you to replicate the complexity and beauty of real feathers. As you gain experience and confidence, you will be able to experiment with different stitches, threads, and blending methods, continually improving your skills and expanding your artistic possibilities. The result will be embroidery that not only captures the essence of feathers but also elevates your work to new levels of realism and sophistication.
By skillfully integrating these stitches, you can create feathers that are not only visually stunning but also rich in texture and detail. This comprehensive approach to feather embroidery will add a new dimension to your work, making your designs more captivating and lifelike. As you continue to practice and refine these techniques, you will be able to create embroidery that truly stands out, showcasing your mastery of the art form.
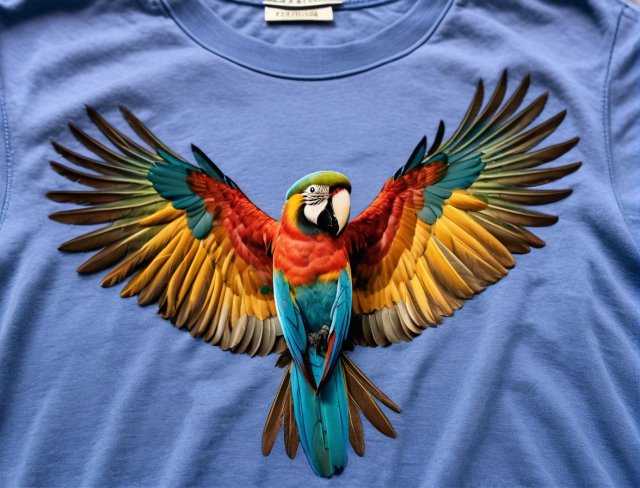
Creating Feather Designs
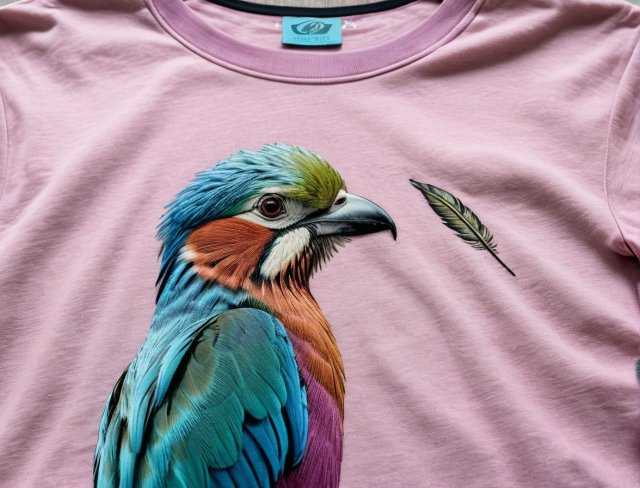
Creating feather designs in machine embroidery is an intricate process that requires attention to detail, careful selection of colors, and maintaining consistency in stitches. Each element contributes to the overall realism and aesthetic appeal of the feather. Here’s an in depth look at how to excel in detailing, color variation, and consistent stitching for feather embroidery:
• Detailing
Detailing is critical in feather embroidery as it brings out the intricate patterns and textures that make each feather unique. Fine details such as the barbs and barbules (the tiny filaments branching off the barbs) need to be meticulously crafted to capture the feather’s delicate nature.
To achieve this, use a combination of split stitches and fine satin stitches. Split stitches can be used to outline the rachis and the central veins of the feather, adding texture and definition. For the barbs, use fine satin stitches to create a smooth, glossy appearance. These stitches should be short and closely spaced to replicate the fine lines of a feather’s barbs accurately.
Additionally, incorporating French knots or tiny seed stitches can add dimension and mimic the natural imperfections and details found in feathers. These small stitches can represent the tiny nodes and irregularities on the feather’s surface, adding to the authenticity of the design.
Another important aspect of detailing is the edge of the feather. The feather’s edge can be crafted using a combination of split stitches and small satin stitches, ensuring a smooth transition from the central part of the feather to its fringes. This helps in creating a realistic and natural look.
• Color Variation
Color variation is essential for creating lifelike feather embroidery. Real feathers often exhibit a range of colors, from subtle gradients to sharp contrasts, which need to be captured through thoughtful thread selection and blending techniques.
Start by selecting a color palette that closely matches the natural hues of the feather you are replicating. This might include multiple shades of a single color, as well as complementary or contrasting colors to add depth and vibrancy. For example, a peacock feather might require deep blues and greens with hints of gold or bronze.
Using a technique called thread painting can enhance color variation. Thread painting involves blending different colors of thread within a single stitch or series of stitches to create smooth transitions and gradients. This technique can be achieved by alternating between two or more colors as you stitch, ensuring that the transitions are gradual and seamless.
Another method to achieve color variation is layering. By stitching multiple layers of different colors, you can create a rich, multi dimensional effect. Start with the base color and gradually add layers of lighter or darker shades to mimic the natural shading and highlights found in real feathers.
Finally, consider the use of variegated threads, which change color along their length. These threads can add a dynamic, ever changing appearance to the feather, simulating the iridescence and shifting colors often seen in real feathers.
• Consistent Stitches
Consistency in stitching is paramount for achieving a polished and professional look in feather embroidery. Inconsistent stitches can detract from the realism and overall quality of the design.
To maintain consistent stitches, practice and precision are key. When using satin stitches for the barbs, ensure that each stitch is of uniform length and closely packed. This creates a smooth, even surface that mimics the sleek appearance of real feathers. Using an embroidery hoop can help keep the fabric taut and ensure even tension, which is crucial for consistent stitches.
For longer stitches, such as those used in the rachis or the main veins of the feather, it’s important to maintain a steady hand and even spacing. Marking the fabric lightly with a washable fabric pen can provide guidelines to follow, ensuring that the stitches remain straight and evenly spaced.
Additionally, adjusting the machine’s tension settings can help achieve uniform stitches. Too tight or too loose tension can cause stitches to pull unevenly, disrupting the smoothness of the design. Experiment with different settings and practice on scrap fabric to find the optimal tension for your specific thread and fabric combination.
Using a high quality stabilizer is also essential for maintaining consistent stitches. A good stabilizer prevents the fabric from puckering or shifting during embroidery, ensuring that your stitches remain even and precise. Choose a stabilizer that matches the weight and type of your fabric for the best results.
Finally, take breaks as needed to maintain focus and avoid fatigue, which can lead to mistakes and uneven stitching. Embroidery is a meticulous art form that requires patience and attention to detail, so working in shorter, focused sessions can help maintain the quality of your work.
Combining detailed stitching, thoughtful color variation, and consistent technique results in feather embroidery that is both realistic and visually stunning. By paying close attention to these aspects, you can create designs that capture the intricate beauty of real feathers, adding depth and dimension to your embroidery projects.
Mastering these techniques requires practice, experimentation, and a keen eye for detail. As you continue to refine your skills, you’ll find that your feather designs become more sophisticated and lifelike, showcasing your ability to replicate the natural world in your embroidery. This comprehensive approach will not only enhance your current projects but also open up new possibilities for creating detailed and realistic embroidered art.

Combining Fur and Feathers in Mixed Media Embroidery
Combining fur and feathers in a single embroidery project can create a rich tapestry of textures and details, resulting in visually stunning and highly realistic designs. Successfully blending these two elements requires careful consideration of transitioning stitches, balancing textures, and highlighting key features. Here’s an in depth look at how to master these aspects:
• Transitioning Stitches
Transitioning between fur and feathers in a mixed media embroidery piece involves seamlessly integrating different stitch types and textures to ensure a cohesive look. The goal is to create a smooth transition that reflects the natural blending of fur and feathers, such as in animals like birds of prey or mythical creatures like griffins.
To achieve smooth transitions, start by planning your design layout carefully. Identify areas where fur and feathers will meet and determine the most appropriate stitches for each section. For instance, long and short stitches used for fur can gradually give way to fishbone or split stitches for feathers. This gradual change in stitch types helps create a natural blend.
One effective technique for transitioning is to use intermediate stitches that share characteristics of both fur and feather stitches. For example, combine longer satin stitches with shorter split stitches to bridge the gap between the fluffy texture of fur and the more defined structure of feathers. This technique helps create a gradual shift, making the transition appear more organic.
Additionally, consider using overlapping stitches. Start the feather stitches slightly within the fur area, allowing them to intermingle. This overlap creates a visual blend, softening the boundary between the two textures. Using thread colors that gradually shift from those used in the fur to those used in the feathers can also enhance the transition.
Experimenting with different stitch lengths and densities can further refine the transition. For example, you might use denser stitching at the beginning of the feather section to mimic the fluffiness of fur, gradually spacing out the stitches as you move into the feather area. This technique ensures a seamless and visually appealing transition.
• Balancing Textures
Balancing textures is crucial when combining fur and feathers to ensure that neither element overwhelms the other. The goal is to create a harmonious design where both textures complement each other, adding depth and interest to the piece.
Start by analyzing the natural textures of fur and feathers and how they interact in real life. Fur typically has a softer, more uniform texture, while feathers are more structured and defined. Use this understanding to guide your stitch selection and placement.
When stitching fur, focus on creating a soft, fluffy appearance using long and short stitches or thread blending techniques. Ensure that the fur sections are dense enough to convey the desired texture without appearing too heavy. Using varying shades of thread within the fur can add depth and prevent the texture from looking flat.
For the feather sections, use more structured stitches such as fishbone, split stitch, or satin stitch to replicate the rigid, defined texture of feathers. Pay attention to the directionality of the stitches, ensuring that they follow the natural lines and flow of the feathers. Using multiple thread colors and incorporating techniques like thread painting can enhance the realism of the feathers.
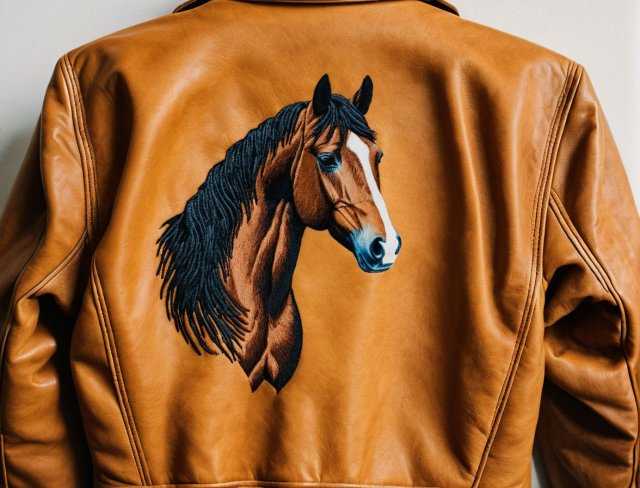
Balancing the density of stitches is also important. If the fur section is densely stitched, ensure that the feather section is equally detailed to maintain visual balance. Conversely, if one section is lighter and more open, the other should complement it without overwhelming it. This balance helps create a cohesive design where both textures are equally represented.
Consider the overall composition of your design. Distribute the fur and feather elements evenly throughout the piece to avoid creating areas that feel too heavy or too sparse. This balanced distribution ensures that the viewer’s eye moves naturally across the design, appreciating the interplay of textures.
• Highlighting Key Features
Highlighting key features in a mixed media embroidery project involves emphasizing the most important elements of your design, whether they are the intricate patterns of feathers or the lush texture of fur. Effective highlighting draws attention to these features, enhancing the overall impact of the piece.
Start by identifying the focal points of your design. These could be the detailed feathers of a bird’s wing, the expressive fur around an animal’s face, or any other prominent element. Use contrasting stitches and colors to draw attention to these areas, ensuring they stand out from the surrounding textures.
For feathers, focus on adding detailed shading and highlights. Use lighter thread colors for highlights and darker shades for shadows, creating a sense of depth and dimension. Techniques like thread painting can be particularly effective here, allowing you to blend colors smoothly and create realistic gradients. Pay special attention to the tips and edges of the feathers, adding extra detail to enhance their appearance.
In fur sections, emphasize the natural variations in texture and color. Use longer stitches to create the appearance of longer fur strands and shorter stitches for denser, fluffier areas. Incorporate thread blending to replicate the subtle color changes found in real fur. Highlight key areas such as the contours of the face, limbs, or tail to bring out the character and expression of the animal.
Using metallic or specialty threads can also help highlight key features. For example, adding a touch of metallic thread to the feathers can simulate iridescence, making them catch the light and stand out. Similarly, using a slightly different texture or sheen in the fur can add visual interest and draw the viewer’s eye to specific areas.
Consider the use of negative space to highlight features. Leaving some areas less densely stitched can create a contrast that makes the detailed sections stand out more. This technique can be particularly effective in mixed media embroidery, where the interplay between different textures and stitch densities adds to the overall composition.
Combining fur and feathers in mixed media embroidery requires careful planning and execution. By mastering transitioning stitches, balancing textures, and highlighting key features, you can create intricate and visually stunning designs that capture the beauty and complexity of nature. Each element should work together to create a harmonious and cohesive piece, showcasing your skill and creativity as an embroiderer. As you continue to refine these techniques, your mixed media embroidery projects will become more sophisticated and lifelike, captivating viewers with their realism and artistry.
Practical Application Tips
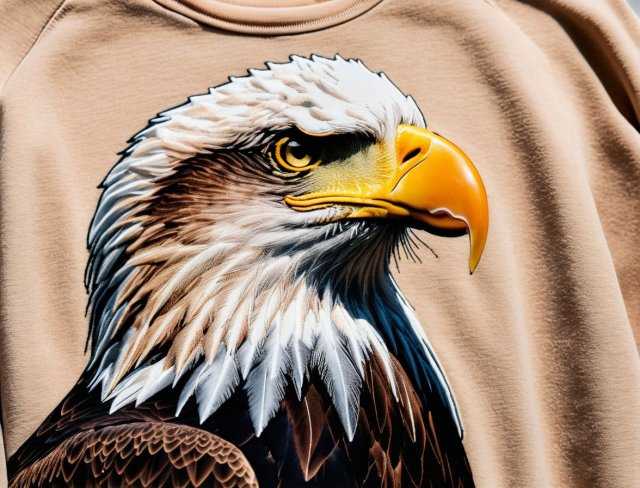
Creating realistic fur and feather designs in machine embroidery requires not only technical skill but also practical planning and execution. Here are some in depth and comprehensive tips for ensuring success in your embroidery projects, focusing on sample swatches, reference images, and experimentation.
• Sample Swatches
Sample swatches are an invaluable tool for any embroiderer. They allow you to test stitch types, thread colors, and fabric interactions before committing to your final design. This step is crucial for achieving the desired texture and appearance in your fur and feather embroidery.
Creating Sample Swatches: Start by selecting a small piece of fabric similar to the one you will use in your final project. Use this fabric to test various stitches and thread combinations. For fur, experiment with long and short stitches, satin stitches, and thread blending techniques. For feathers, try out stem stitches, fishbone stitches, and split stitches. Pay attention to how different stitches interact with the fabric and how they contribute to the overall texture and appearance.
Evaluating Swatches: After stitching your samples, examine them closely. Look for the smoothness of transitions, the effectiveness of color blending, and the overall texture. Consider how the stitches lay on the fabric and whether they achieve the desired effect. If necessary, make adjustments to your technique or thread selection.
Documenting Swatches: Keep a record of your sample swatches, including notes on the stitches used, thread colors, and any adjustments made. This documentation will serve as a valuable reference for future projects, helping you replicate successful techniques and avoid past mistakes.
Sample swatches also allow you to test the durability of your stitches. Gently wash and handle your swatches to see how well they hold up. This step ensures that your final design will be both beautiful and long lasting.
• Reference Images
Using reference images is essential for creating realistic fur and feather embroidery. High quality images provide a visual guide for understanding the intricate details, textures, and colors found in real fur and feathers.
Selecting Reference Images: Choose clear, high resolution images that show the details of the fur or feathers you wish to replicate. Look for images that capture different angles and lighting conditions, as these variations can reveal important details about texture and color. Nature photography, wildlife documentaries, and birdwatching guides are excellent sources for finding detailed reference images.
Analyzing Reference Images: Study your reference images carefully. Pay attention to the direction of the fur or feather growth, the layering and overlapping of different sections, and the natural variations in color and texture. Note how light interacts with the fur or feathers, creating highlights and shadows that add depth and dimension.
Applying Reference Images: Use your reference images as a guide when planning your embroidery design. Sketch out the basic shape and structure of the fur or feathers, referring to the images for accuracy. As you stitch, continue to consult your reference images to ensure that your work remains true to the natural appearance.
Reference images can also help you understand the behavior of different fur and feathers in motion. Observing how they flow and move can inform your stitch direction and layering techniques, adding a dynamic quality to your embroidery.
• Experimentation
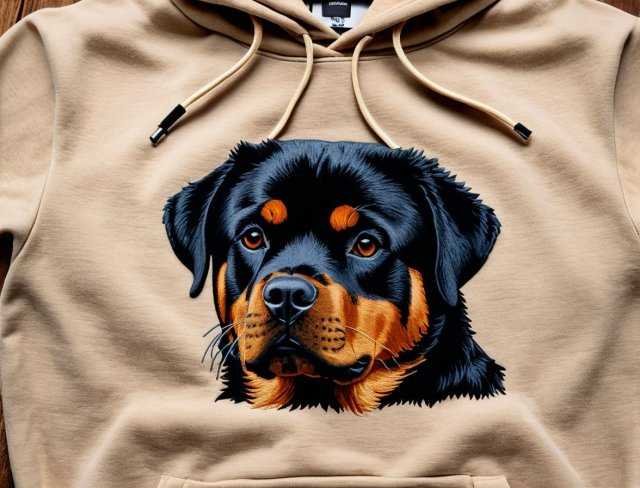
Experimentation is a key component of mastering fur and feather embroidery. Trying out new techniques, stitches, and materials can lead to unexpected discoveries and improvements in your work.
Exploring New Stitches: Don’t be afraid to step outside your comfort zone and try new stitches. For example, you might experiment with embroidery stitches not traditionally used for fur or feathers, such as the bullion knot or couching stitch, to create unique textures. Combining different stitches in innovative ways can also yield interesting results.
Testing Different Threads: Experiment with various types of threads, including cotton, silk, metallic, and variegated threads. Each type has unique properties that can add different effects to your embroidery. For instance, metallic threads can add a shimmering quality to feathers, while variegated threads can create natural looking color gradients in fur.
Varying Tension and Density: Play with different tension settings on your embroidery machine and vary the density of your stitches. Tighter tension can create more defined stitches, while looser tension can result in softer, more blended textures. Similarly, adjusting the stitch density can help you achieve different effects, from dense, plush fur to delicate, airy feathers.
Combining Techniques: Combine various techniques within a single design to enhance realism. For example, you might use thread painting for detailed color blending, along with long and short stitches for texture, and metallic threads for highlights. Experimenting with these combinations can help you discover new ways to bring your designs to life.
Learning from Mistakes: View mistakes as opportunities to learn and improve. If a particular technique or thread combination doesn’t work as expected, analyze what went wrong and consider how you might adjust your approach. Keeping an open mind and a willingness to experiment will help you grow as an embroiderer.
Experimentation also extends to the tools and materials you use. Trying out different types of fabric, stabilizers, and hoops can lead to new insights and techniques that enhance your embroidery.
Incorporating these practical application tips into your embroidery process will help you achieve greater success and satisfaction in your fur and feather designs. By creating sample swatches, using reference images, and embracing experimentation, you can refine your skills and produce embroidery that is both realistic and visually stunning. These strategies will not only improve your current projects but also inspire new creative possibilities, allowing you to continually evolve and excel in the art of machine embroidery.
Troubleshooting and Refining Techniques
Even the most experienced embroiderers encounter challenges when creating intricate fur and feather designs. Troubleshooting and refining your techniques are crucial steps to ensure your work looks polished and professional. Here, we delve into some common issues and offer comprehensive solutions for uneven stitching, color blending, and texture.
• Uneven Stitching
Uneven stitching can detract from the overall quality of your embroidery, making the design appear less cohesive and professional. This issue can arise from various factors, including tension settings, fabric choice, and stitch execution.
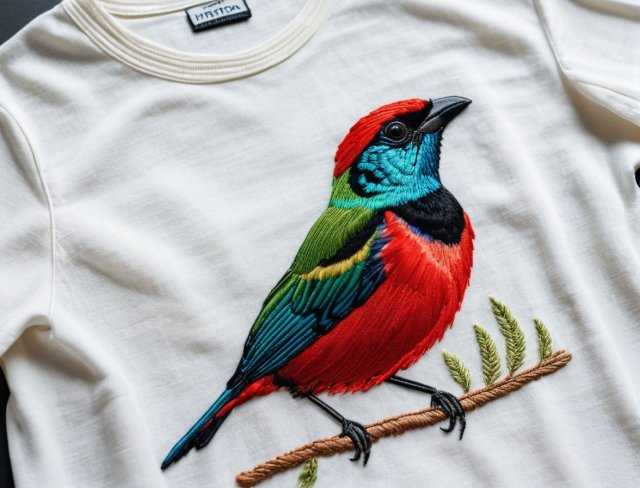
Tension Settings: Uneven tension can cause stitches to appear irregular or puckered. Ensure your machine’s tension is appropriately set for the type of thread and fabric you are using. Conduct test runs on scrap fabric to fine tune the tension before starting your main project. For fur, which often requires a mix of dense and loose stitches, adjusting the tension for each section can help maintain consistency.
Fabric Stabilization: The fabric’s stability plays a crucial role in maintaining even stitches. Use an appropriate stabilizer to keep the fabric taut and prevent shifting during stitching. A tear away or cut away stabilizer can be particularly effective for fur and feather designs, providing the necessary support without adding bulk.
Hooping Techniques: Proper hooping ensures the fabric remains taut throughout the embroidery process. Avoid over tightening the hoop, which can distort the fabric and affect stitch quality. Instead, gently stretch the fabric, ensuring it is smooth and evenly tensioned within the hoop. For challenging fabrics, such as those with stretch, consider using a double hooping technique or additional clips to maintain even tension.
Stitch Length and Density: Variations in stitch length and density can cause unevenness. For fur, use long and short stitches to create a natural, varied texture, ensuring smooth transitions between lengths. For feathers, maintain consistent stitch length and density to replicate the structured appearance. Adjust your machine settings as needed to achieve the desired effect.
Thread Quality: The quality of the thread can impact stitch consistency. High quality threads tend to have fewer inconsistencies and breakages, resulting in more even stitching. Regularly check and maintain your machine, ensuring it is clean and well oiled, as this can also affect stitch quality.
• Color Blending
Achieving realistic color blending is essential for creating lifelike fur and feather designs. Effective color blending involves smooth transitions between shades and careful attention to detail.
Thread Selection: Choose threads in a range of shades within the same color family to facilitate smooth blending. For fur, select threads that mimic the natural color variations, such as lighter shades for highlights and darker shades for shadows. For feathers, consider the natural iridescence and use variegated threads to capture the subtle color shifts.
Layering Techniques: Layering different colors of thread can create depth and dimension. Start with a base layer in the dominant color, then gradually add layers of lighter or darker shades to build up the texture. For fur, use overlapping long and short stitches to blend colors seamlessly. For feathers, incorporate color changes within the fishbone or split stitches to achieve a gradual transition.
Thread Painting: Thread painting is a technique where you use a single strand of thread to create intricate details and smooth color transitions. This method is particularly effective for adding highlights and shadows to both fur and feathers. Use short, overlapping stitches to blend colors naturally, mimicking the fine details found in nature.
Blending Tools: Utilize blending tools such as blending filaments or woolly nylon threads to enhance color transitions. These tools can add subtle shifts in color and texture, creating a more realistic effect. Experiment with different combinations to find the best results for your design.
Practice and Patience: Mastering color blending takes practice and patience. Create sample swatches to test different color combinations and blending techniques. Pay attention to how colors interact under various lighting conditions, as this can affect the final appearance of your embroidery.
• Texture
Creating realistic texture is fundamental to bringing fur and feather designs to life. Texture adds depth and interest, making your embroidery stand out.
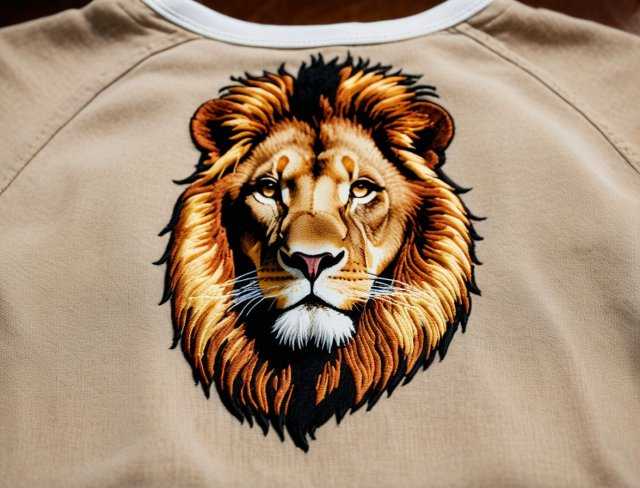
Stitch Variation: Varying your stitches can create a rich texture. For fur, use a combination of long and short stitches, satin stitches, and thread blending. This variation mimics the natural irregularity of animal hair. For feathers, employ fishbone, stem, and split stitches to replicate the structured yet delicate texture of real feathers.
Thread Types: Different thread types can enhance texture. Use matte threads for a softer look and metallic or glossy threads to add highlights and shimmer. For fur, consider using fuzzy or textured threads to add a realistic, fluffy appearance. For feathers, fine, smooth threads can replicate the sleekness of plumage.
Layering and Overlapping: Layering stitches adds depth and dimension. In fur designs, overlap layers of stitches to create a thick, dense appearance. Vary the direction of stitches to mimic the natural growth patterns of fur. In feather designs, overlap the ends of fishbone stitches to create a layered effect, simulating the way feathers overlap on a bird’s wing.
Dimensional Techniques: Incorporate dimensional techniques such as couching or padding to add a three dimensional effect. Couching involves stitching over a thicker thread or cord, creating raised areas that add depth to your design. Padding, using layers of stitches to build up areas, can enhance the texture and make your embroidery more tactile.
Attention to Detail: Small details can significantly impact the overall texture. Pay close attention to the direction of your stitches, the density of each area, and the interplay of different stitch types. For fur, ensure that the texture flows naturally, following the contours of the animal. For feathers, emphasize the individual barbs and vanes to create a realistic look.
Experimentation: Don’t be afraid to experiment with new techniques and materials. Try combining different threads, stitches, and dimensional techniques to discover unique textures. Keep detailed notes and swatches of your experiments, building a reference library that you can draw upon for future projects.
Troubleshooting and refining your embroidery techniques are essential for achieving professional quality fur and feather designs. By addressing common issues such as uneven stitching, color blending, and texture, you can elevate your work to new heights. Each aspect of your embroidery, from the choice of threads and stitches to the careful layering and attention to detail, contributes to the overall realism and impact of your design. With practice, patience, and a willingness to experiment, you can master these techniques and create stunning, lifelike embroidery that captures the beauty and complexity of nature.
Conclusion
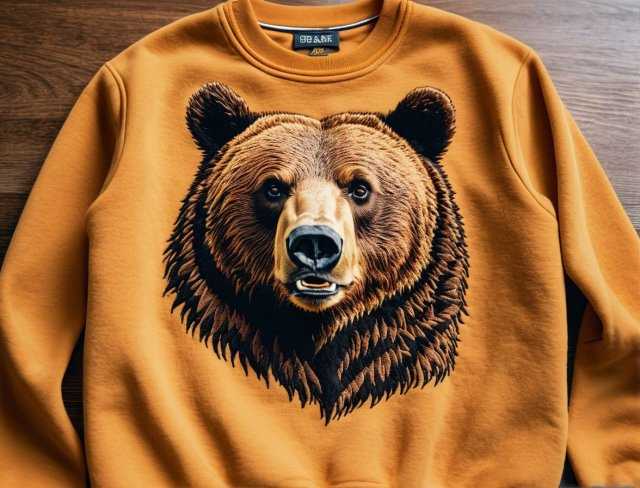
Creating realistic fur and feather effects with machine embroidery is a rewarding and intricate art that requires a blend of technical skill, creativity, and attention to detail. From understanding the foundational techniques to mastering specific stitches like the long and short stitch for fur or the fishbone stitch for feathers, each element plays a crucial role in bringing your designs to life. The use of layering, directional stitching, and careful color blending helps in achieving the depth and texture that make fur and feathers look authentic and vibrant.
By leveraging practical application tips such as creating sample swatches, using reference images, and embracing experimentation, you can refine your techniques and produce more lifelike results. Troubleshooting common issues like uneven stitching, color blending, and texture ensures that your work remains polished and professional. The combination of fur and feathers in mixed media embroidery adds a dynamic dimension to your designs, allowing you to explore new creative possibilities.
Ultimately, the journey of mastering fur and feather embroidery is one of continuous learning and exploration. By applying the knowledge and techniques discussed in this article, you can enhance your skills and create stunning, realistic designs that captivate and impress. Whether you are a beginner or an experienced embroiderer, the detailed guidance provided here will serve as a valuable resource in your quest to perfect the art of creating fur and feathers with machine embroidery.
Now that you have read through this article, feel free to SHOP for products we have created. If you are looking for something special which isn’t in our store, feel free to contact us.

